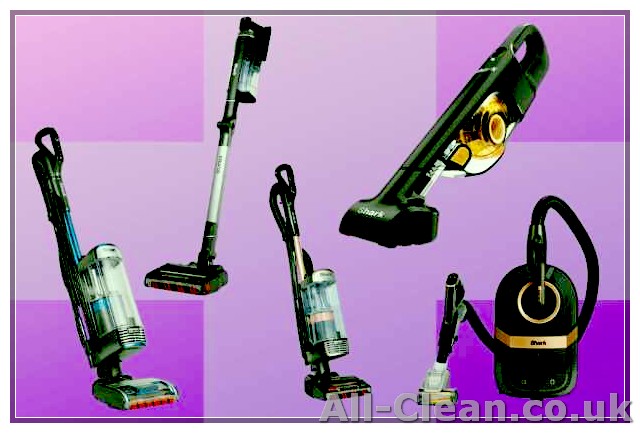
Keeping your Shark vacuum cleaner clean is essential to ensure its optimal performance and longevity. Regular maintenance, including cleaning the filters, brushes, and other parts, will help your vacuum cleaner work efficiently and last longer. Whether you have a Shark cordless, upright, or handheld vacuum cleaner, this ultimate guide will provide you with step-by-step instructions on how to clean it thoroughly.
Before you start cleaning your Shark vacuum cleaner, you should gather all the necessary tools and materials. You will need a screwdriver (if any part needs detaching), a brush or toothbrush, a damp cloth or sponge, mild detergent, baking soda, vinegar, and warm water. Once you have everything prepared, you’re ready to begin.
Step 1: Detach and clean the removable parts
The first step is to detach all removable parts, such as the dust cup, filters, brush-roll, and hose. These parts should be washed with warm water and mild detergent. If there are any stubborn stains or odors, you can soak them in a mixture of warm water and vinegar or baking soda for a few hours to help loosen them. Once clean, ensure they are completely dry before reattaching them to the vacuum cleaner.
Step 2: Clean the brush-roll and remove any hair or debris
The brush-roll is one of the main parts of your Shark vacuum cleaner that requires regular cleaning. Use a pair of scissors or a seam ripper to cut away any hair or tangled threads from the brush-roll. You can also use a brush or toothbrush to remove any remaining debris. If the brush-roll is clogged or not rotating properly, refer to the user manual or the manufacturer’s website for additional instructions on how to clean or replace it.
Step 3: Clean the filters
The filters in your Shark vacuum cleaner play a crucial role in trapping dust and allergens. Depending on your model, there are usually three types of filters: foam, felt, and HEPA filters. Refer to your user manual to know the exact location and types of filters in your vacuum cleaner. Rinse the washable filters under warm water until the water runs clear. Allow them to dry completely before reinstalling them. Replace any non-washable filters according to the manufacturer’s instructions.
By following these simple steps, you can effectively clean your Shark vacuum cleaner and keep it in top working condition. Remember to clean your vacuum cleaner at least once every three months or more frequently if you have pets or a lot of dirt and debris in your home. Clean filters and brushes ensure better suction power and prevent blockages that may affect the performance of your vacuum cleaner. Regular maintenance not only extends the life of your Shark vacuum cleaner but also ensures a clean and healthy home.
Empty the Dust Cup
One of the most important steps in cleaning your Shark vacuum cleaner is emptying the dust cup. This should be done regularly, especially after each use, to ensure optimal performance and prolong the life of your vacuum.
1. Detach the dust cup from the vacuum cleaner. Depending on the model you own, this may involve pressing a button or releasing a latch. Refer to your user manual for specific instructions.
2. Find an appropriate place to empty the dust cup. Choose an area away from furniture, decor, or any items that may be affected by dust. It’s also a good idea to empty the cup near an outlet in case your vacuum needs to be plugged in for any further cleaning.
3. To prevent any odors from getting released or the dust cup from getting clogged, shake it gently over a trash can to remove any loose debris.
4. If there are any stubborn or stuck particles, use a toothbrush or a small brush to loosen them. Be careful not to damage the dust cup or any of its components while doing so.
5. Once the cup is empty, wipe it clean with a damp cloth or rinse it with water and mild soap. Make sure to thoroughly dry it before reattaching it to the vacuum.
6. Check the dust cup for any signs of damage or obstructions. If there are any issues, consult the user manual for troubleshooting tips or consider contacting customer support for assistance.
7. Before reassembling the dust cup to the vacuum cleaner, check the filters and brush-roll for any dirt or debris. Remove and clean them according to the manufacturer’s instructions if necessary. This will help maintain the suction power and effectiveness of your vacuum.
By following these step-by-step instructions, you can ensure that your Shark vacuum cleaner’s dust cup is empty and ready for use. Regularly emptying the dust cup and cleaning it will not only keep your vacuum running smoothly, but it will also help eliminate odors and prolong the life of your appliance.
Remove and Clean the Filters
One of the most important steps in cleaning a Shark vacuum cleaner is to remove and clean the filters. The filters help to trap dust, dirt, and allergens, ensuring that the air released by the vacuum cleaner is clean. Over time, the filters can get dirty and clogged, reducing the performance of the vacuum cleaner. Follow these step-by-step instructions to keep your Shark cleaner in top shape:
- First, make sure the vacuum cleaner is turned off and unplugged for safety.
- Locate the filter release buttons or tabs on your Shark vacuum cleaner. These buttons or tabs are usually located on the top or bottom of the vacuum cleaner.
- Press the filter release buttons or tabs to access the filters. Some Shark models may have multiple filters, so make sure to remove all of them.
- Once the filters are removed, gently tap them against a trash bin to remove any loose dirt and debris. It’s also a good idea to use a brush to remove any stubborn dirt or debris from the filters.
- If the filters are very dirty, you may need to wash them with warm soapy water. Check the manufacturer’s instructions for your specific Shark model to see if the filters are washable. If they are, gently wash the filters and rinse them thoroughly. Allow the filters to air dry completely before reattaching them to the vacuum cleaner.
- If your Shark vacuum cleaner uses a HEPA filter, it may need to be replaced periodically. Check the manufacturer’s instructions to see how often the filter needs to be replaced.
- Before reattaching the filters to the vacuum cleaner, take a moment to check the filter housing for any obstructions. Remove any debris or obstructions that may be blocking the airflow.
- Once the filters are clean and dry, carefully reattach them to the vacuum cleaner. Make sure they are properly aligned and securely in place.
- Finally, turn on your Shark vacuum cleaner and test it to make sure everything is working properly. You should notice improved suction and performance after cleaning the filters.
Remember to clean your Shark vacuum cleaner filters regularly to maintain optimal performance and prolong the life of your vacuum cleaner. Following these simple tips will help you keep your Shark vacuum cleaner in great shape and ensure it continues to leave your floors clean and fresh.
If you need additional help or have questions, please consult your Shark vacuum cleaner owner’s manual or visit the SharkClean blog for more tips and information.
Clean the Brush Roll

One of the most important parts of cleaning a Shark vacuum cleaner is cleaning the brush roll. Over time, dirt, hair, and other debris can get wrapped around the brush roll, which can affect its performance. Here is a step-by-step guide on how to clean the brush roll:
- Before cleaning the brush roll, make sure the Shark vacuum cleaner is unplugged to avoid any accidents.
- Flip the vacuum cleaner over and locate the brush roll, which is usually located on the bottom of the vacuum.
- Using a pair of scissors, carefully cut away any hair or fibers that are wrapped around the brush roll. Be sure to use caution when handling the scissors to avoid any potential injuries.
- If there are any stubborn debris that cannot be easily cut away, gently use a comb or a brush to loosen and remove the debris.
- Once the brush roll is free of debris, use a damp cloth or sponge to wipe down the brush roll to remove any remaining dirt or grime.
- Inspect the brush roll for any signs of damage or wear. If the brush roll is damaged, it may need to be replaced.
- After cleaning and inspecting the brush roll, reattach it to the vacuum cleaner. Make sure it is securely attached before using the vacuum cleaner again.
Cleaning the brush roll should be done regularly to keep your Shark vacuum cleaner in optimal condition. By following these simple steps, you can ensure that your vacuum cleaner stays clean and efficient for longer. It is also a good idea to refer to the manufacturer’s instructions for specific cleaning tips and recommendations.
Detach and Clean the Hose
The hose of your Shark vacuum cleaner plays a crucial role in maintaining its efficiency. Over time, the hose can collect dirt, dust, and debris, which can affect its suction power. Cleaning the hose regularly is essential to ensure optimal performance.
To detach the hose, follow these simple steps:
- Step 1: Make sure your Shark vacuum cleaner is turned off and unplugged.
- Step 2: Locate the hose attachment point on the main body of the vacuum cleaner. It is usually marked or labeled.
- Step 3: Twist and pull the hose gently to detach it from the vacuum cleaner.
Now that the hose is detached, it’s time to clean it. Here’s what you’ll need:
- Warm water
- Mild dish soap
- A brush with soft bristles
Follow these instructions to clean the hose:
- Step 1: Fill a sink or basin with warm water and add a few drops of mild dish soap. Mix gently to create a soapy solution.
- Step 2: Submerge the detached hose in the soapy water and let it soak for about 10 minutes.
- Step 3: After soaking, use the brush with soft bristles to scrub the inside and outside of the hose. Pay extra attention to any visibly dirty or clogged areas.
- Step 4: Rinse the hose thoroughly with clean water to remove any soap residue.
- Step 5: Shake the hose gently to remove excess water and let it air dry completely before reattaching it to the vacuum cleaner.
By following this method, you can make sure that your Shark vacuum cleaner’s hose is cleaned properly and ready to use.
Pro tip: If you have a larger clogged area in the hose that doesn’t get cleaned with just a brush, you can use a straightened wire hanger or a plumbing snake to remove the obstruction. Be cautious not to damage the hose while doing so.
Remember, cleaning the hose regularly is crucial to maintaining the suction power and effectiveness of your Shark vacuum cleaner. Make it a part of your cleaning routine to keep your vacuum cleaner performing at its best!
Wipe Down the Exterior

One of the first steps in cleaning your Shark vacuum cleaner is to wipe down the exterior. This helps to remove any dust or dirt that may have accumulated on the surface of the vacuum. It is important to disconnect the vacuum from the power source before you start cleaning.
To clean the exterior of your vacuum, you can use a dry cloth or a microfiber cloth. Gently wipe down the entire vacuum, including the handle, wand, and canister. Pay attention to any crevices or corners where dirt may be trapped.
If your vacuum has a DuoClean feature, make sure to clean the brush rolls thoroughly. Use a damp cloth to wipe away any debris that may have accumulated on the brush rolls. You can also use a small brush or a comb to remove any tangled hair or fibers.
Some manufacturers offer special cleaning products or wipes specifically designed for cleaning vacuum exteriors. These products can help to remove stubborn dirt or grime and leave your vacuum looking like new. Follow the manufacturer’s instructions when using these products.
If your vacuum has a scent disc, you can remove it and wipe it down with a damp cloth. This will help to remove any dirt or dust that may have accumulated on the disc. Allow the disc to air dry before reattaching it to your vacuum.
It is also a good idea to clean the wheels of your vacuum. Dirt and debris can get trapped in the wheels, which can affect the performance of your vacuum. Use a dry cloth or a toothbrush to remove any dirt or debris from the wheels.
Once you have finished wiping down the exterior of your vacuum, you can reconnect it to the power source and continue cleaning.
Reassemble the Vacuum
Once you have finished cleaning the various parts of your Shark vacuum cleaner, it is time to reassemble the vacuum so that it is ready for use again. Here is a step-by-step guide on how to reassemble your Shark vacuum:
- Start by reattaching the base of the vacuum to the main body. Make sure that it is securely locked in place to prevent any issues during operation.
- If you have removed any parts or attachments, such as the hose or floorheads, now is the time to reattach them. Simply align the attachment with the corresponding connection point and push or twist them into place.
- Check the brush-roller for any signs of clogs, clumps of hair, or debris. If needed, remove any obstructions and clean the brush-roller before reinserting it back into the vacuum.
- If you have replaced any filters or dust cups, make sure they are properly secured in their respective slots.
- Refer to your Shark vacuum cleaner’s manual for any specific reassembly instructions or recommendations.
- Once all the parts are back in place, give the vacuum one final wipe down with a damp cloth to remove any remaining dirt or dust.
- Let the vacuum air dry completely before using it again to avoid any potential damage or malfunction.
- If you prefer, you can also sanitize the vacuum by using a mild soapy solution and warm water. Just make sure to rinse off any soap residue thoroughly.
Remember, regular cleaning and proper maintenance of your Shark vacuum cleaner will help to improve its performance and ensure it lasts for a long time. By following these cleaning methods, you can keep your vacuum in great condition and enjoy cleaner and fresher homes.
For more information and inspiration, please visit our blog on sharkclean.com.


