

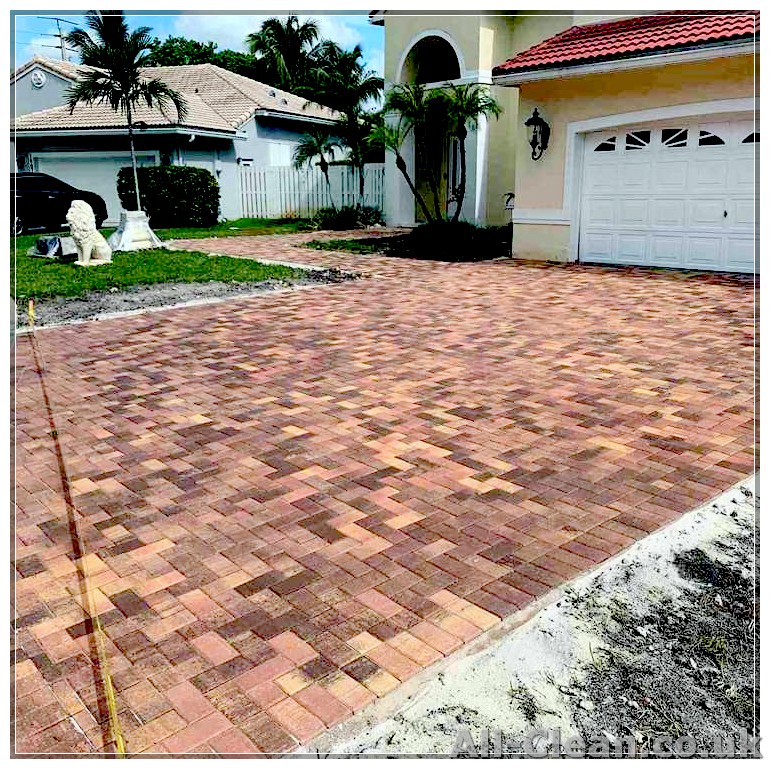
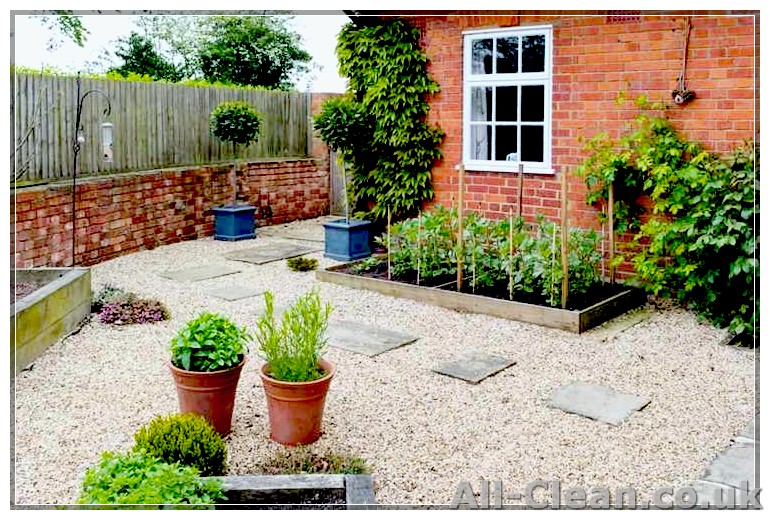
If you have a decorative gravel surface in your home, learning how to clean it properly is essential to maintain its appearance and durability. Gravel surfaces, such as patios and driveways, can easily accumulate dirt, stains, and debris over time, making them look worn and unattractive. Pressure washing is a popular method to make these areas look brand new again.
To begin the cleaning process, gather all the necessary supplies. You’ll need a pressure washer, a broom, a mold and mildew remover, and regular cleaning supplies like water and detergent. If you don’t own a pressure washer, you can usually rent one from a home improvement store or hire a professional to do the job for you.
Start by removing any fallen leaves or debris from the gravel surface. Use a broom to sweep away the loose dirt and leaves, making sure to clear all the areas between the gravel. This step will make the overall cleaning process easier and more effective.
Next, prepare the pressure washer by connecting it to a water source and adding the appropriate cleaning solution. The pressure washer will help to remove any stubborn stains, dirt, or grime from the gravel surface. Start by rinsing the entire area with water to remove loose dirt and debris.
Once the surface is ready, begin pressure washing the gravel by using long, sweeping motions. Keep the nozzle of the pressure washer at a distance from the gravel to prevent any damage. Work in small sections, overlapping each pass to ensure even cleaning.
If you notice any stubborn stains or areas that need extra attention, use a mold and mildew remover to eliminate them. Apply the remover according to the product instructions, and let it sit for a few minutes before rinsing it off with the pressure washer.
After cleaning the entire gravel surface, give it a final rinse to remove any remaining detergent or cleaning solution. This step is crucial to prevent any residues that might cause future staining or damage. Once rinsed, allow the gravel to dry naturally.
Regular maintenance is key to keep your gravel surface looking its best for years to come. Make sure to regularly sweep away any fallen leaves or debris and clean any stains or spills as soon as they appear. By following this step-by-step guide, you’ll have a clean and well-maintained gravel surface that will enhance the overall look of your home.
For more tips on home improvement, sign up for our newsletter where you’ll find a range of relevant advice and ideas to keep your home looking its best.
- How to Clean Gravel: Step 2
- Step 1: Prepare the Surface
- Step 2: Use a Pressure Washer or a Brush
- Step 3: Remove Stains or Stuck-On Dirt
- Step 4: Rinse the Gravel
- Step 5: Maintain Regularly
- Step-by-Step Guide for Cleaning Gravel on Patios, Driveways, and More
- Step 1: Remove any large debris
- Step 2: Grade the gravel
- Step 3: Sweep the gravel surface
- Step 4: Apply a cleaning solution
- Step 5: Brush the gravel
- Step 6: Rinse with water
- Step 7: Let it dry
- Step 8: Regular maintenance
- Gather the Necessary Cleaning Supplies
- Prepare the Gravel Surface
- Start the Cleaning Process
- 1. Prepare the area
- 2. Gather your cleaning tools
- 3. Determine the appropriate cleaning solution
- 4. Start with a spot test
- 5. Wash the gravel
- 6. Rinse thoroughly
- Maintain and Prevent Future Dirt and Debris
- Sweep and Remove Debris
- Check for Weeds
- Power Wash for a Deeper Clean
- Use a Gravel Cleaner Solution
- Install Weed Barrier
- Regularly Maintain and Clean
How to Clean Gravel: Step 2
After you’ve gathered all the necessary supplies, it’s time to start cleaning your gravel. This step-by-step guide will walk you through the process.
Step 1: Prepare the Surface
Before you begin cleaning, make sure to remove any loose debris and sweep the surface of the gravel. Use a rake or a garden brush to remove leaves, dirt, or any other small particles that may have accumulated over time.
Step 2: Use a Pressure Washer or a Brush
Depending on the size of the area you want to clean, you can use a pressure washer or a brush with water and an appropriate cleaning solution. Pressure washers are most commonly used for larger gravel surfaces like driveways, while brushes with cleaning solution are more suitable for smaller areas and decorative gravel.
Step 3: Remove Stains or Stuck-On Dirt
If there are any stains or stuck-on dirt on your gravel, use a gravel stain remover or a brush with a cleaning solution to gently scrub the affected areas. Make sure to follow the instructions on the stain remover or cleaning solution packaging.
Step 4: Rinse the Gravel
Once you’ve finished scrubbing the gravel, rinse it thoroughly with a hose or a pressure washer to remove any remaining cleaning solution and dirt. Make sure to rinse all areas, including the exposed gravel and any areas with greenery or plants.
Step 5: Maintain Regularly
To keep your gravel looking clean and in good condition, it’s important to maintain it regularly. Sweep the surface of the gravel with a rake or a brush to remove any loose debris or dirt. You can also use a leaf blower to remove leaves and other debris.
In fact, a regular maintenance routine for your gravel can help prevent the buildup of dirt and keep your outdoor areas looking great. By following these steps, you can ensure that your gravel stays clean and free of debris.
Step-by-Step Guide for Cleaning Gravel on Patios, Driveways, and More
Gravel is a popular choice for patios, driveways, and other outdoor areas. However, over time, dirt, leaves, and other debris can accumulate, making the gravel look dirty and unkempt. Cleaning gravel is not a difficult task, but it does require some time and effort. Follow this step-by-step guide to keep your gravel areas looking clean and presentable.
Step 1: Remove any large debris
Start by removing any large debris, such as leaves or sticks, from the gravel surface. Use a rake or a shovel for this task. If needed, you can also use a leaf blower to quickly clear away any loose leaves or debris.
Step 2: Grade the gravel
If the gravel surface is uneven or has areas with low spots, use a rake or a shovel to grade the gravel. This will help to ensure proper drainage and prevent water from pooling on the surface. Simply rake the gravel to level it out and fill in any low areas.
Step 3: Sweep the gravel surface
Using a broom or a specialist gravel cleaner, sweep the gravel surface to remove any remaining dirt or dust. Be thorough in your sweeping, making sure to reach all corners and edges of the area.
Step 4: Apply a cleaning solution
For a deep clean, you can use a mixture of water and a mild detergent or a commercial gravel cleaner. Follow the instructions on the cleaner or mix one part detergent to four parts water. Apply the solution evenly over the gravel, using a watering can or a sprayer.
Step 5: Brush the gravel
Use a stiff brush or a broom to scrub the gravel and work the cleaning solution into the surface. This will help to loosen any dirt or stains on the gravel. Be sure to brush in all directions to cover the entire area.
Step 6: Rinse with water
Once you have scrubbed the gravel, rinse the area thoroughly with water. You can use a hose or a pressure washer for this step. Make sure to remove all traces of the cleaning solution to prevent any damage to the gravel or surrounding areas.
Step 7: Let it dry
Allow the gravel to dry completely before using the area again. This can take a few hours or even a full day, depending on the weather conditions. Avoid walking or driving on the wet gravel to prevent imprints or shifting.
Step 8: Regular maintenance
To keep your gravel areas looking clean and tidy, it is important to perform regular maintenance. Sweep leaves and debris off the gravel surface regularly. Use a rake to smooth out any uneven areas or rake up any new leaves that have fallen. By staying on top of maintenance, you can prevent a buildup of dirt and keep your gravel looking its best.
Following this step-by-step guide will help you keep your gravel areas clean and well-maintained. Regular cleaning and maintenance will ensure that your patio, driveway, or other gravel surface remains an attractive part of your outdoor space.
Gather the Necessary Cleaning Supplies
Before you can start cleaning your gravel, you’ll need to gather a few essential cleaning supplies. Here’s a list of the items you’ll need:
- A rake: This tool will help you remove any debris or fallen leaves from the surface of the gravel.
- A brush: Use a brush to scrub away any stubborn stains or dirt that may have accumulated over time.
- A pressure washer: If your gravel is in need of a deep clean, a pressure washer can be a great tool. Make sure to use a low-pressure setting to avoid damaging the gravel or the surrounding plants.
- A wheelbarrow or bags: These will come in handy for clearing away any excess gravel or debris that you may remove during the cleaning process.
- A membrane: If you have weeds or plants growing through your gravel, you may need to consider adding a membrane to prevent further growth.
- A gravel cleaner or remover: This specialized tool can help you target smaller areas of your gravel that may need extra attention.
- Water: You’ll need plenty of water for rinsing off the gravel and cleaning the surface.
Now that you have all your cleaning supplies in order, you’re ready to move on to the next step in the cleaning process.
Prepare the Gravel Surface
Before you begin cleaning your gravel surface, there are a few steps you can take to ensure that the process goes smoothly and effectively. Here’s how to prepare the surface:
- Clear the area: Start by removing any objects, such as furniture or outdoor decor, that may be on the gravel. This will make it easier to clean and prevent any damage to your belongings.
- Sweep the surface: Use a broom or leaf blower to remove any loose leaves, debris, or dirt from the gravel. This will help to get rid of the surface-level dirt and make it easier to deep clean later on.
- Check for weeds: Walk around and inspect the gravel for any weeds or unwanted plants that have sprouted. If you spot any, pull them out by hand or use a weed killer to eliminate them. Keeping the gravel surface weed-free will help to maintain its appearance and prevent further growth.
- Level the gravel: Use a rake or shovel to even out any uneven areas of the gravel. This will create a more aesthetically pleasing surface and minimize the risk of tripping or slipping when walking or driving on it.
- Protect nearby plants: If there are any plants or greenery near the gravel surface, consider covering them with a plastic sheet or tarp to protect them from any cleaning solutions or debris that may be sprayed or washed off during the cleaning process.
By following these steps, you’ll ensure that your gravel surface is well-prepared for the cleaning process. This will help you achieve the best results and keep your outdoor space looking clean and well-maintained.
Start the Cleaning Process
To clean your gravel patio, driveway, or garden, you’ll need to gather a few supplies and follow a step-by-step guide. By doing the cleaning yourself, you can save money and ensure that the job is done to your satisfaction.
1. Prepare the area
Before you begin cleaning, make sure to remove any larger debris and sweep the area with a garden rake. This will help to loosen the dirt and make the cleaning process more effective. If your gravel is aged and has accumulated a layer of moss or weeds, it’s a good idea to use a weed membrane to prevent their growth after the cleaning.
2. Gather your cleaning tools
For the cleaning process, you’ll need a range of tools and products. You can find these items at your local home improvement store or on online platforms like Amazon. Some of the basic supplies include a broom or brush for sweeping, a good garden hose with a nozzle attachment, a dustpan or shovel, and a bucket for mixing cleaning solutions.
3. Determine the appropriate cleaning solution
Depending on the type of stain or mould you’re dealing with, you’ll need to choose an appropriate cleaning solution. For general cleaning, a mixture of water and white vinegar can be sufficient. If you’re dealing with stubborn stains, you may need to use a detergent or a specialized cleaning product. It’s always a good idea to read the product labels and follow the manufacturer’s instructions.
4. Start with a spot test
Before applying the cleaning solution to the entire area, it’s recommended to perform a spot test to ensure that it doesn’t damage or discolor the gravel. Choose a small, inconspicuous spot and apply the solution according to the instructions. If there are no adverse effects after a few minutes, you can proceed with the cleaning process.
5. Wash the gravel
Using a bucket or hose with a nozzle attachment, wash down the gravel with the cleaning solution. Start from one corner and work your way across the surface, making sure to cover all areas. Use a broom or brush to scrub any stubborn stains or mould. Pay attention to areas that are more exposed to dirt and debris, such as the edges of the patio or driveway.
6. Rinse thoroughly
After scrubbing, rinse the gravel thoroughly with clean water. This will help to remove any remaining dirt or cleaning solution. Be sure to rinse the gravel from top to bottom, allowing the dirty water to drain away. A garden hose with a nozzle attachment is ideal for this step.
By following these tips and using the appropriate cleaning solutions, you can effectively clean your gravel patio, driveway, or garden. Regular maintenance is key to keeping the area looking good and preventing the growth of weeds and mould. Remember to consult a professional or seek advice from reputable sources if you’re unsure about the cleaning process or if your gravel requires special care.
For more outdoor cleaning and maintenance tips, sign up for our newsletter.
Maintain and Prevent Future Dirt and Debris
Once you have completed the cleaning process and your gravel is looking fresh and new, it is important to maintain it and prevent future build-up of dirt and debris. Regular maintenance will help prolong the cleanliness of your gravel and keep it looking its best.
Sweep and Remove Debris
To start, regularly sweep your gravel surface to remove any loose dirt or debris. This can be done with a broom or a leaf blower. By doing this simple task, you can prevent dirt and debris from settling into the gravel and making it dirty again.
Check for Weeds
Another important step in maintaining your gravel is to check for and remove any weeds that may start to grow between the gravel. Weeds can not only make your gravel area look unkempt but can also cause damage to the underlying material.
To remove weeds, you can use a small hand shovel to dig them out. Make sure to remove the entire root to prevent any regrowth. Regularly checking for and removing weeds will help keep your gravel clean and weed-free.
Power Wash for a Deeper Clean
If you want to give your gravel area an extra deep clean, you can use a pressure washer. A pressure washer is an effective cleaning tool that can remove tough dirt and stains from the surface of your gravel.
Before using a pressure washer, check the manufacturer’s instructions to ensure you are using it correctly and safely. Start by using a lower pressure setting and gradually increase it until you achieve the desired cleaning power. Be careful not to use too much pressure, as this can damage the surface of your gravel.
Use a Gravel Cleaner Solution
If you prefer not to use a pressure washer, there are gravel cleaner solutions available that can help remove dirt and stains. These solutions are usually applied with a brush or a broom and then rinsed off with water.
Specialist gravel cleaner solutions can be found at home improvement stores or online. Follow the instructions on the product label to ensure proper usage and effectiveness.
Install Weed Barrier
If you are looking for a long-term solution to prevent weed growth and maintain the cleanliness of your gravel, consider installing a weed barrier. A weed barrier is a material that is placed underneath the gravel to prevent weeds from growing through.
Before installing a weed barrier, make sure to thoroughly clean your gravel surface. Once cleaned, carefully lay the weed barrier over the surface, making sure it covers the entire area. Then, pour your gravel on top of the weed barrier and spread it evenly. The weed barrier will help keep weeds from growing through the gravel and making it dirty.
Regularly Maintain and Clean
To keep your gravel looking its best, it is important to regularly maintain and clean it. Follow the above steps on a regular basis to prevent future build-up of dirt and debris. By taking these steps, you can ensure that your gravel remains clean and enhances the overall appearance of your outdoor space.
Remember, a clean gravel surface not only improves the aesthetic of your home, but it also means less dirt and debris being tracked into your home. Utilize the advice in this step-by-step guide to keep your gravel clean and looking fresh for years to come!


