
Bricks are a popular building material due to their durability and aesthetic appeal. However, over time, they can become stained with soot, which can detract from their appearance. If you’re dealing with stubborn soot stains on your bricks, don’t worry! In this article, we will guide you through the process of removing soot from bricks, using expert-based methods.
Before you start cleaning, it’s important to protect yourself and the surrounding area. Soot can be messy and even harmful if inhaled or ingested. So, make sure to wear goggles, gloves, and suitable clothing to avoid any contact with the soot. Additionally, ensure proper ventilation in the area to prevent the buildup of chemicals.
1. Start by removing any excess soot from the bricks. You can do this by using a brush or a broom to sweep off the loose soot particles. Make sure to sweep from top to bottom and work from the outside in, as this will prevent the soot from spreading to unaffected areas.
2. Once you’ve removed the excess soot, it’s time to make a cleaning paste. Mix equal amounts of mild soap, baking soda, and tsp (trisodium phosphate) in a bucket with warm water. This mixture will help break down the soot stains and make them easier to remove.
3. Use a brush or sponge to apply the cleaning paste to the soot stains on the bricks. Scrub gently in circular motions, paying extra attention to stubborn areas. If necessary, you can use a bit of elbow grease and a scrub brush to tackle tougher stains.
4. After scrubbing, let the cleaning paste sit on the bricks for about 10-15 minutes. This will allow the paste to penetrate the stains and work its magic.
5. Once the paste has had time to work, rinse the bricks with clean water. You can use a hose or a bucket of water to rinse off the cleaning solution. Make sure to rinse thoroughly to remove any leftover soap or baking soda residue.
6. After rinsing, allow the bricks to air dry. You can speed up the drying process by using a fan or opening windows in the area. Avoid using excessive heat or direct sunlight, as this may cause the bricks to crack.
By following these steps, you can effectively remove soot from your bricks and restore their natural beauty. Just remember to take proper safety precautions and use the right cleaning materials. With a little bit of effort and the right techniques, you can make your brickwork look as good as new!
- Why is Soot Removal from Bricks Important?
- Step 1: Assess the Condition of the Bricks
- Step 2: Prepare the Cleaning Solution
- Step 3: Apply the Cleaning Solution to the Bricks
- Protect Yourself
- Protect the Surrounding Areas
- Apply the Cleaning Solution
- Step 4: Rinse and Dry the Bricks
- Rinsing the Bricks
- Drying the Bricks
Why is Soot Removal from Bricks Important?

Removing soot from bricks is an essential part of maintaining the cleanliness and appearance of your fireplace or wood-burning stove. Soot is a black, powdery substance that is produced when wood is burned. Over time, it can build up on the bricks, causing them to become dirty and discolored.
In addition to being unsightly, soot can also be a health hazard. When bricks are covered in soot, it can release small particles into the air that can be inhaled. These particles can irritate the respiratory system and contribute to breathing difficulties for individuals with asthma or other respiratory conditions.
Soot removal also plays a crucial role in preventing potential fire hazards. When soot accumulates on the bricks, it can become flammable and increase the risk of a chimney fire. The heat generated by the fireplace or wood-burning stove can ignite the soot, leading to a dangerous and potentially devastating fire.
Furthermore, removing soot from bricks helps to extend the lifespan of the bricks themselves. The acidic nature of soot can gradually eat away at the surface of the bricks, causing them to deteriorate over time. Regular cleaning and removal of soot can help to preserve the integrity of the bricks and prevent costly repairs or replacements.
In conclusion, soot removal from bricks is necessary for several reasons. It helps to maintain the cleanliness and appearance of your fireplace or wood-burning stove, protects your health by reducing the release of airborne particles, lowers the risk of chimney fires, and ensures the longevity of your bricks. By following the steps outlined in this article, you can successfully remove soot from your bricks and enjoy a clean and safe living environment.
Step 1: Assess the Condition of the Bricks
Before you start the process of removing soot from bricks, it’s important to assess the condition of the bricks. This step will help you determine the best method to use and increase your chances of success.
1. Spread a white cloth or piece of paper on the ground near the bricks you want to clean. This will help you evaluate the amount of soot and the condition of the bricks more clearly.
2. Consider the contact that the bricks have had with the soot. If the soot is limited to just the outside of the bricks, you may have an easier time cleaning them. However, if the soot has penetrated the brickwork, inside and out, cleaning may be more challenging.
3. Look for any signs of damage or deterioration in the bricks. If the bricks are already crumbling or showing signs of significant wear, it’s important to consult a professional before attempting to clean them yourself.
4. Determine if the soot is from a wood-burning fireplace or another source. Wood-burning soot can be more difficult to remove than soot from other sources, so you may need to use different cleaning methods.
5. Consider your safety. Cleaning soot from bricks can involve the use of chemicals and potential exposure to harmful substances. Make sure to wear protective clothing and follow all safety instructions provided with the cleaning products.
6. Research and gather information about different cleaning solutions and methods. Vinegar, baking soda, and commercial brick cleaners are all valid options. Each method has its own pros and cons, so it’s important to understand the best approach for your specific situation.
7. Vacuum the bricks before cleaning to remove loose soot and debris. This will help prevent spreading the soot while cleaning and improve the effectiveness of the cleaning process.
8. Start with the least aggressive cleaning method. For example, you might try using a mixture of equal parts vinegar and water or a mild dish soap like Dawn. These gentler methods are less likely to cause damage to the bricks.
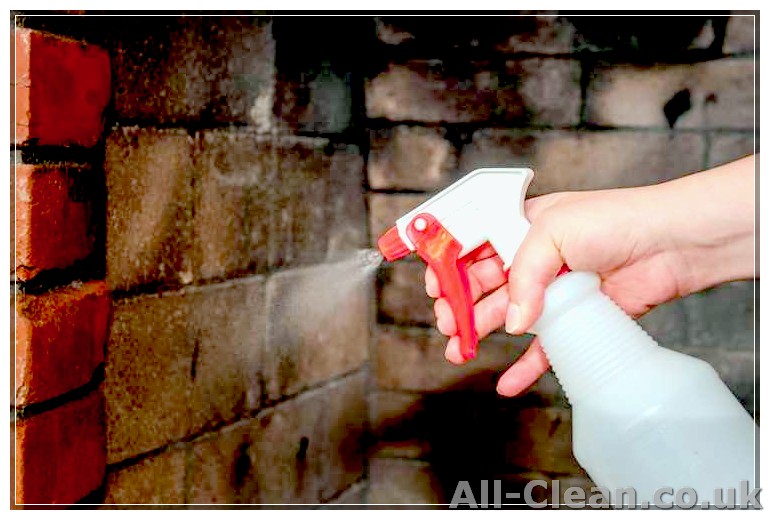
9. Test the cleaning solution on a small, inconspicuous area of the bricks before proceeding to clean the entire surface. This will help you determine if the solution is safe to use and will not cause any unwanted damage or discoloration.
10. Apply the cleaning solution to the bricks using a sponge or a soft brush. Scrub gently in a circular motion, paying extra attention to areas with heavy soot buildup.
11. Allow the cleaning solution to sit on the bricks for a few minutes to penetrate the soot. This will help loosen the soot and make it easier to remove.
12. Rinse the bricks thoroughly with clean water to remove any cleaning solution residue. Use a sponge or a hose to rinse off the bricks, making sure to remove all traces of the cleaning solution.
13. Allow the bricks to dry completely before assessing the results. The drying process may take several hours or even days, depending on the weather conditions and the porosity of the bricks.
14. Repeat the cleaning process if necessary. If the bricks are still stained or have soot residue after the first cleaning, you might need to repeat the cleaning process or try a different cleaning method.
15. If the bricks are heavily stained or damaged, it is recommended to consult a professional brick cleaner. They have the expertise and specialized equipment to clean the bricks effectively without causing further damage.
By following these steps, you can assess the condition of the bricks and choose the appropriate cleaning method to remove soot effectively. Cleaning your bricks not only improves their appearance but also helps maintain their longevity and structural integrity.
Step 2: Prepare the Cleaning Solution
Before you start scrubbing away at the soot residue, you’ll need to prepare a cleaning solution. One effective cleaning solution that you can make at home is a mixture of baking soda and water.
To create the cleaning solution, you will need the following:
- 1 cup of baking soda
- 3 tsp of water
In a small bowl, combine the baking soda and water to form a paste. If you find that the mixture is too dry, you can add a little more water. The consistency should be similar to toothpaste.
Note: There are also commercial cleaning products available that are specifically designed for soot removal, such as AspenClean. These products may contain chemicals, so be sure to read and follow the instructions provided by the manufacturer. If you choose to use a commercial cleaning product, make sure to wear protective gloves and follow all safety precautions.
However, if you prefer to use a more natural and DIY approach, the baking soda solution should work just fine.
Quick Tip: Before you start cleaning, it’s a good idea to test the cleaning solution on a small, inconspicuous area of your bricks to ensure that it doesn’t cause any damage or discoloration.
Step 3: Apply the Cleaning Solution to the Bricks
Once you’ve prepared your cleaning solution, it’s time to apply it to the bricks. Before you begin, make sure to protect yourself and the surrounding areas.
Protect Yourself
Wear safety goggles to protect your eyes from any splashes or debris.
Wear old clothing that you don’t mind getting dirty or stained.
If you’re removing soot from a wood-burning fireplace, make sure to wear a mask to prevent inhaling any ash or soot particles.
Protect the Surrounding Areas
Cover any nearby furniture or objects that could potentially get splashed or stained during the cleaning process.
Place a tarp or drop cloth on the floor to catch any cleaning solution or debris that may fall.
Apply the Cleaning Solution
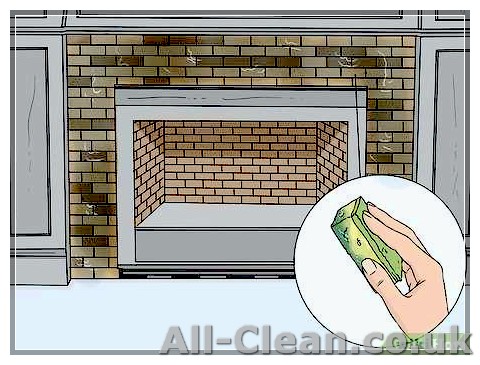
- Using a soft brush or sponge, dip it into the cleaning solution.
- Gently scrub the soot-covered bricks using circular motions.
- Start from the top and work your way down.
- Be thorough and make sure to cover all areas of the bricks.
- If the soot is stubborn and not coming off easily, you may need to apply more pressure.
- If you find that the cleaning solution is drying out too quickly, reapply it as needed.
- Rinse the bricks with clean water to remove any remaining cleaning solution.
- You can use a hose or a bucket of water for rinsing.
- Make sure to remove all the cleaning solution to avoid any residue left behind.
- Allow the bricks to dry completely before moving on to the next step.
- This will ensure the best results and prevent any streaking or water spots.
- Drying times can vary depending on the temperature and humidity, but it’s recommended to wait at least 24 hours.
Congratulations! You’ve successfully applied the cleaning solution to the bricks. Now you’re ready to move on to the next step in the process.
Step 4: Rinse and Dry the Bricks
Once you’ve scrubbed away the soot and residue from the bricks, it’s time to rinse and dry them. This step will help remove any remaining cleaning solution and leave the bricks looking fresh and clean.
Rinsing the Bricks
- Fill a bucket with warm water.
- Dip a clean sponge or cloth into the water and wring it out to remove excess moisture.
- Gently wipe down the bricks with the damp sponge or cloth to remove any soap residue.
- Repeat this process as necessary until all the soap is removed from the bricks.
Drying the Bricks
Once you have finished rinsing the bricks, it’s important to allow them to dry properly. This will help prevent any moisture from getting trapped in the bricks, which could lead to further damage or discoloration.
- Use a clean, dry cloth or towel to gently blot the bricks and remove any excess water.
- Allow the bricks to air dry completely before using or applying any additional treatments.
It’s also a good idea to check for any leftover soot or residue after the bricks have dried. If you notice any remaining stains, you may need to repeat the cleaning process or consider using a stronger cleaning solution. Additionally, if you’re unsure about any aspect of the cleaning process or if you’re dealing with stubborn stains, it’s always a good idea to consult with a professional cleaner for guidance.
By following these steps and using the right cleaning techniques, you’ll be able to effectively remove soot from your bricks without causing any damage. Remember to always prioritize safety by wearing protective goggles and gloves, and to read any warnings and instructions on the cleaning products you’re using.
Next, we’ll move on to step 5, where we’ll discuss some additional tips and methods for removing soot from bricks.


