
There’s no denying that dirty radiators can be a real eyesore in our homes. Not only do they affect the appearance of our living spaces, but they can also lead to a rise in energy bills. Thankfully, cleaning your radiator is a simple and easy task that you can do on your own. Plus, regular cleaning can help improve the efficiency of your heating system, which will in turn reduce your energy bills.
If you’re wondering how to clean your radiator properly, this step-by-step guide will help you get the job done quickly and efficiently. Before you begin, make sure to turn off your heating system and wait for the radiator to cool off. This will help avoid any accidents or burns.
Step 1: Start by removing any loose debris or dust from the radiator. You can use a vacuum cleaner or a brush to get rid of the surface dirt. Make sure to clean both the front and back of the radiator and pay special attention to the fins, as this is where dirt tends to build up.
Step 2: Mix a solution of warm water and mild detergent in a spray bottle. Spray the solution onto a towel or use a brush to scrub the radiator. This will help remove any stubborn stains or grease that may have accumulated over time. For hard-to-reach areas, you can use a long brush or a garden hose with a cleaner attachment.
Step 3: Rinse the radiator with clean water to remove any soapy residue. Make sure to thoroughly rinse all parts of the radiator, including the fins. You can use a garden hose for this, but be careful not to use too much pressure, as it may damage the fins.
Step 4: Use a towel or a cloth to dry off the radiator. Make sure to remove any excess water and finish off by gently wiping the radiator to give it a clean and polished look.
Step 5: Once the radiator is dry, turn on your heating system to check if it’s working properly. If you notice any leaks or issues, it’s best to contact a professional to get them fixed.
In conclusion, cleaning a radiator is a simple and easy task that can be done with a few basic steps. By keeping your radiator clean, you can improve its efficiency, reduce your energy bills, and ensure a healthier and more comfortable living environment in your home. So, don’t wait for your radiator to get too dirty – start cleaning it today and enjoy the benefits!
- Radiator Preparation
- 1. Turn off the heating
- 2. Remove any obstacles
- 3. Vacuum or sweep the floor
- 4. Protect yourself
- 5. Prepare the cleaning solution
- 6. Spray and wipe
- 7. Remove stubborn dirt
- 8. Clean the exterior
- 9. Wait for the radiator to dry
- Radiator Drainage
- Radiator Cleaning Process
- Step 1: Turn off the Heating
- Step 2: Access the Radiator
- Step 3: Remove the Dust and Debris
- Step 4: Spray the Cleaner
- Step 5: Scrub the Radiator
- Step 6: Rinse the Radiator
- Step 7: Dry the Radiator
- Step 8: Finish and Reassemble
- Radiator Brush – Is this the Solution?
- 1. Why Use a Radiator Brush?
- 2. How to Use a Radiator Brush
- 3. Benefits and Drawbacks of Using a Radiator Brush
- 4. Conclusion
- Radiator Reinstallation
- Step 1: Position the Radiator
- Step 2: Reconnect Pipes and Valves
- Step 3: Bleed the Radiator
- Step 4: Test the Radiator
- Step 5: Clean Up
- Step 6: Conclusion
- Videos:
- How to do complete coolant flush/How to use prestone radiator flush and cleaner/flush Muddy coolant
Radiator Preparation
When the weather starts getting warmer, it’s the perfect time to give your radiators a good cleaning. Cleaning your radiators can increase their efficiency and help you save on energy bills. Here’s a step-by-step guide on how to clean your radiator properly:
1. Turn off the heating
Before you start cleaning your radiator, make sure that the heating system is turned off. This will prevent any hot water or steam from coming out and burning you during the cleaning process.
2. Remove any obstacles
Clear the area around the radiator by removing any furniture, rugs, or curtains that may be blocking the access to it. This will make it easier for you to clean the radiator and prevent any damage to your belongings.
3. Vacuum or sweep the floor
Before you begin cleaning the radiator, it’s a good idea to vacuum or sweep the floor underneath to remove any dust or debris that might have accumulated. This will ensure that the area is clean and prevent any dirt from getting into the radiator during the cleaning process.
4. Protect yourself
It’s important to protect yourself while cleaning the radiator, especially if you have any allergies or sensitivities. Consider wearing gloves, a face mask, and goggles to avoid any contact with allergens or harmful substances that may be present in the radiator.
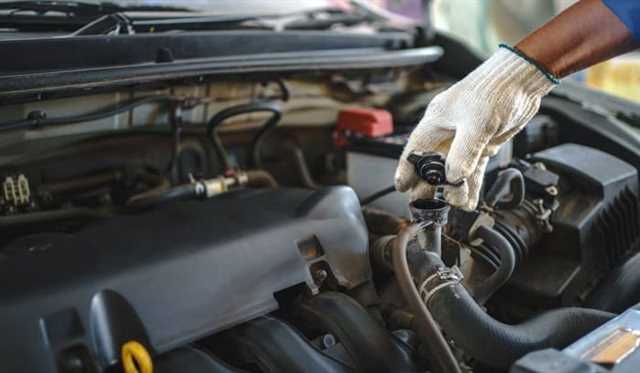
5. Prepare the cleaning solution
To clean your radiator, you can either use a commercial radiator cleaner or make your own cleaning solution using a mixture of water and mild detergent. Mix the solution in a spray bottle for easy application.
6. Spray and wipe
Spray the cleaning solution on the radiator’s surface and allow it to sit for a few minutes to loosen any dirt or grime. Then, use a soft cloth or towel to wipe the radiator from top to bottom. Pay special attention to the fins and crevices where dust and build-up can accumulate.
7. Remove stubborn dirt
If there are any stubborn stains or dirt on the radiator, you can use a soft brush or toothbrush to gently scrub the affected areas. Be careful not to apply too much pressure or use abrasive materials that could damage the radiator’s surface.
8. Clean the exterior
Don’t forget to clean the exterior of the radiator as well. Wipe down any visible dust or dirt on the grille or exterior surface using a damp cloth or sponge.
9. Wait for the radiator to dry
After you have finished cleaning the radiator, allow it to air dry completely before turning on the heating system. This will prevent any water or moisture from damaging the radiator or causing rust.
In conclusion, cleaning your radiator is a simple task that can greatly improve your heating efficiency and help you save on energy bills. By following this step-by-step guide, you can ensure that your radiator is clean and ready to keep your home warm and comfortable.
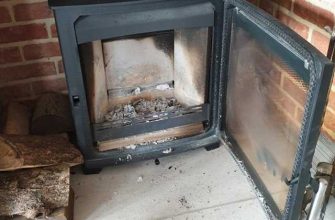
Radiator Drainage
Draining the radiator is an essential step in the cleaning process, as it allows for easier access to the interior of the radiator and ensures a thorough cleaning. Follow these steps to properly drain a radiator:
- Turn off the heating system in your home to allow the radiator to cool down. This is important for your safety and to avoid any potential burns.
- Locate the radiator’s drain valve. In many homes, this valve can be found near the bottom of the radiator, often on one side.
- Place a towel or a container below the drain valve to catch any water that may spill onto the floor.
- Use a wrench or pliers to carefully turn the drain valve counterclockwise, allowing the water to flow out of the radiator. Be sure to have a bucket or a container nearby to collect the water.
- Wait for the radiator to completely drain. This may take some time depending on the size of the radiator and the amount of water present.
- Once the radiator is completely drained, close the drain valve by turning it clockwise.
Draining the radiator not only allows for a more effective cleaning process but also helps to remove any built-up sediment or debris that may have accumulated over time. It is an essential part of maintaining a clean and efficient radiator.
Radiator Cleaning Process
Cleaning your radiator is an important task to maintain its efficiency and prevent any potential problems. Here, we will guide you step-by-step on how to clean a radiator properly.
Step 1: Turn off the Heating
Before starting the cleaning process, make sure to turn off the heating system in your home. This will help prevent any accidents and injuries during the cleaning.
Step 2: Access the Radiator
Locate the radiator in your home. In most cases, radiators are located against a wall or under a window. Move any furniture or obstacles that may block your access to the radiator.
Step 3: Remove the Dust and Debris
Use a vacuum cleaner or a soft brush to remove any dust and debris from the surface of the radiator. Be gentle to avoid damaging the delicate fins of the radiator.
Step 4: Spray the Cleaner
Using a radiator cleaner, spray the cleaner onto the radiator fins. Make sure to cover the entire surface of the radiator. Let the cleaner sit for a few minutes to allow it to break down any dirt or build-up.
Step 5: Scrub the Radiator
Take a soft brush or a towel and gently scrub the radiator fins to remove any dirt or grime. Be thorough in your scrubbing to ensure a clean and efficient radiator.
Step 6: Rinse the Radiator
Use a hose or a bucket of water to rinse off the radiator. Make sure to remove all the cleaner residue and any remaining dirt. Pay extra attention to the top and bottom parts of the radiator.
Step 7: Dry the Radiator
Once the radiator is rinsed, use a towel or let it air dry. Make sure the radiator is completely dry before turning on the heating system again.
Step 8: Finish and Reassemble
After the radiator is dry, reassemble any parts that were removed during the cleaning process. Make sure everything is properly attached and secured.
In conclusion, cleaning your radiator is an easy task that can help improve the efficiency of your heating system and reduce energy bills. By following these simple steps, you can keep your radiator clean and avoid any clogged fins or build-up. Remember to clean your radiator regularly to maintain its performance and prolong its lifespan.
Radiator Brush – Is this the Solution?
When it comes to cleaning radiators, there are a few different methods you can try. One popular option is to use a radiator brush. But is this the solution you’ve been looking for?
Using a radiator brush can be a quick and efficient way to clean your radiators. With the right equipment, you can remove dirt, dust, and debris that can build up over time. Plus, it can help improve the efficiency of your heating system, which can save you money on your energy bills.
1. Why Use a Radiator Brush?
Radiators can get dirty, especially if they are located near a garden or if you have pets in your home. Dust and debris can collect on the fins of the radiator, reducing its efficiency. A radiator brush can help you reach those hard-to-access areas and remove the dirt and dust.
2. How to Use a Radiator Brush
- Turn off your central heating system and wait for the radiator to cool down.
- Use a vacuum cleaner or a damp towel to remove any loose dirt or dust from the surface of the radiator.
- Insert the radiator brush between the fins and gently scrub to remove any stubborn dirt.
- If there’s a lot of built-up dirt, you may consider using a radiator cleaner spray to help loosen and remove it.
- Once the radiator is clean, use a damp towel to wipe off any remaining dirt or cleaner.
- Turn your central heating system back on and wait for the radiator to heat up. Check that all the fins are cool to the touch, indicating that the radiator is working efficiently.
3. Benefits and Drawbacks of Using a Radiator Brush
Using a radiator brush has its benefits and drawbacks. On the positive side, it is a simple and time-efficient method for cleaning your radiators. It can remove dirt and dust that other methods may not reach. Plus, it can help increase the efficiency of your heating system.
However, there are some drawbacks to consider. A radiator brush may not be suitable for heavily soiled radiators or radiators with deep-set dirt. In these cases, you may need to consider alternative cleaning methods or seek professional help. Additionally, there is a risk of damaging the fins of the radiator if too much force is applied when using the brush.
4. Conclusion
A radiator brush can be a useful tool for cleaning your radiators, especially for light to moderate dirt and dust buildup. However, it may not be the solution for all types of radiator cleaning. Depending on the level of dirt and the condition of your radiators, you may need to explore other cleaning methods. It’s important to weigh the pros and cons and choose the method that best suits your needs.
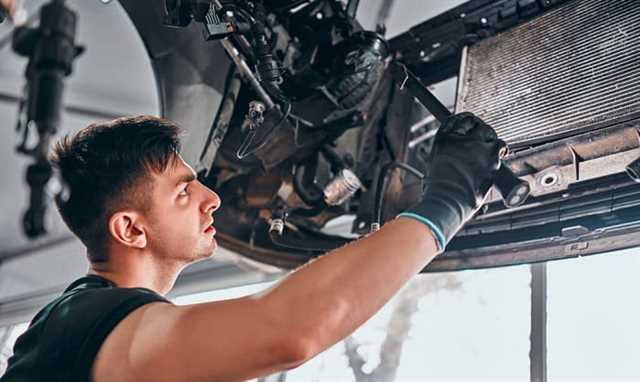
Radiator Reinstallation
Once you have removed, cleaned, and dried the radiator fins, it’s time to reinstall the radiator back into your heating system. Follow these steps to ensure a smooth and efficient reinstallation process:
Step 1: Position the Radiator
Place the radiator in its original position or any other desired location in your home. Make sure it is securely placed and level to avoid any potential issues.
Step 2: Reconnect Pipes and Valves
Carefully reconnect the pipes and valves to the radiator, ensuring a tight and leak-free connection. Use a wrench or spanner to tighten the fittings if necessary.
Step 3: Bleed the Radiator
To remove any trapped air from the system and ensure efficient heating, bleed the radiator. Use a radiator key or a flathead screwdriver to open the bleed valve on the radiator, and let the air escape until water starts to flow steadily. Close the valve once the air is removed.
Step 4: Test the Radiator
Turn on the heating system and wait for the radiator to warm up. Check for any leaks or unusual noises. If everything seems to be working fine, move on to the next step.
Step 5: Clean Up
Clean up any leftover debris or dust from the floor or surrounding area. Use a vacuum cleaner or a broom to ensure the area is tidy and free of any potential hazards.
Step 6: Conclusion
Congratulations! You have successfully reinstalled your radiator. Regular cleaning and maintenance will help keep your radiator functioning efficiently, saving you money on energy bills and ensuring a warmer and healthier home. Thank you for using our step-by-step guide on how to clean a radiator properly.