
Keeping your Shark vacuum clean and well-maintained is essential to make sure it stays in optimal working condition. As an owner, regular maintenance is the key to extending the life of your vacuum and ensuring its maximum efficiency. Whether you consider yourself a cleaning pro or a bit of a cheapskate, insuring that you’re properly maintaining your Shark vacuum is crucial.
One of the most important steps to consider when cleaning your Shark vacuum is to make sure you’ve cleaned the inner and outer parts of the vacuum thoroughly. Dust, debris, and pet hair can accumulate in various parts of the vacuum, including the brushroll, filter, and dust cup. Regular cleaning of these components will help to avoid malfunctions and ensure efficient suction.
Another essential step in maintaining your Shark vacuum is checking the brushroll regularly. Over time, the bristles can become worn or tangled with hair, reducing the vacuum’s cleaning power. By removing any hair or debris from the brushroll, you can keep your vacuum at its best performance. Some newer models even have an easy-access brushroll feature, making the cleaning process even more convenient.
In addition to cleaning the brushroll, it’s important to regularly check and clean the filters of your Shark vacuum. The filters are responsible for trapping dust and allergens, ensuring that the air released from the vacuum is clean. Cleaning or replacing the filters when needed is crucial for both the vacuum’s performance and the air quality in your home.
When it comes to cleaning the dust cup of your Shark vacuum, it’s best to empty it after each use. This will prevent the dust cup from reaching its maximum capacity and reduce the chances of any dust or debris falling back into the vacuum. Additionally, wiping down the exterior of the vacuum with a damp cloth will help to remove any dirt or stains, further keeping your vacuum in excellent condition.
In conclusion, proper maintenance of your Shark vacuum is essential for optimal performance and longevity. By following these step-by-step cleaning instructions, you can keep your vacuum in top shape and avoid unnecessary malfunctions. Regularly cleaning the brushroll, filters, and dust cup, as well as checking for any needed replacements, will ensure your Shark vacuum continues to provide you with peace of mind and clean flooring.
- Step-by-Step Guide on Cleaning a Shark Vacuum
- Step 1: Emptying the Dust Cup
- Step 2: Cleaning the Filters
- Step 3: Brush Roll Maintenance
- Step 4: Checking the Hose and Attachments
- Step 5: Wiping Down the Vacuum
- Importance of Regular Maintenance
- Ask Me Anything
- 1. How do I clean my Shark vacuum?
- 2. How often should I deep-clean my Shark vacuum?
- 3. What should I do if there are blockages in my Shark vacuum?
- 4. How do I remove odors from my Shark vacuum?
- 5. Can I use other cleaning products with my Shark vacuum?
- 6. How often should I check the filter in my Shark vacuum?
- 7. What should I do if my Shark vacuum is not working properly?
- Best Cookbooks for Kitchen Newbies
- 1. “The Joy of Cooking” by Irma S. Rombauer
- 2. “Salt, Fat, Acid, Heat” by Samin Nosrat
- 3. “The Complete Vegetarian Cookbook” by America’s Test Kitchen
- 4. “How to Cook Everything” by Mark Bittman
- 5. “The Smitten Kitchen Cookbook” by Deb Perelman
- 6. “Cooking for Geeks” by Jeff Potter
- Insuring Fine Jewelry
- 1. Assess the value of your jewelry
- 2. Check your homeowner’s or renter’s insurance policy
- 3. Consider separate jewelry insurance
- 4. Keep detailed records
- 5. Take preventive measures
- 6. Update your policy regularly
- 7. Understand the terms and conditions
- 8. Work with reputable insurers
- 9. Use appraisals for jewelry purchases
- 10. Keep insurance certificates safe
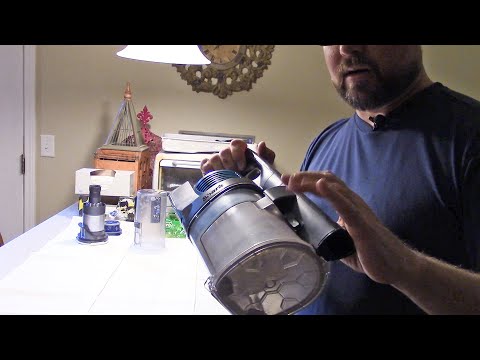
- Video:
- Shark Rocket Pro – How To Empty And Clean The Dust Container
Step-by-Step Guide on Cleaning a Shark Vacuum
Regular maintenance and cleaning of your Shark vacuum is crucial to keep it in optimal working condition. A clean vacuum not only ensures efficient suction but also extends the lifespan of the machine. Follow these steps to properly clean and maintain your Shark vacuum:
Step 1: Emptying the Dust Cup
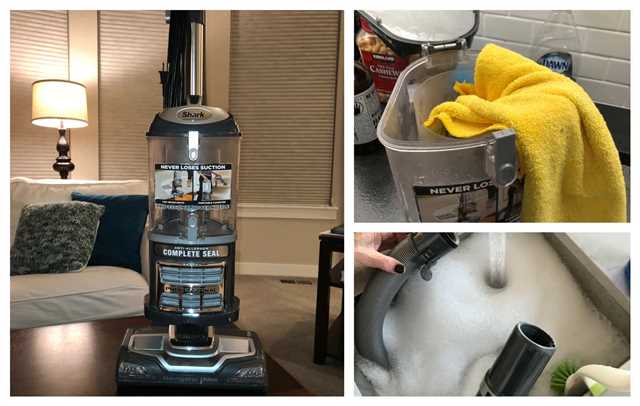
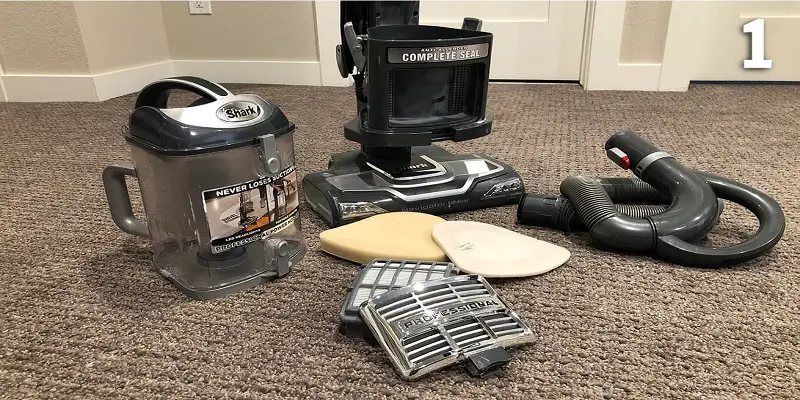
The first step in cleaning your Shark vacuum is to empty the dust cup. Lift away the dust cup from the vacuum body and locate the release latch. Push the latch and separate the cup from the rest of the vacuum. Empty the contents of the dust cup into a trash bag or bin. If necessary, clean the cup with mild soap and water and let it dry completely before reattaching.
Step 2: Cleaning the Filters
Shark vacuums typically have two filters: a pre-motor foam filter and a post-motor HEPA filter. Remove both filters from the vacuum, following the manufacturer’s recommendation. Rinse the foam filter with warm water until it runs clear, then squeeze out the excess water and let it air dry. For the HEPA filter, tap it gently to remove any loose dirt, or use a soft brush to clean it. Do not wash the HEPA filter, as it is not washable. Depending on your vacuum model, it may be a good idea to clean or replace these filters every 3 to 6 months.
Step 3: Brush Roll Maintenance
Next, you’ll want to check the brush roll and its housing for any debris or tangled hair. Lift the vacuum head and locate the brush roll underneath. Using a pair of scissors or your fingers, carefully remove any hair or thread wrapped around the brush roll. Clean the brush roll housing as well, as dirt can accumulate in these areas. Taking care of the brush roll will ensure optimal cleaning performance and prevent any damage to the vacuum.
Step 4: Checking the Hose and Attachments
Inspect the vacuum hose and attachments for any blockages or clogs. If there are any visible obstructions, gently remove them using a cleaning tool or a long, flexible brush. Pay special attention to areas such as the hose end, where it connects to the vacuum, and any crevices or narrow parts of the attachments.
Step 5: Wiping Down the Vacuum
After cleaning all the internal parts, give the exterior of the vacuum a wipe-down. Use a damp cloth or sponge to clean the housing and other surfaces. If there are any stubborn stains, you can use a mild detergent or cleaner. Avoid getting excessive moisture on the vacuum, especially if it has electronic components. Once you’re done cleaning, let the vacuum dry completely before using it again.
By following these simple steps and regularly maintaining your Shark vacuum, you can enjoy optimal cleaning performance and prolong its lifespan. Remember to consult your user manual for any specific recommendations or guidelines applicable to your model.
Importance of Regular Maintenance
Maintaining your Shark vacuum is crucial to ensure its proper functionality and longevity. Regular maintenance helps to prevent malfunctions and keep your vacuum working at its best. Here are some reasons why regular maintenance is important:
- Effective Cleaning: Regular maintenance ensures that your vacuum can effectively clean your floors. By keeping the machine clean and free from any blockages, it can efficiently pick up dirt and debris.
- Longer Lifespan: Just like any other appliance, regular maintenance can extend the lifespan of your Shark vacuum. Proper cleaning and care can prevent wear and tear on the parts, keeping the machine running smoothly for longer.
- Improved Air Quality: A well-maintained vacuum with a clean HEPA filter can help improve the air quality in your home. The HEPA filter traps allergens and dust, preventing them from being released back into the air.
- Cost Savings: Regular maintenance can save you money in the long run. By taking care of your vacuum and addressing any issues early on, you can avoid costly repairs or the need to purchase a new vacuum.
- Easy to Use: A well-maintained vacuum is easier to use. When the parts are clean and in good condition, the vacuum will glide smoothly across your floors and make your cleaning tasks much easier.
Follow the manufacturer’s recommendations for maintenance, which include emptying the dust cup, cleaning the filters, and checking for any signs of wear or malfunctions. Additionally, here are some general guidelines for maintenance:
- Frequent Emptying: Empty the dust cup after each use or when it is full. This prevents the vacuum from losing suction power and allows it to continue picking up dirt effectively.
- Regular Cleaning: Clean the filters and brush roller regularly to remove any trapped dirt or debris. This will ensure that the vacuum works optimally and prevents any blockage.
- Inspect Parts: Check all the parts of the vacuum, including the brush roller and powered rotating tool, for any signs of damage or wear. Replace any worn-out parts to maintain the vacuum’s performance.
In conclusion, regular maintenance is essential for keeping your Shark vacuum in excellent working condition. By following the recommended maintenance steps and taking care of your vacuum, you can ensure its longevity, efficiency, and effectiveness in cleaning your home.
Ask Me Anything
Welcome to the “Ask Me Anything” section of this article! If you have any questions, concerns, or need any assistance related to cleaning and maintaining your Shark vacuum, feel free to ask. I’m here to help!
1. How do I clean my Shark vacuum?
To clean your Shark vacuum, start by unplugging it from the electrical outlet to ensure safety. Remove the dust cup and empty it. If the dust cup is dirty, you can rinse it with water and let it air dry completely before reattaching it. Use a damp cloth to wipe down the exterior of the vacuum body to remove any dirt or particles.
2. How often should I deep-clean my Shark vacuum?
It’s recommended to deep-clean your Shark vacuum every 3-6 months, depending on usage. This will help remove any build-up or blockages that may affect its performance.
3. What should I do if there are blockages in my Shark vacuum?
If you notice any blockages in your Shark vacuum, first, make sure it is unplugged. Use a cotton swab or a small brush to remove any debris or obstructions from the brush roll or hose. Regularly checking for blockages will ensure successful vacuuming.
4. How do I remove odors from my Shark vacuum?
If your Shark vacuum has developed an odor, you can try a few methods to eliminate it. First, check the filter and clean or replace it if necessary. You can also sprinkle a small amount of baking soda on the carpets or on the floor before vacuuming to neutralize any odors. Additionally, cleaning the brush roll and other removable parts regularly can help prevent mildew or odor build-ups.
5. Can I use other cleaning products with my Shark vacuum?
It’s best to follow the manufacturer’s instructions and use only the recommended cleaning products for your Shark vacuum. Using other products may cause damage or affect its performance. Always refer to the owner’s manual for specific instructions.
6. How often should I check the filter in my Shark vacuum?
The filter in your Shark vacuum should be checked regularly, at least once a month or whenever you notice a decrease in suction power. Cleaning or replacing the filter as needed will help maintain optimal performance.
7. What should I do if my Shark vacuum is not working properly?
If you are experiencing any issues with your Shark vacuum, refer to the owner’s manual for troubleshooting tips. If the problem persists, you may need to contact customer service for further assistance or take it to an authorized repair center.
I hope this FAQ section answers some of your questions! Feel free to ask anything else that comes to mind, and I’ll do my best to assist you.
Best Cookbooks for Kitchen Newbies
1. “The Joy of Cooking” by Irma S. Rombauer
This classic cookbook is a must-have for any kitchen newbie. With over 4,000 recipes and step-by-step instructions, it’s the perfect guide for those who are just starting their culinary journey. From basic techniques to more complex dishes, this book covers it all.
2. “Salt, Fat, Acid, Heat” by Samin Nosrat
If you’re looking to understand the fundamentals of cooking, this book is for you. Samin Nosrat breaks down the four elements that make food taste delicious: salt, fat, acid, and heat. With beautiful illustrations and easy-to-follow explanations, this cookbook will help you develop your cooking skills and create flavorful meals.
3. “The Complete Vegetarian Cookbook” by America’s Test Kitchen
If you’re a newbie in the kitchen who wants to explore vegetarian cooking, this cookbook is a valuable resource. It offers a wide range of delicious and nutritious vegetarian recipes, along with step-by-step instructions and helpful tips. Whether you’re a vegetarian or simply looking to incorporate more plant-based meals into your diet, this book has you covered.
4. “How to Cook Everything” by Mark Bittman
As the title suggests, this cookbook covers just about everything. Mark Bittman provides clear instructions and practical advice for cooking a variety of dishes, from everyday meals to special occasions. With over 2,000 recipes and variations, this comprehensive guide will help you become a confident cook in no time.
5. “The Smitten Kitchen Cookbook” by Deb Perelman
If you’re a fan of beautiful food photography and crave delicious recipes, this cookbook is a must-have. Deb Perelman shares her favorite recipes along with stories and tips that will inspire you to get creative in the kitchen. From brunch ideas to dinner party menus, this book has something for everyone.
6. “Cooking for Geeks” by Jeff Potter
Calling all science lovers! This cookbook is perfect for those who want to understand the “why” behind cooking. Jeff Potter explores the science and techniques behind popular dishes, making cooking an exciting and educational experience. With recipes and experiments, this book will take your culinary skills to the next level.
Whether you’re a kitchen newbie or a seasoned home cook, these cookbooks will help you expand your culinary repertoire and discover the joy of cooking. So grab a pen, join the cooking adventure, and start creating delicious dishes.
Insuring Fine Jewelry
When it comes to fine jewelry, insuring your valuable pieces is essential. Fine jewelry can be expensive and sentimental, making it important to protect against loss or damage. Here are some steps to help ensure you have the right insurance coverage for your jewelry:
1. Assess the value of your jewelry
Before insuring your fine jewelry, it’s essential to determine its value. Take your jewelry to a professional appraiser who can provide an accurate assessment. This appraisal will help you determine the appropriate coverage amount.
2. Check your homeowner’s or renter’s insurance policy
Review your existing homeowner’s or renter’s insurance policy to see if it covers jewelry. Some policies may have limited coverage for jewelry, and additional coverage may be necessary.
3. Consider separate jewelry insurance
For more comprehensive coverage, consider purchasing a separate jewelry insurance policy. These policies often provide coverage for a wider range of perils, including loss, theft, and accidental damage.
4. Keep detailed records
Keep detailed records of your jewelry, including receipts, appraisals, and photographs. These records will help facilitate the claims process in the event of a loss.
5. Take preventive measures
To minimize the risk of loss or damage, take preventive measures. Store your jewelry in a secure location when not in use and consider keeping it in a safe deposit box when traveling. Regularly clean and inspect your jewelry for any signs of damage.
6. Update your policy regularly
Review your jewelry insurance policy regularly to ensure it reflects the current value of your jewelry. If you acquire new pieces or the value of your jewelry increases, notify your insurance company to update your coverage accordingly.
7. Understand the terms and conditions
Read and understand the terms and conditions of your jewelry insurance policy. Pay close attention to any exclusions or limitations that may affect your coverage.
8. Work with reputable insurers
Choose an insurance provider with a reputation for excellent customer service and timely claims processing. Research different insurers and read reviews to make an informed decision.
9. Use appraisals for jewelry purchases
Obtain appraisals for new jewelry purchases. This will establish the value of the items and provide documentation for insurance purposes.
10. Keep insurance certificates safe
Keep copies of your insurance certificates in a safe and secure location, separate from your jewelry. In the event of a loss, these certificates will be necessary to file a claim.
By following these steps and insuring your fine jewelry, you can have peace of mind knowing that your valuable pieces are protected.