
If you own a house with an external brick wall, you’re probably familiar with the challenges of keeping it clean and well-maintained. Over time, bricks can become dirty, stained, and even damaged. Restoring and cleaning brick surfaces is a necessary task to preserve their beauty and protect the integrity of your walls.
In this step-by-step guide, we will discuss the most effective techniques for restoring and cleaning your exterior brick walls. Whether you want to remove mold, moss, or any other unsightly stains, the tips and methods discussed here will help you achieve a clean and beautiful brick wall.
The first thing you’ll need to do is to thoroughly clean the bricks. You can use a warm water and detergent solution for this purpose. Scrub the bricks using a stiff brush, paying special attention to any areas with heavy staining or fungal growth. After scrubbing, rinse the bricks with clean water and let them dry.
Once the bricks are cleaned and dried, you can proceed with the restoration process. If your bricks show signs of efflorescence (a white powdery substance on the surface), you’ll need to remove it before applying any new products. Use a mild acid, like vinegar or lemon juice, mixed with water to dissolve the efflorescence. Scrub the affected areas gently, then rinse thoroughly.
After restoring the bricks, you can apply a protective product to enhance their durability and resistance to staining. There are several types of brick sealants available, so choose the one that best suits your needs. Follow the instructions on the product for the best results.
In conclusion, cleaning and restoring your exterior brick walls can be a labor-intensive task, but the results are well worth it. By following the steps outlined in this guide, you can protect your bricks from further damage and keep them looking beautiful for years to come.
- Assessing the Condition of the Bricks
- Preparing the Bricks for Restoration
- Step 1: Inspect and Assess
- Step 2: Gather Your Materials
- Step 3: Remove Loose Grime and Mortar
- Step 4: Wet the Brick Surfaces
- Step 5: Apply Cleaning Solution
- Step 6: Scrub and Power Wash
- Step 7: Rinse and Dry
- Step 8: Repair and Replace
- Step 9: Protect and Improve
- Step 10: Enjoy the Results
- Cleaning and Restoring the Bricks
- Basic Cleaning Tips
- Filling and Repairing Tips
- Cleaning the Bricks
- A Step-By-Step Guide To Protecting Bricks
- Step 1: Assess the Condition of the Bricks
- Step 2: Prepare the Surroundings
- Step 3: Clean the Bricks
- Step 4: Treat the Bricks
- Step 5: Seal the Bricks
- Step 6: Maintain Regular Cleaning
- Step 7: Seek Professional Help if Needed
- Understanding the Importance of Brick Protection
- 1. Preserve the Structural Integrity
- 2. Enhance Brick’s Appearance
- 3. Prevent Fungal Growth
- 4. Resist Stains and Discoloration
- 5. Save Time and Energy on Cleaning
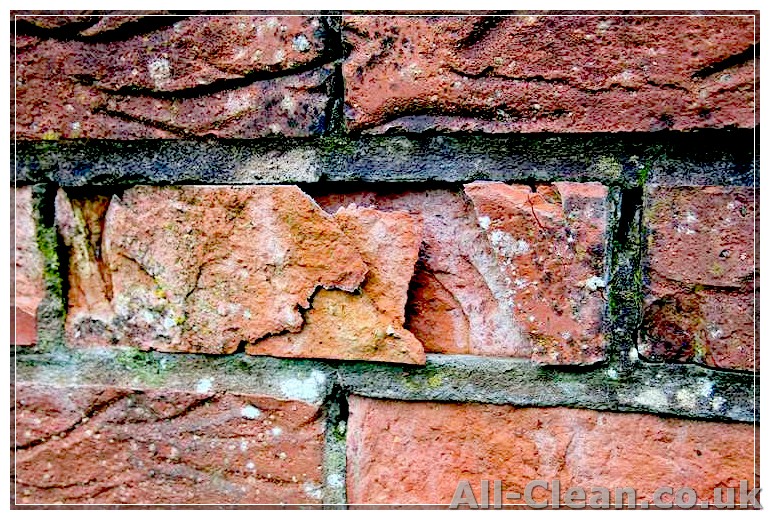
Assessing the Condition of the Bricks
Before embarking on a restoration and cleaning project for your brick walls, it is important to assess the condition of the bricks. This will help determine the extent of the work that needs to be done and the appropriate treatments to be applied.
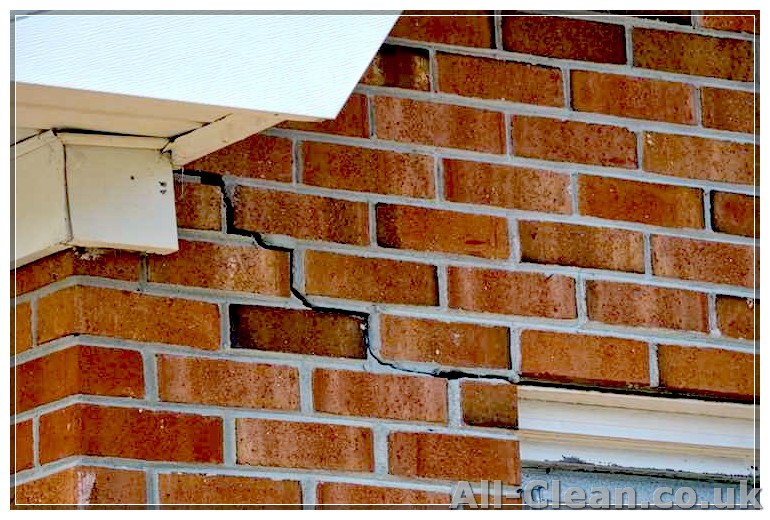
Start by visually inspecting the bricks. Look for any signs of damage or deterioration, such as cracks, chips, or crumbling. These issues may indicate underlying structural problems that need to be addressed by a professional.
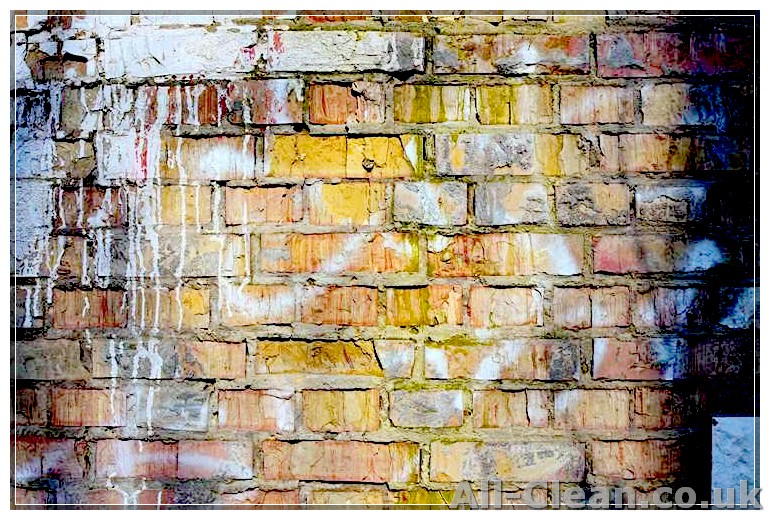
Next, check for any signs of discoloration or staining on the surface of the bricks. This could be caused by weathering, pollution, or the growth of algae and moss. Depending on the severity of the discoloration, different treatments may be required to restore the bricks to their original color and appearance.
It is also important to examine the condition of the mortar between the bricks. Cracked or deteriorated mortar can weaken the structural integrity of the walls. If needed, mortar repairs or repointing should be done before proceeding with the brick restoration and cleaning process.
In addition to visual inspection, you can perform a water absorption test to assess the porosity of the bricks. Pour a small amount of water on the surface of the bricks and observe how quickly it is absorbed. Bricks that absorb water more slowly are generally in better condition and provide better protection against moisture.
Another test that can be done is the salt movement test. Mix a paste of salt and water and apply it to the surface of the bricks. After a few hours, check for any signs of salt crystals forming on the bricks. Salt crystals indicate water penetration and can be detrimental to the bricks’ long-term durability. If salt movement is detected, proper measures must be taken to address the issue before proceeding with restoration.
Once you have assessed the condition of the bricks and determined the necessary repairs and treatments, you are ready to move forward with the restoration and cleaning process. Remember to follow recommended guidelines and seek professional advice if needed to ensure the best results and preserve the value and beauty of your brickwork.
Preparing the Bricks for Restoration
Before you begin the process of restoring and cleaning the bricks outside, there are a few key steps to take to properly prepare the bricks. Follow this step-by-step guide to ensure the best results for your brick restoration project.
Step 1: Inspect and Assess
Start by thoroughly inspecting the brick wall or surface you want to restore. Look for any cracks, loose mortar, or other signs of damage. Take note of areas that require repair before proceeding with the restoration process.
Step 2: Gather Your Materials
Make sure you have all the necessary materials and tools for the restoration process. This includes protective eyewear, a wire brush, a scraper, mortar mix, a paste of water and vinegar or a cleaning solution, and a power washer if available.
Step 3: Remove Loose Grime and Mortar
- Using a wire brush, gently scrub away any loose grime or dirt from the brick surfaces.
- For areas with loose or deteriorated mortar, carefully remove the old mortar using a scraper or chisel.
Step 4: Wet the Brick Surfaces
Pour water over the brick surfaces to wet them thoroughly. This helps in dissolving the grime and makes the cleaning process more effective.
Step 5: Apply Cleaning Solution
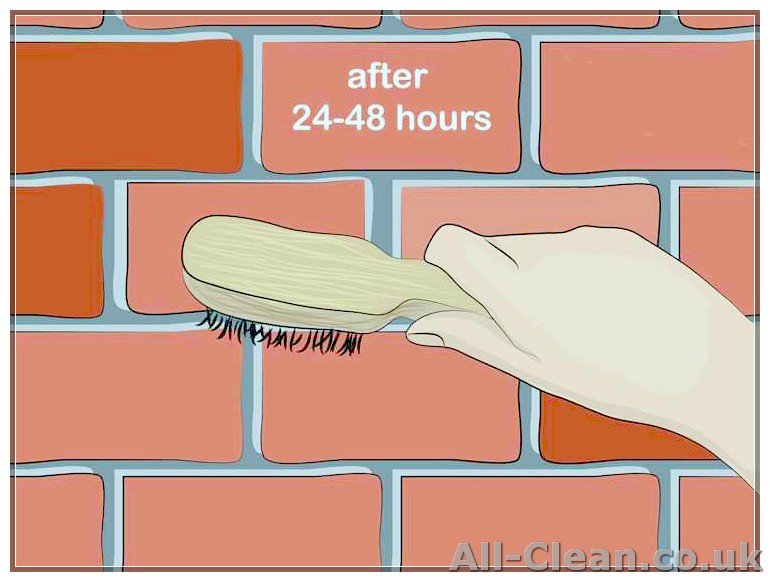
If you’re using a cleaning solution, mix it according to the manufacturer’s instructions. Apply the solution to the wet brick surfaces using a brush or sprayer. Allow the solution to sit for the recommended amount of time.
Step 6: Scrub and Power Wash
- Using a wire brush or scrub brush, scrub the brick surfaces to remove any remaining grime or dirt.
- If you have a power washer, you can use it to further clean the brick surfaces. Be sure to follow the manufacturer’s instructions and adjust the pressure settings accordingly.
Step 7: Rinse and Dry
Pour water over the brick surfaces to rinse away the cleaning solution and any remaining dirt. Allow the bricks to air dry completely before proceeding to the next step.
Step 8: Repair and Replace
Now that the bricks are clean, it’s the perfect time to repair any cracks or damaged areas. Use mortar mix to fill in any gaps or replace any bricks that are beyond repair. Follow a proper guide or seek professional help if needed.
Step 9: Protect and Improve
To further protect the restored brick surfaces, consider applying a solvent-based sealer or a water repellent. These coatings can help improve the brick’s resistance to moisture and prevent future damage.
Step 10: Enjoy the Results
With the brick surfaces cleaned, repaired, and protected, you can now admire the results of your hard work. The restored brick wall or surface is ready to stand the test of time and enhance the beauty of your outdoor space.
By following these step-by-step tips, you can effectively restore and clean the bricks outside your home or building. With a little patience and the right tools, you’ll be able to transform your brick surfaces and bring them back to their former glory.
Cleaning and Restoring the Bricks
When it comes to cleaning and restoring bricks, there are several purposes it can serve. Whether you want to repair damaged bricks or simply clean the surfaces to make them look better, knowing how to properly clean and restore your bricks is crucial.
Basic Cleaning Tips
- Before starting the cleaning process, it is important to inspect the bricks and identify any areas that require repair.
- Clean the bricks using a high-pressure washer. Be cautious and protect your eyes when using the washer.
- Rinse the bricks thoroughly to remove any leftover detergent or residue.
- Unfortunately, high-pressure washers can be detrimental to the bricks if not used properly. They can create high levels of heat and pressure that can damage the bricks or mortar joints.
- Knowing the type of bricks you have is crucial before applying any cleaning methods or solvents. Different types of bricks may require different cleaning techniques.
- Mineral spirits can be used as a solvent for basic cleaning purposes. For tougher stains, you can try using a mixture of baking soda and water.
Filling and Repairing Tips
- If there are any damaged bricks, you will need to fill and repair them before cleaning the entire wall or surface.
- Mix a suitable mortar according to the specifications of the brick manufacturer.
- Thoroughly clean the damaged area and remove any loose debris.
- Apply the mortar mixture to the damaged area using a trowel, ensuring that it is level with the rest of the brick wall.
- Allow the mortar to set and dry completely before moving on to the cleaning process.
Cleaning the Bricks
Now that the necessary repairs have been made, it is time to clean the bricks. Here are some tips to help you achieve the best results:
- Start by spraying water around the brick walls or surfaces. This will help prevent them from absorbing too much water during the cleaning process.
- Mix a suitable detergent or cleaning solution according to the manufacturer’s instructions.
- Spray the detergent or cleaning solution onto the bricks, ensuring that every area is covered.
- Allow the detergent or cleaning solution to sit on the bricks for about 5 minutes to allow it to penetrate the surface and loosen any dirt or grime.
- Using a brush or scrubber, gently scrub the bricks in a circular motion to remove the dirt and grime.
- Rinse the bricks thoroughly with clean water to remove all traces of the detergent or cleaning solution.
Restoring and cleaning the bricks outdoors can be a little challenging, but with the right tools and knowledge, you can achieve excellent results. Just remember to take the necessary precautions, repair any damaged areas, and clean the bricks thoroughly using the appropriate techniques and solvents.
A Step-By-Step Guide To Protecting Bricks
Bricks can add a beautiful and classic look to the exterior of your home, but they can also become dirty and damaged over time. In order to protect and maintain the appearance of your bricks, it’s important to follow a step-by-step guide for cleaning and restoration. Here’s how:
Step 1: Assess the Condition of the Bricks
The first step in protecting your bricks is to assess their condition. Look for any signs of grime, holes, or damage, and determine whether the bricks have been painted or treated with any protective coatings.
Step 2: Prepare the Surroundings
Before starting any cleaning or restoration work, it’s important to prepare the surroundings. Cover any plants or delicate surfaces nearby to avoid any detrimental effects from cleaning products or pressure washing.
Step 3: Clean the Bricks
- Mix a solution of water and a brick cleaner recommended for external use in the UK. It’s highly recommended to follow manufacturer’s instructions.
- With a brush or a sponge, apply the cleaning solution to the bricks, working in small sections.
- Scrub the bricks in a circular motion to effectively remove dirt, grime, and mold.
- Rinse the bricks with clean water, either using a hose or a pressure washer set to a low pressure level.
- If needed, repeat the cleaning process for stubborn stains or heavily soiled areas.
Step 4: Treat the Bricks
If you notice any mold or mildew on the bricks, it’s important to treat them to prevent future growth. Apply a mold and mildew killer according to the manufacturer’s instructions, ensuring that the product is suitable for use on bricks.
Step 5: Seal the Bricks
To provide extra protection to your bricks, consider applying a brick sealer. This will help improve resistance to water, stains, and other elements.
Step 6: Maintain Regular Cleaning
To keep your bricks in the best condition possible, it’s important to regularly clean and maintain them. Sweep away any dirt or debris, and use a mild soapy solution and a soft brush to clean any visible dirt or stains.
Step 7: Seek Professional Help if Needed
If you’re unsure about any step of the brick protection process or if you notice significant damage, it may be best to seek professional help. A brick restoration expert can provide advice and guidance to effectively restore and protect your bricks.
By following this step-by-step guide, you can effectively protect and maintain the appearance of your bricks, ensuring that they remain beautiful and durable for years to come.
Understanding the Importance of Brick Protection
When restoring and cleaning bricks outside, it is crucial to understand the importance of brick protection. Without proper protection, the bricks can deteriorate over time and lose their original beauty and strength. Here are some key considerations to keep in mind:
1. Preserve the Structural Integrity
Brickwork can be affected by various external elements such as moisture, pollutants, and chemicals. If these elements are not effectively protected against, they can penetrate the bricks and cause damage, leading to weakened structures. Applying a protective layer will help prevent these elements from seeping into the bricks and ensure their long-term structural integrity.
2. Enhance Brick’s Appearance
Over time, bricks can become dull and discolored due to exposure to dirt, dust, and pollutants. Additionally, the mortar between the bricks can deteriorate, resulting in an unsightly appearance. Protecting the bricks can help maintain their original color and prevent discoloration caused by environmental factors. It will also help keep the mortar in good condition, preserving the overall aesthetics of the brickwork.
3. Prevent Fungal Growth
Brick surfaces are susceptible to fungal growth, especially in damp environments. When moisture seeps into the bricks, it creates a favorable environment for fungal spores to thrive. This can lead to the growth of unsightly green or black patches on the brickwork. Applying a protective coating can help create a barrier that hinders fungal growth, keeping the bricks free from such issues.
4. Resist Stains and Discoloration
Bricks are porous and can absorb stains easily. Common sources of stains include oil, paint, and water. By applying a protective layer, you can create a barrier that resists the absorption of these substances. This makes it easier to clean any spills or stains that may occur in the future and helps maintain the bricks’ original color and appearance.
5. Save Time and Energy on Cleaning
By providing an extra layer of protection, you can significantly reduce the frequency and effort required for cleaning. The protective coating makes it easier to remove dirt, dust, and other contaminants from the brick surface, as they won’t adhere to the bricks as strongly. This means less time spent scrubbing and more time enjoying the clean and well-maintained appearance of your exterior walls.
Overall, understanding the importance of protecting your bricks is essential for both their longevity and visual appeal. By investing in a suitable protective coating, you can ensure that your bricks remain in excellent condition for years to come.


