
When it comes to keeping your floors in tip-top shape, regular cleaning is essential. Vinyl and linoleum floors are a popular choice for homeowners due to their durability and easy maintenance. However, over time, dirt and grime can build up, causing the floor to look dull and dirty. That’s where deep-cleaning comes in!
In this article, we will guide you through the process of deep-cleaning your vinyl and linoleum floors. Whether you have a long-standing floor that needs a good cleaning or you have just installed new flooring and want to know how to maintain its shine, these easy steps will help you achieve a sparkling finish.
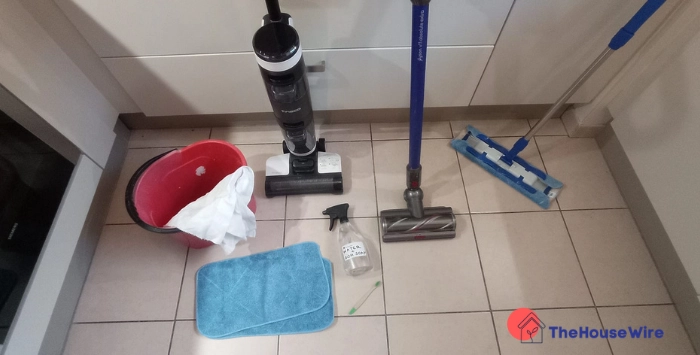
Before you begin the deep-cleaning process, it’s important to gather all the tools and materials you’ll need. Some common items include a vacuum cleaner, mop, bucket, microfiber cloth, ammonia-based cleaner, baking soda, and a soft-bristle brush. Additionally, make sure to protect your furniture and baseboards by using a blanket or sheet to avoid any damage during the cleaning process.
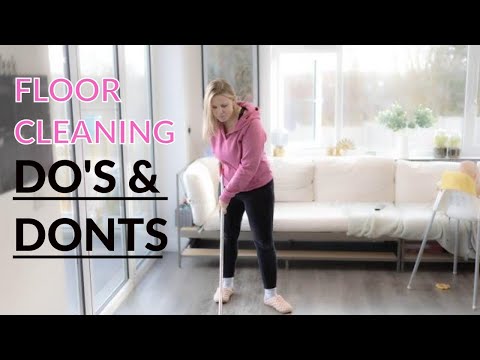
To start, begin by vacuuming the floor to remove any loose dirt and debris. This step is crucial to prevent scratching the floor during the deep-cleaning process. Once the floor is vacuumed, mix a solution of warm water and an ammonia-based cleaner. Dip your mop or cloth into the mixture and wring out any excess liquid. From there, you’ll want to mop the floor, making sure to focus on any areas that are particularly dirty.
If your flooring has stubborn stains that won’t come off with the cleaning solution, you can try using a paste made from baking soda and water. Apply the mixture to the stain and let it sit for a few minutes before scrubbing with the soft-bristle brush. Be sure to test this method in a small, inconspicuous area first to avoid any damage to the floor.
Once you’ve finished cleaning the entire floor, take a clean cloth or mop and go over it again with warm water to remove any remaining residue. This will help ensure that your floor is completely clean and free of any cleaning product residue. Finally, allow the floor to air dry or use a dry cloth to dry it thoroughly.
And there you have it! By following these simple steps, you can deep-clean your vinyl and linoleum floors and restore their natural shine without any hassle. Regular deep-cleaning is essential to maintain the beauty and longevity of your floors, and with proper care, they will continue to look as good as new for many years to come.
- Tips for Preparing Your Floors
- Gather the Right Tools
- Prevent Further Damage
- Protect Baseboards and Corners
- Follow the Steps
- Gather the Necessary Cleaning Supplies
- Here’s a list of the items you’ll need:
- Step 1: Sweep or Vacuum the Floor
- Step 2: Mix a Cleaning Solution
- Step 3: Mop the Floor with the Cleaning Solution
- Commercial Cleaners to Use on Vinyl Floors
- 1. pH-Neutral Cleaners
- 2. Ammonia-Based Cleaners
- 3. Mould and Mildew Cleaners
- 4. All-Purpose Cleaners
- 5. Microfiber Mop and Cleaner Kit
- 6. Homemade Vinyl Floor Cleaner
- Benefits of Using Commercial Cleaners
- 1. Specialized Formulas
- 2. Deep-Cleaning Power
- 3. Time-Saving
- 4. Protects and Maintains
- 5. Safe and Easy to Use
Tips for Preparing Your Floors

Before you deep-clean your vinyl or linoleum floors, it’s important to properly prepare them. Taking the time to prep your floors will ensure that they are in the best shape possible and will help you achieve a thorough clean.
Gather the Right Tools
To start, gather all the tools and items you will need for the cleaning process. Here are some common tools homeowners often use:
- Vacuum or broom: Use a vacuum or broom to remove any loose dirt and debris from the floors.
- Mop: A mop or microfiber cloth will be used to apply the cleaning solution and mop the floors.
- Bucket: You will need a bucket to mix the cleaning solution.
- Cleaning solution: Use an appropriate cleaning solution for vinyl or linoleum floors. Avoid ammonia-based cleaners, which can damage the finish.
- Blanket or furniture pads: If you need to move furniture, use a blanket or furniture pads to protect the floors from scratches and damage.
Prevent Further Damage
Before you begin the deep cleaning process, take a look around the area to identify any areas that need special attention. Look for scuffs, stains, or areas of damage that may require extra cleaning or repair. By addressing these issues beforehand, you can prevent further damage during the cleaning process.
Protect Baseboards and Corners
When cleaning your floors, it’s important to protect the baseboards and corners from excess moisture and damage. These areas are prone to collecting dirt and can be difficult to clean. Use a damp cloth to wipe them down, but be careful not to soak them or cause any water damage. If possible, cover the baseboards and corners with plastic wrap or tape to protect them.
Follow the Steps
Now that you have gathered your tools and prepared the floors, it’s time to follow the step-by-step guide for deep cleaning vinyl and linoleum floors. By following these steps and using the proper tools and cleaning solution, you can keep your floors looking their best for a long time.
Gather the Necessary Cleaning Supplies
Before you begin deep-cleaning your vinyl or linoleum floors, it’s important to gather all the necessary cleaning supplies. Having them on hand will make the cleaning process easier and more efficient.
Here’s a list of the items you’ll need:
- Vinyl or linoleum floor cleaners (commercial or homemade)
- Bucket
- Gallon of warm water
- Cleaning tools (such as a mop, brush, or sponge)
- Soft-bristle brush or scrub brush
- Felt pads or blankets
- Ammonia-based cleaners (if needed)
- Mould and mildew cleaner (if needed)
- White vinegar or baking soda (for extra cleaning power)
- Old towels or rags
- Vacuum cleaner or broom
- Microfiber or cotton mop
- Baseboards duster or soft cloth
When choosing vinyl or linoleum floor cleaners, make sure to select products that are safe for use on these types of flooring. Avoid using harsh chemicals or abrasive cleaners that can damage the finish. You can also make your own homemade floor cleaner using household items such as white vinegar, baking soda, or mild dish soap.
Having all these items ready will help you follow the step-by-step guide without any interruptions. Note that some of these supplies may vary depending on the specific needs of your flooring and the severity of dirt or stains. Always remember to read and follow the instructions on the cleaning products you use.
Step 1: Sweep or Vacuum the Floor

Before deep cleaning your vinyl or linoleum floor, it’s important to start with a clean surface. Start by sweeping or vacuuming the floor to remove any loose dirt, dust, or debris. This step is essential to prevent scratching the floor during the cleaning process.
If you have a large area to clean, using a vacuum cleaner with a soft brush attachment is the best option. The soft bristles will effectively pick up dirt and dust without causing any damage to the flooring. However, if you don’t have a vacuum cleaner, you can use a broom with soft bristles instead.
Make sure to pay extra attention to the corners and edges of the floor where dirt and dust tend to accumulate. Use a small brush or a felt-tipped dusting tool to reach these areas and remove any stubborn dirt.
If you notice any scuffs or stains on the floor, avoid using abrasive cleaners or tools that could potentially damage the surface. Instead, try using a mixture of warm water and a mild, pH-neutral cleaner specifically designed for vinyl or linoleum flooring. Always follow the instructions on the cleaner’s packaging for the best results.
Once you’ve gathered all your cleaning tools and materials, you’re ready to move on to the next step in the deep cleaning process.
Step 2: Mix a Cleaning Solution
Once you have gathered all the necessary tools, it’s time to mix a cleaning solution for your vinyl or linoleum floors. The type of solution you use will depend on the specific needs of your flooring.
If your vinyl or linoleum is heavily soiled or has stubborn stains, you may need to use a ‘deep-clean’ solution to thoroughly remove dirt and grime. In this case, you can create your own solution by mixing equal parts warm water and an ammonia-based cleaner. Be sure to read the instructions on the cleaner to ensure you’re using the correct proportions.
If your vinyl or linoleum is not heavily soiled or just needs a quick clean, an easy-to-clean solution with a pH-neutral cleaner will be sufficient. You can mix a solution by adding a few drops of mild dish soap or pH-neutral cleaner to a gallon of warm water.
It’s important to note that you should never use bleach, abrasive cleaners, or oil-based cleaners on vinyl or linoleum floors, as they can cause damage and discoloration.
Here’s a simple cleaning solution recipe you can follow:
- For ‘deep-clean’ solution:
- Equal parts warm water and ammonia-based cleaner.
- Mix thoroughly.
- For easy-to-clean solution:
- A few drops of mild dish soap or pH-neutral cleaner.
- A gallon of warm water.
- Mix thoroughly.
Having a well-mixed cleaning solution will ensure that your vinyl or linoleum floors are properly cleaned without causing any damage.
Step 3: Mop the Floor with the Cleaning Solution
Once you have prepared the cleaning solution, it’s time to mop the vinyl or linoleum floor. This step will help to remove any remaining dirt or grime and leave your floor looking clean and shiny. Follow these steps:
- Gather your tools: Grab a mop, mop bucket, and a microfiber mop pad or a sponge mop. These tools are best for deep-cleaning vinyl and linoleum floors.
- Prepare the mop bucket: Fill the mop bucket with warm water and mix in a quarter cup of a ph-neutral floor cleaner. Ensure that the cleaning product is suitable for vinyl or linoleum flooring. Read the instructions on the bottle to determine the appropriate amount of cleaner to add for the size of your space.
- Dampen the mop: Dip the mop head into the cleaning solution, allowing it to become saturated but not dripping. Wring out any excess liquid to prevent pooling on the floor.
- Mop the floor: Start mopping the floor from one end, working your way towards the other side of the room. Use smooth, even strokes and apply moderate pressure to ensure thorough cleaning. Pay attention to corners and baseboards, which may accumulate more dirt and require extra attention.
- Re-wet and wring out the mop as needed: Once the mop becomes dirty or the cleaning solution dries up, rinse it in the bucket and wring out excess water. This will prevent spreading dirt around and ensure effective cleaning.
- Continue mopping: Repeat the previous steps until you have thoroughly cleaned the entire floor. Remember to change the cleaning solution if it becomes too dirty.
If the floor has stubborn scuffs or stains that the mop doesn’t fully remove, you may need to use a gentle scrub pad or a soft-bristled brush. Scrub the area gently using the cleaning solution to avoid damaging the flooring.
After mopping, allow the floor to air dry or use a clean, dry microfiber mop pad to speed up the drying process. Ensure the floor is completely dry before allowing foot traffic on it to prevent slips and falls.
Remember, deep-cleaning vinyl and linoleum floors should be done periodically to maintain their durability and keep them looking their best. Regular sweeping, vacuuming, and quick spot cleaning are also essential for proper floor care.
Commercial Cleaners to Use on Vinyl Floors
When it comes to deep cleaning your vinyl floors, there are many commercial cleaners available that can help you achieve a sparkling clean finish. Read on to discover some of the best options for cleaning your vinyl floors.
1. pH-Neutral Cleaners
One of the most important things to consider when choosing a commercial cleaner for your vinyl floors is its pH level. Look for pH-neutral cleaners as they are gentle and safe to use on vinyl flooring. These cleaners will effectively remove dirt and grime without damaging the finish.
2. Ammonia-Based Cleaners
If your vinyl floors have developed scuffs or stains, an ammonia-based cleaner can help remove them. Be sure to dilute the cleaner as directed and test it in a small, inconspicuous area first to ensure it doesn’t cause any damage to the flooring.
3. Mould and Mildew Cleaners
If you notice any areas of mould or mildew on your vinyl floors, a mould and mildew cleaner is necessary to tackle the problem. These cleaners are specifically designed to eliminate mould and mildew and prevent them from returning. Remember to follow the instructions carefully to ensure effective and safe use of the cleaner.
4. All-Purpose Cleaners
All-purpose cleaners are a versatile option for deep cleaning vinyl floors. They can effectively remove dirt, grime, and stains without causing any damage. However, it’s important to choose an all-purpose cleaner that is safe for use on vinyl floors, as some may contain harsh chemicals that can strip off the finish.
5. Microfiber Mop and Cleaner Kit
If you prefer a more eco-friendly approach, consider using a microfiber mop and cleaner kit. These kits usually come with a specially designed mop and a cleaner that is specifically formulated for use on vinyl floors. The microfiber mop helps to effectively lift and trap dirt, while the cleaner leaves your floors looking clean and shiny.
6. Homemade Vinyl Floor Cleaner

If you prefer to make your own cleaner, you can create a homemade solution using common household items. Mix a gallon of warm water with a cup of white vinegar and a few drops of dish soap. This solution is safe for use on vinyl floors and will effectively remove dirt and grime without damaging the finish.
Remember to always follow the instructions on the commercial cleaner packaging and test the cleaner in a small, inconspicuous area before using it on the entire floor. Keep in mind that different vinyl floors may have different cleaning needs, so it’s important to choose a cleaner that is suitable for your specific flooring. With these commercial cleaners, you can keep your vinyl floors looking new and prevent any damage or dullness over time.
Benefits of Using Commercial Cleaners
When it comes to deep-cleaning vinyl and linoleum floors, using a commercial cleaner has several benefits. These cleaners are specifically designed for cleaning and maintaining these types of flooring, so they are more effective than household cleaners in removing tough stains and dirt buildup. Here are some of the reasons why using commercial cleaners is the best choice:
1. Specialized Formulas
Commercial cleaners are formulated with ingredients that are specifically designed to tackle the unique cleaning needs of vinyl and linoleum floors. These formulas are often pH-neutral, meaning they won’t cause any damage or discoloration to your flooring. They are also effective in removing dirt, grime, and stains without leaving any residue behind.
2. Deep-Cleaning Power
Commercial cleaners have the power to deeply clean your vinyl and linoleum floors and remove even the toughest stains. They penetrate the surface, breaking down dirt and grime that regular mopping or spot cleaning alone cannot remove. This deep-cleaning action helps restore the natural shine and finish of your floors, making them look brand new again.
3. Time-Saving
Using a commercial cleaner saves you time and effort compared to traditional cleaning methods. Instead of spending hours scrubbing your floors on your hands and knees, a commercial cleaner allows you to quickly and efficiently clean your floors with a mop or a cleaning machine. This makes the cleaning process much easier and more efficient, especially for larger areas.
4. Protects and Maintains
Commercial cleaners not only deep-clean your vinyl and linoleum floors but also provide protection against future stains and damage. They often contain protective additives that create a barrier on the surface, preventing dirt and stains from penetrating and making them easier to clean in the future. This helps to extend the lifespan of your flooring and keep it looking its best for longer.
5. Safe and Easy to Use
Commercial cleaners are designed to be safe and easy to use. Most of them come with clear instructions on how to properly mix and apply the cleaner, making it easy even for beginners. They also usually have a pleasant scent, which leaves your floors smelling fresh and clean. Additionally, commercial cleaners are generally eco-friendly and free from harsh chemicals, making them safe for your family and pets.
In conclusion, using a commercial cleaner is the best option for deep-cleaning vinyl and linoleum floors. They are specifically designed to meet the unique needs of these types of flooring, providing specialized formulas that deep-clean, protect, and maintain the look of your floors. Moreover, using commercial cleaners saves you time and effort, making the cleaning process much easier and more efficient. So, the next time your floors need a deep-cleaning, consider using a commercial cleaner for the best results.


