
Your remote control is one of those tiny yet essential items that we often overlook when it comes to cleaning and maintaining our home. But keeping this small area clean is crucial, especially considering how frequently we handle it. In this step-by-step guide, I will show you exactly what you need to do to clean your remote control without risking any damage.
Before we dive into the cleaning process, it’s essential to understand why it’s so important to keep your remote control clean. Not only does a dirty remote control look unappealing, but it can also harbor a lot of germs and bacteria. When you think about it, we often use our remote controls when we’re sick or handling dirty things, and these germs can easily transfer onto the remote control’s surface.
To begin cleaning your remote control, start by removing the battery. This step is crucial to avoid any damage when cleaning the interior. Next, use a dry toothpick or a cotton swab to remove any visible dirt or debris from the buttons and crevices. Be extra careful when doing this to avoid pressing any of the buttons unintentionally.
Once you’ve removed the surface dirt, prepare a solution of equal parts vinegar and water. Moisten a microfiber cloth with this solution and gently wipe down the entire exterior of the remote control. If there are any stubborn stains, you can also use a tiny amount of mild dish soap on the cloth. However, be careful not to let any liquid seep into the remote control, as this can damage the electronics.
Finally, use a dry cotton cloth to wipe off any excess moisture and allow the remote control to air dry completely. Once it’s dry, insert the battery back in, and you’re good to go! By following these simple steps, you can ensure that your remote control is always clean and free from germs, allowing it to last longer and work better.
Remember, cleaning your remote control should be a regular part of your home maintenance routine. Whether it’s for your TV, gaming console, or other devices, it’s best to clean them at least once a month. And if you’re not sure whether you should clean a particular remote control, it’s always better to be safe than sorry.
Now that you have a step-by-step guide on how to clean your remote control, there’s no reason to put it off any longer. Start by gathering the necessary items and follow the instructions carefully. With a little effort, you’ll have a clean and germ-free remote control in no time!
- Gather the necessary supplies
- Remove the batteries
- Clean the Exterior
- What You’ll Need
- Step-by-Step Guide
- Clean the buttons
- Step 1: Turn off the remote control
- Step 2: Remove visible dirt and debris
- Step 3: Clean the buttons with a cotton swab
- Step 4: Wipe the buttons dry
- Step 5: Repeat if necessary
- Step 6: Clean the surrounding areas
- Step 7: Let it dry and reassemble
- Clean the battery compartment
- What you’ll need:
- Step-by-step instructions:
Gather the necessary supplies
Before you begin cleaning your remote control, it’s important to gather all the necessary supplies. By having everything ready, you can clean your remote control more efficiently and without any interruptions. Here are the supplies you’ll need:
- Cotton swabs
- Microfiber cloth or soft cloth
- Cleaning wipes (specialized for remote controls)
- Mild soap or cleaning solution
- Toothpick (only if needed for stubborn dirt or debris)
These items will help you clean your remote control thoroughly and safely. Now that you know exactly what you’ll need, let’s move on to the step-by-step guide on how to clean your remote control.
Remove the batteries
One of the first steps in cleaning your remote control is to remove the batteries. This is important to ensure that no liquid or cleaning solution comes into contact with the electrical components of the control, keeping it safe from any damage. It also prevents any accidental pressing of buttons during the cleaning process.
Before you start removing the batteries, it’s a good idea to clean the outside area of the control with a dry cloth or a can of compressed air to get rid of any dust or grit that might have accumulated on the surface.
Once the batteries have been removed, you can start cleaning the control more thoroughly. Here’s a step-by-step guide on how to do it:
- Prepare the cleaning solution: You can use a mixture of vinegar and water or a mild cleaning liquid diluted with water. Avoid using harsh chemicals or abrasive cleaners as they could damage the control.
- Get the right tools: You will need a soft cloth or cotton swabs, toothpicks, and possibly some alcohol wipes. These tools will help you clean the control effectively.
- Clean the buttons and contacts: Use the cloth or cotton swabs soaked in the cleaning solution to wipe down the buttons and contacts. Pay special attention to the tiny spaces between the buttons where dirt and grime can accumulate. Use a toothpick or a cotton swab dipped in the solution to clean these hard-to-reach areas.
- Remove sticky residue: If your control has sticky buttons, you can clean them with alcohol wipes or a cloth dampened with a small amount of rubbing alcohol. Be cautious not to saturate the control with excessive liquid.
- Dry the control: Once you’ve cleaned the control, make sure it is completely dry before reinserting the batteries. You can use a clean cloth or allow it to air dry for a few minutes.
By following these steps, you should be able to clean your remote control effectively and keep it in the best condition. Remember to consult the manufacturer’s guide for any specific cleaning instructions, as different controls may have different requirements.
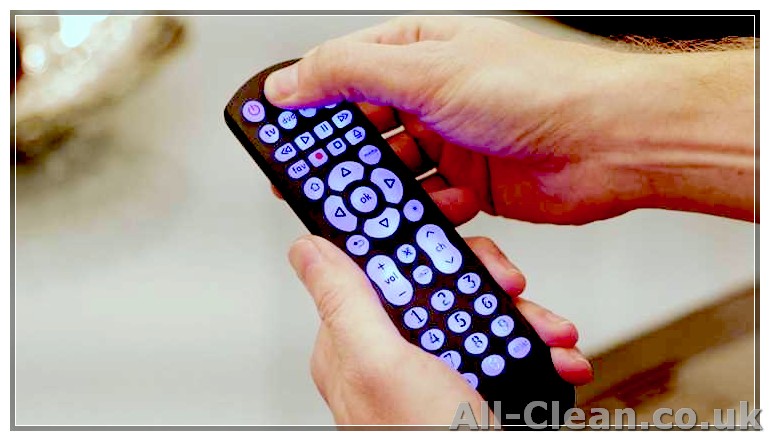
Clean the Exterior
The exterior of your remote control can often become sticky and dirty from frequent use. Cleaning it regularly can help maintain its condition and prevent the buildup of bacteria.
What You’ll Need
- Soft cloth or cotton swab
- Mild liquid dish soap
- Warm water
Step-by-Step Guide
- Turn off your TV or any other device your remote control is linked to. This will prevent any accidental button presses during the cleaning process.
- Remove the batteries. It’s essential to remove the power source before cleaning to avoid any potential damage to the internal components.
- Dampen a soft cloth or cotton swab with a mixture of warm water and mild liquid dish soap. Make sure the cloth or swab is not too wet.
- Gently wipe the surface of your remote control with the damp cloth or swab. Pay close attention to areas that are sticky or dirty.
- Do not allow any liquid to seep into the control buttons or battery contacts. Excess liquid can damage the internal components and render your remote control unusable.
- If there are stubborn stains or sticky bits on the surface, you can use a toothpick or cotton swab to carefully scrape or dislodge them. Be careful not to scratch or damage the surface.
- Once you’ve cleaned the exterior of your remote control, use a dry cloth to wipe off any excess moisture. Make sure the remote control is thoroughly dry before reinserting the batteries.
- Reinsert the batteries and put the battery cover back on. Make sure they are properly aligned and securely in place.
- Turn on your TV or device to test if the remote control is working properly after it has been cleaned.
By following these steps, you’ll be able to keep your remote control in good condition and ensure it continues to function effectively. Remember to clean your remote control regularly to prevent the buildup of dirt and bacteria.
Clean the buttons
Cleaning the buttons on your remote control is an important step in maintaining its functionality and preventing the spread of bacteria. Even though the buttons may seem small and insignificant, they can accumulate dirt, dust, and grime over time. Additionally, sticky liquids or food particles can get trapped between the buttons, causing damage to the internal components of the remote control.
To clean the buttons, you’ll need a few items:
- Toothpicks
- Cotton swabs
- Microfiber cloths
- Isopropyl alcohol or vinegar-water solution
Step 1: Turn off the remote control
Before you start cleaning, make sure to turn off the remote control and remove the batteries. This is to avoid any electrical damage or accidental button presses during the cleaning process.
Step 2: Remove visible dirt and debris
Take a toothpick and gently slide it between the buttons to remove any visible dirt or debris. Be careful not to apply too much pressure as it may cause damage to the buttons or other internal components.
Step 3: Clean the buttons with a cotton swab
Moisten a cotton swab with isopropyl alcohol or a vinegar-water solution. Gently rub the cotton swab over each button to remove any remaining dirt or grime. Pay extra attention to the edges and crevices of the buttons as these areas tend to accumulate more dirt.
Step 4: Wipe the buttons dry
Use a microfiber cloth to wipe the buttons dry. The cloth will not only absorb the moisture but also remove any remaining dirt or bacteria. Make sure to wipe all the buttons, front and back.
Step 5: Repeat if necessary
If the buttons are still dirty or sticky, repeat steps 3 and 4 until they are clean. Sometimes, particularly dirty or sticky buttons may require multiple cleaning attempts to become completely clean.
Step 6: Clean the surrounding areas
Don’t forget to clean the area around the buttons as well. Use a cotton swab or a microfiber cloth moistened with the cleaning solution to clean the surface around the buttons. This will help ensure that no dirt or bacteria remains on the remote control.
Important note: If your remote control has gaming buttons or other related features, consult the manufacturer’s instructions to ensure proper cleaning.
Step 7: Let it dry and reassemble
After cleaning, let the remote control air dry for a few minutes or use a dry microfiber cloth to speed up the process. Once dry, reassemble the remote control by putting the batteries back in.
Tip: To keep your remote control clean, consider wiping it with a microfiber cloth regularly. This will help prevent the buildup of dirt and bacteria, keeping your remote control in good condition for longer.
Clean the battery compartment
The battery compartment is an important area to clean since dirt and grime can build up, affecting the performance of your remote control. Here’s how to clean it:
What you’ll need:
- Vinegar
- Toothpicks or a small brush
- Cotton swab or cloth
- Liquid soap or mild detergent (optional)
Step-by-step instructions:
- Start by removing the battery cover of your remote control. Make sure to remove the batteries before cleaning.
- If there is any visible dirt or debris, use a toothpick or small brush to gently remove it from the crevices and corners of the battery compartment.
- Dampen a cotton swab or cloth with vinegar. Vinegar is a great natural cleaning agent that can help remove sticky residue and kill germs.
- Wipe the interior of the battery compartment with the vinegar-soaked swab or cloth, paying attention to any areas with stickiness.
- You can also apply a small amount of liquid soap or mild detergent to the swab or cloth for a deeper clean, although this step is optional.
- After cleaning, use a dry cloth or paper towel to remove any excess moisture from the battery compartment.
- If there are any stubborn areas of stickiness or dirt, you can gently scrub them with a toothpick or small brush dipped in the vinegar or vinegar-water solution.
- Once the battery compartment is clean and dry, reinsert the batteries and put the battery cover back on.
By regularly cleaning the battery compartment, you’ll be able to keep your remote control in good working condition and prevent any sticky or malfunctioning buttons.
Remember to always check the manufacturer’s instructions for specific cleaning advice, as some remotes may require special care.
If you’ve been keeping your remote control in a drawer or somewhere else where it can collect dust and dirt, it’s a good idea to clean the exterior as well. You can use a soft cloth or wipes to gently wipe down the surface and buttons.
Now that you know how to clean the battery compartment, you can keep your remote control in the best possible condition, ensuring it works properly every time you press a button!


