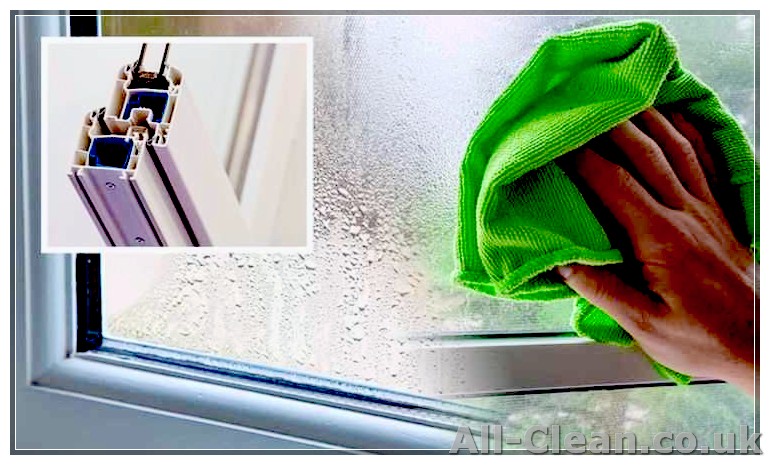

If you’ve noticed a build-up of dirt, dust, or condensation between the panes of your double glazed windows, it’s time to take action. Cleaning inside double glazed windows may seem like a daunting task, but with the right supplies and skills, it can be done without calling in the professionals. In this step-by-step guide, we’ll walk you through the process to help you restore clarity and improve the efficiency of your windows.
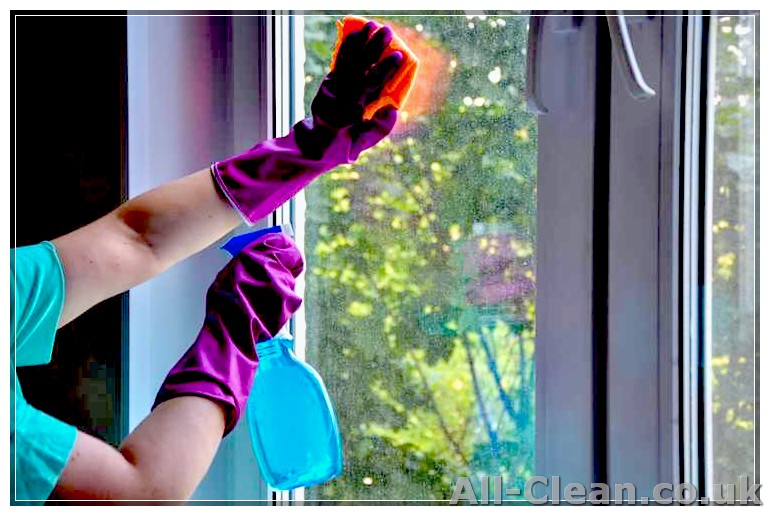
The first thing you’ll need to do is gather all the necessary supplies. You’ll need a drill with a small bit, a spray bottle filled with a mixture of warm water and a mild glass cleaner, a microfibre cloth, and a vacuum cleaner with a circular brush attachment. It’s also important to wear protective gloves and eyewear to ensure your safety while working on the windows.
Start by loosening the seal around the double-glazed unit. Using the drill with a small bit, carefully drill small holes in the corners of the window frame where the glass is joined. Be sure to drill at an angle to avoid drilling directly into the glass. These holes will allow you to inject the cleaner between the panes of glass and break up any dirt or build-up that has accumulated.
Next, spray the cleaner onto the microfibre cloth and use it to wipe away any dirt and grime on the interior surface of the glass. Be sure to clean the entire surface, paying close attention to any misted or cloudy areas. Once you’ve finished cleaning, use the vacuum cleaner with the circular brush attachment to clear away any dust or debris that may have fallen onto the window frames.
Once you’ve cleaned the glass and cleared the frames, it’s time to seal everything back up. Apply a small amount of rubber glazing sealant to the drilled holes, making sure to close them off completely. This will help to secure the double-glazed unit together and prevent any further build-up or condensation from occurring. Finally, wipe away any excess sealant with a clean microfibre cloth.
By following these steps, you can confidently clean the inside of your double glazed windows and ensure they are clear and properly sealed. Not only will this improve the appearance of your windows, but it will also help to maintain the energy efficiency of your home. Remember to check your manufacturer’s warranty before attempting any DIY repairs, as some warranties may be voided if the seal is broken or if you drilling into the glass.
- Gather the Necessary Materials
- Prepare the Area
- 1. Gather the Necessary Supplies
- 2. Inspect the Window Seals
- 3. Open the Windows
- 4. Protect the Surrounding Area
- 5. Close the Bottom Sash (if necessary)
- 6. Stop the Flow of Condensation (if applicable)
- Remove the Window Coverings
- Clean the Window Frames and Sills
- Clean the Window Glass
- Supplies
- Step 1: Inspect the Glass
- Step 2: Spray the Glass Cleaner
- Step 3: Wipe the Glass
- Step 4: Repeat if Necessary
- Step 5: Inspect for Haze or Scratches
- Step 6: Dry and Absorb Any Excess Liquid
- Related Solutions
- Reassemble and Restore
Gather the Necessary Materials
Before you start cleaning the inside of your double glazed windows, make sure you have all the necessary materials. Having the right tools and products will ensure that you can clean your windows effectively and efficiently.
Here’s a list of the materials you will need:
- A vacuum cleaner
- A soft cloth or microfiber cloth
- A spray bottle filled with a mixture of warm water and a small amount of dish soap
- A sponge or non-abrasive scrub brush
- A squeegee or window cleaning tool
- A towel or absorbent cloth
It’s important to wear gloves when cleaning the inside of your double glazed windows, especially if you have sensitive skin or are using a cleaner that contains chemicals. Gloves will protect your hands from any potential irritation or allergic reactions.
Additionally, consider using a ladder or step stool if your windows are located in a high or hard-to-reach area.
Prepare the Area
Before you begin cleaning the inside of your double-glazed windows, it’s important to prepare the area for the task. This will help you complete the cleaning process efficiently and minimize the chances of causing any scratches or damage to the windows.
1. Gather the Necessary Supplies
Start by gathering all the necessary supplies you will need for cleaning the inside of your double-glazed windows. Here is a list of the basic supplies you will need:
- Cleaner: Choose a mild liquid cleaner specifically designed for glass surfaces.
- Soft Cloth: Use a microfiber cloth or a lint-free cloth to avoid leaving any lint or fibers on the windows.
- Vacuum Cleaner: A vacuum cleaner with a brush attachment can be useful in removing any dust or debris from the window frames and sills.
- Scrub Brush: Have a soft-bristle scrub brush handy to scrub away any stubborn dirt or grime.
- Bucket of Warm Water: Fill a bucket with warm water to dilute the cleaner and rinse the windows.
2. Inspect the Window Seals
Before you start cleaning, inspect the window seals for any signs of damage or wear and tear. If you notice any cracks or holes in the seals, it’s important to address them before proceeding with the cleaning process. Damaged seals can allow moisture to enter the double-glazed units and cause condensation or fogging between the glass panes.
3. Open the Windows
Next, open the windows to allow easier access to the interior glass surfaces. Double-glazed windows usually have a mechanism that allows them to tilt or turn inward for cleaning purposes. Refer to the manufacturer’s instructions or contact the sales representative of your window supplier to learn how to open the windows properly.
4. Protect the Surrounding Area
To prevent any accidental spills or damage to the surrounding area, it’s important to take precautions. Place a protective cloth or plastic sheet on the floor beneath the windows to catch any drips or splatters. Additionally, cover any furniture or other property near the windows to keep them clean and free from cleaning solutions or water.
5. Close the Bottom Sash (if necessary)

If your double-glazed windows have a bottom sash that can be closed independently, it’s recommended to close it before starting the cleaning process. This will help to prevent any cleaning solution or water from flowing into the interior of your property.
6. Stop the Flow of Condensation (if applicable)
If there is any condensation or mist trapped between the glass panes of your double-glazed windows, you may want to stop the flow of condensation before cleaning. This can be done by drilling small holes into the glass and injecting a special gas or desiccant to remove the moisture. However, this is a professional process and should not be attempted without proper knowledge and expertise.
Remove the Window Coverings

Before you begin cleaning the inside of your double-glazed windows, you’ll need to remove any window coverings such as curtains or blinds. This will allow for better access to the window and ensure a thorough cleaning process.
Start by opening up the window coverings all the way so they are out of your way. If they are secured with any hooks or ties, be sure to undo them and remove the coverings completely. Place the coverings aside in a clean and safe location until you’re finished with the window cleaning.
Removing the window coverings will allow you to have a clear view of the inside of the double-glazed panels and identify any potential issues or build-up that needs to be addressed. It’s also important to remove any coverings to avoid accidentally spraying cleaning supplies onto them, which can cause damage or stains.
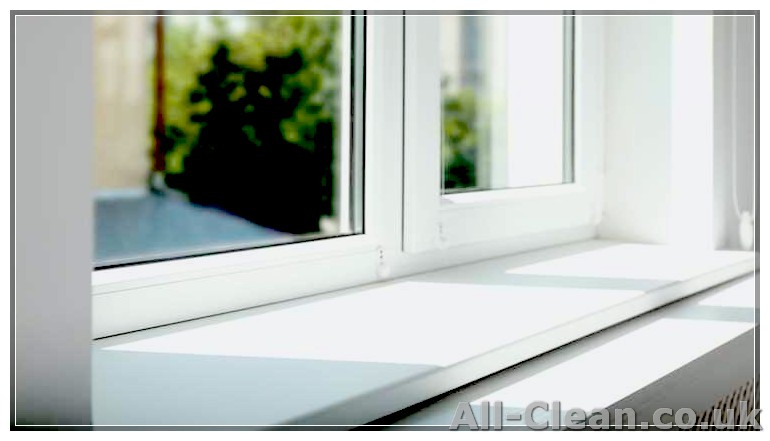
Clean the Window Frames and Sills
While it is important to clean the glass of your double glazed windows, don’t neglect the window frames and sills. These areas can accumulate dirt and grime over time, making them unsightly and potentially causing damage.
Here’s a step-by-step guide to help you clean the window frames and sills:
- Prepare the necessary supplies: Before you start cleaning, gather all the necessary supplies. You will need a vacuum cleaner with a brush attachment, a soft cloth, a mild liquid detergent, warm water, a sponge, and a rubber squeegee.
- Begin by vacuuming: Use the brush attachment on your vacuum cleaner to remove any loose dirt and debris from the window frames and sills. This will help prevent scratches when you start cleaning.
- Wipe away the dirt: Dampen a soft cloth with warm water and a mild liquid detergent. Gently wipe down the window frames and sills, paying special attention to any stubborn stains. Be sure to thoroughly clean all surfaces to remove any built-up grime.
- Inspect for damage: While cleaning, carefully inspect the window frames and sills for any signs of wear or damage. Look for cracks, holes, or broken seals that could affect the insulation of the double glazing.
- Rinse and dry: After cleaning, rinse the window frames and sills with clean water to remove any remaining detergent. Use a sponge or cloth to wipe away the excess water, and then dry the surfaces thoroughly with a clean cloth.
- Apply a protective seal: To keep your window frames and sills looking their best, consider applying a protective seal. This can help prevent dirt and grime from building up and make future cleaning easier.
By following these steps, you can ensure that your double glazed windows are not only clean on the inside, but also that the frames and sills are well-maintained. Remember to inspect your windows regularly and address any issues promptly to avoid costly repairs or replacements.
Clean the Window Glass
The first step in cleaning the inside of double glazed windows is to clean the window glass. This is necessary to remove any dirt, dust, or grime that may have accumulated on the glass surface.
Supplies
- Gather the following supplies before you start:
- Glass cleaner (distilled water and vinegar solution can also be used)
- Microfiber cloth or lint-free cloth
Step 1: Inspect the Glass
Inspect the glass for any scratches, haze, or other imperfections. If there are any, it is best to consult a professional to avoid causing further damage.
Step 2: Spray the Glass Cleaner
Spray the glass cleaner onto the glass surface. Make sure to spray enough to cover the entire area that needs to be cleaned.
Step 3: Wipe the Glass
Using a microfiber cloth or lint-free cloth, start wiping the glass in a circular motion. Make sure to apply even pressure and cover the entire surface. Pay close attention to any spots or stains that may require extra cleaning.
Step 4: Repeat if Necessary
If there is still dirt or grime left on the glass, repeat steps 2 and 3 until the glass is clean and clear.
Step 5: Inspect for Haze or Scratches
Once the glass is cleaned, inspect it again for any haze, scratches, or other imperfections. If there are any, you may need to use specialized solutions or consult a professional.
Step 6: Dry and Absorb Any Excess Liquid
After cleaning the glass, use a dry cloth or paper towel to absorb any excess liquid left on the surface. This will prevent water spots or streaks from forming.
Related Solutions
If you notice condensation between the panes of your double-glazed windows, it may be a sign of a broken seal. In such cases, it is best to consult a professional for repair or replacement.
If there are scratches or damage to the glass that cannot be repaired, the only solution may be to replace the entire double-glazed unit.
For foggy or cloudy windows that cannot be cleaned, you can try using dehumidifiers or opening the windows to allow air circulation. However, these are temporary solutions and it is best to consult a professional for a permanent fix.
Reassemble and Restore
Once you have completed the cleaning process for the interior of your double glazed windows, it is time to reassemble and restore them to their original condition.
You will need to carefully put each part back together in the reverse order that you disassembled them. Make sure that all parts are clean and dry before reassembling. If you notice any cracks or damage to the frames or glass panels, it is best to address those issues before reassembling.
If there are any scratches or misted windows, you may resort to professional help. In such cases, hiring a double-glazed window repair service is the best thing to do. They have the skills and equipment to fix any issues without looking for a replacement unit. Furthermore, if your windows are still under warranty, it is best to contact the sales or service department for repair or replacement options.
Before reassembling, gather all the necessary supplies, including a clean cloth and any tools you may need. Check that all components are in good condition and secure. Dust off any loose particles and wipe down the frames and glass panels to ensure a clean surface.
Start by placing the window frame back into its original position. If it was removed using screws, make sure to screw them back in tightly. If the frame was held in place with clips or brackets, insert them back into the correct positions.
Once the frame is secure, carefully fit the glass panels back into place. Make sure they are properly aligned and seated within the frame. Gently press down on each corner to ensure a snug fit. Fasten any clips or brackets to hold the glass panels securely in place.
Finally, close the window and check that it operates smoothly. Open and close it several times to ensure there are no obstructions or sticking points. If everything looks good, give the window one final wipe-down to remove any fingerprints or smudges.
As a precaution, periodically check the seal around the window for any signs of damage or wear. This will help prevent any moisture or droplets from forming between the glass panels, which can cause the window to become cloudy or misted over time.
If you want to have more control over the moisture inside the window, you can consider investing in various dehumidifiers or moisture control devices. These can help regulate the humidity levels and prevent condensation from forming.


