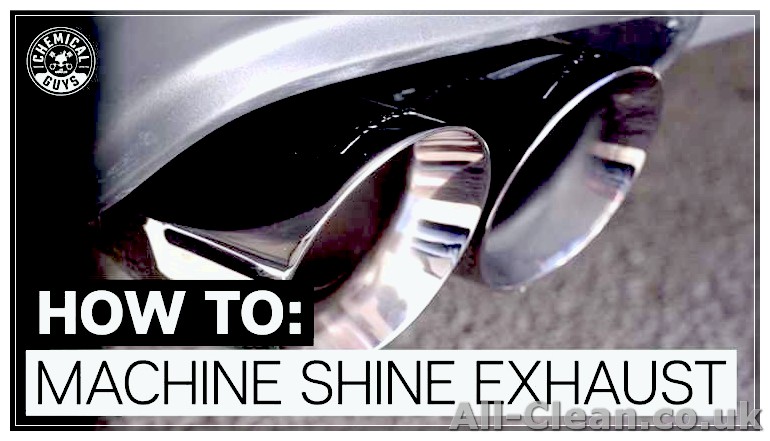
Welcome to our comprehensive guide on how to clean and protect your car’s exhaust tips. Over time, exhaust tips can become dirty and contaminated with road grime, bugs, and other environmental contaminants. Cleaning and protecting your exhaust tips not only enhances the overall appearance of your vehicle but also helps prevent damage to the finish. In this step-by-step guide, we will walk you through the process of cleaning and protecting your exhaust tips for a better-looking, longer-lasting finish.
Step 1: Prepare the necessary tools and cleaning products
Before you begin, gather all the tools and cleaning products you will need for the job. This includes a high-grade metal cleaner, a wool pad or brush, a microfiber towel, and a polishing compound. We suggest using a metal cleaner specifically designed for exhaust tips, as it will be more effective in removing tough contaminants.
Step 2: Clean the exhaust tips
Start by applying the metal cleaner to the exhaust tips. Let the cleaner dwell for the recommended amount of time, usually around 5 minutes. Use a wool pad or brush to agitate the cleaner and remove any stubborn grime. Work in multiple directions to ensure a thorough clean. If you have black soot buildup on your tips, we suggest using an alkaline-based cleaner, such as the ones offered by Gtechniq or Bilt Hamber. These cleaners are specifically formulated to remove black soot and other tough contaminants.
Step 3: Polish the tips
Once the exhaust tips are clean, it’s time to polish them to restore their shine. Apply a small amount of polishing compound to a microfiber towel and work it into the tips using circular motions. The polishing compound will help remove any remaining contaminants and bring out the natural shine of the metal. Be sure to work the compound into all areas of the tips, including hard-to-reach spots.
Step 4: Protect the finish
To ensure the longevity of your exhaust tips’ finish, it’s important to protect them after cleaning and polishing. Apply a dedicated metal sealant or wax to the tips using a clean microfiber towel. This will create a barrier between the metal and any future contaminants, making it easier to clean next time. It will also add a layer of protection against environmental factors such as heat and oxidation.
Step 5: Maintain the cleanliness
To keep your exhaust tips looking their best, regular maintenance is key. Give them a quick wipe-down after each wash to remove any new contaminants. If you notice any stubborn stains or scratches, repeat the cleaning and polishing processes to restore the finish. By following these steps, your exhaust tips will continue to shine and transform the look of your car.
With this step-by-step guide, you’re now equipped with the knowledge and tools to properly clean and protect your exhaust tips. Follow these instructions to ensure the best cleaning and protection results. We hope this guide has been helpful and that the end result brings the desired transformation to your car’s exhaust tips. Best of luck!
- Step-by-Step Guide to Clean and Protect Exhaust Tips
- Step 1: Gather the necessary tools
- Step 2: Pre-cleaning
- Step 3: Apply the cleaning product
- Step 4: Agitate the dirt
- Step 5: Rinse and dry
- Step 6: Apply the exhaust sealant
- Step 7: Final touch-ups
- Step 1 – Apply Wheel Cleaner and Agitate
- Step 2 – Use Ultra-Fine 0000 Grade Wire Wool
- Step 3 – Apply Autosol Metal Polish
- Step 4 – Finish with a Wheel Wax
- Exhaust Tips Cleaning Product List
Step-by-Step Guide to Clean and Protect Exhaust Tips
Cleaning and protecting your exhaust tips is an important thing to do to keep your vehicle looking its best. Over time, exhaust tips can accumulate dirt, soot, and other debris that can detract from their appearance. But with the right cleaning and protection processes, you can easily restore their shine and keep them looking great. In this guide, we will walk you through the step-by-step process to clean and protect your exhaust tips.
Step 1: Gather the necessary tools
Before you start the cleaning process, gather all the necessary tools and parts. You will need a microfiber cloth, a cleaning product specifically designed for exhausts, a wheel brush, and a quality exhaust sealant. These tools will help you effectively clean and protect the exhaust tips.
Step 2: Pre-cleaning
Start by wiping away any loose dirt or debris from the surface of the exhaust tips. Use a microfiber cloth to grab and remove the loose particles. This step will make the cleaning process more effective.
Step 3: Apply the cleaning product
Apply the chosen exhaust cleaning product onto a microfiber cloth. Make sure to follow the manufacturer’s instructions for the best results. Gently rub the cleaning product onto the exhaust tips, moving in a circular motion. This will help remove any stubborn dirt or grime.
Step 4: Agitate the dirt
If the exhaust tips have any stubborn dirt or grime that doesn’t budge with just the cleaning product, use a wheel brush to agitate the dirt. Be gentle but firm, as exhaust tips are often made of durable materials.
Step 5: Rinse and dry
After agitating the dirt, rinse the exhaust tips with water to remove any remaining cleaning product. Dry the exhaust tips thoroughly with a clean microfiber cloth to avoid water spots.
Step 6: Apply the exhaust sealant
Once the exhaust tips are dry, apply a quality exhaust sealant for protection. This will help prevent future dirt and grime buildup and maintain the shine of the exhaust tips. Follow the manufacturer’s instructions for the application process and curing time.
Step 7: Final touch-ups
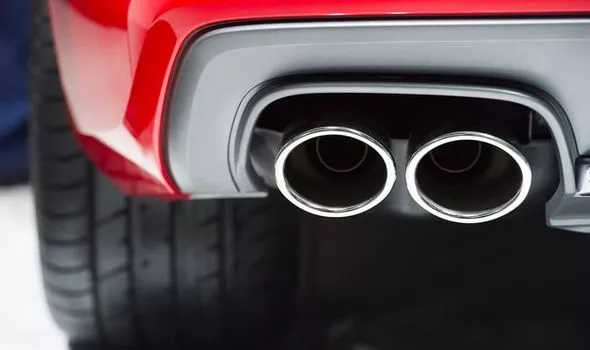
After the exhaust sealant has cured, give the exhaust tips a final wipe with a clean microfiber cloth. This will ensure a polished and shiny finish.
Following these step-by-step processes will help you clean and protect your exhaust tips effectively. Remember to use quality cleaning products and sealants, as they make a big difference in the overall result. With regular maintenance, your exhaust tips will stay clean and protected against dirt, bugs, and other elements that can damage their appearance.
Step 1 – Apply Wheel Cleaner and Agitate
When it comes to cleaning and protecting your exhaust tips, the first step is to apply a wheel cleaner. This is because exhaust tips are often made of stainless steel or other metal surfaces that can accumulate dirt, grime, and carbon buildup over time.
By using a wheel cleaner, you can effectively remove these deposits and bring back the shine to your exhaust tips. It’s important to choose a wheel cleaner that is safe for use on metal surfaces, as some cleaners may be too harsh and could damage the finish.
One highly recommended wheel cleaner is the Auto Wheel Cleaner by Gtechniq. This product is specifically formulated to safely and effectively clean metal surfaces, including exhaust tips. It is non-acidic and does not contain any harsh chemicals that could cause damage.
To apply the wheel cleaner, simply spray it onto the surface of your exhaust tips. Make sure to cover the entire area, including any hard-to-reach areas. It’s best to do this step when your exhaust tips are cool, as applying the cleaner to hot metal surfaces may cause it to evaporate quickly and be less effective.
Once you’ve applied the wheel cleaner, you’ll need to agitate the surface to remove any stuck-on dirt and grime. This can be done using a soft-bristle brush or a wheel woolie. When using a brush, make sure to use a brush with soft bristles to avoid scratching the surface of your exhaust tips.
Gently scrub the surface of your exhaust tips with the brush, focusing on areas where dirt and grime are more concentrated. Use back-and-forth motions and apply some pressure, but be careful not to scratch the surface. Agitating the wheel cleaner will help to loosen and remove any stuck-on grime and make the cleaning process more effective.
After agitating the surface, rinse it thoroughly with water. This will remove any remaining wheel cleaner residue and prepare the surface for the next steps in the cleaning and protection process.
Step 2 – Use Ultra-Fine 0000 Grade Wire Wool
After removing any loose dirt or debris from the exhaust tips, it’s time to move on to the next step in the cleaning process. This step involves using ultra-fine wire wool to remove any stubborn dirt, grime, or scratches from the surface of the exhaust tips.
To get started, make sure you have a high-quality 0000 grade wire wool on hand. This grade of wire wool is thin and fine, making it perfect for cleaning delicate metal surfaces without causing any damage. It’s important to note that using a lower grade wire wool, such as 00 or 0, may be too abrasive and could leave scratches on the exhaust tips.
Before using the wire wool, it’s a good idea to warm up the exhaust tips. This can be done by allowing the engine to run for a few minutes or by using a hairdryer on a low heat setting. The heat will help to soften any stuck-on dirt or grime, making it easier to remove.
Once the exhaust tips are warm, take the wire wool and begin gently rubbing it across the surface of the tips. Use light pressure and make sure to move the wire wool in a circular motion. This will help to agitate any dirt or grime, allowing it to budge from the surface of the tips.
If you encounter any stubborn dirt or scratches that won’t come off with the wire wool, don’t worry. There are other methods and products that can be used to tackle these issues. This guide will provide further information on how to address these problems later on.
Continue to work the wire wool across the entire surface of the exhaust tips, making sure to cover all areas. Take your time with this step, as thoroughness is key to achieving a clean and polished result.
Once you’re satisfied with the cleanliness of the exhaust tips, it’s time to move on to the next step in the cleaning process. Keep in mind that this step is essential for preparing the tips for protection and will greatly enhance the final result.
Step 3 – Apply Autosol Metal Polish
Once you have thoroughly cleaned the exhaust tips and removed any surface dirt and grime, it’s time to apply the Autosol Metal Polish.
1. Preparation:
- Gather all the necessary materials, including Autosol Metal Polish, a microfiber cloth, and a soft-bristle brush or wool pad.
- If the exhaust tips are made of stainless steel or chrome, make sure they are cooled down before you start applying the polish.
2. Technique:
- Squeeze a small amount of Autosol Metal Polish onto the microfiber cloth or directly onto the exhaust tips.
- Using your fingers or a soft-bristle brush, spread the polish evenly over the entire surface of the exhaust tips.
- If the exhaust tips have any burnt-on residue or stubborn dirt, agitate the polish with a soft-bristle brush or wool pad to help remove it.
- Allow the polish to dwell on the exhaust tips for a few minutes, but do not let it dry completely.
- Using a clean microfiber cloth, wipe away the polish in a circular motion.
3. Finishing touches:
- If desired, you can apply a second coat of Autosol Metal Polish for added protection and shine.
- For a deeper shine, you can also use an ultra-fine steel wool to buff the exhaust tips. Make sure to use gentle pressure and a light touch.
- Once you are satisfied with the finish, use a clean microfiber cloth to remove any remaining residue or excess polish.
4. Sealant and protection:
- If you want to provide extra protection for your exhaust tips, you can apply a metal sealant or wax after using the Autosol Metal Polish.
- Make sure the exhaust tips are completely dry before applying the sealant.
- Following the instructions on the sealant product, apply a liberal amount onto the exhaust tips.
- Using a clean microfiber cloth, work the sealant into the metal in a circular motion.
- Allow the sealant to cure as recommended by the manufacturer before exposing the exhaust tips to water or other elements.
By following these steps and applying Autosol Metal Polish, you can easily clean and protect your exhaust tips, leaving them looking shiny and like new. Whether you love the blackened finish or prefer a polished metal look, Autosol Metal Polish is a versatile product that can manage it all. So, don’t worry about the limitations of other polishes and enjoy the durability and cleanliness that Autosol brings.
Step 4 – Finish with a Wheel Wax
Once the exhaust tips have been properly cleaned and polished, it’s time to finish the job with a wheel wax. This will not only provide additional protection to the metal surface but will also give it a brilliant shine.
Choose a high-quality wheel wax product that is specifically designed for use on metal surfaces like chrome, stainless steel, or aluminum. These products are formulated to create a protective barrier that helps prevent the buildup of dirt, grime, and bugs, making it easier to clean your exhaust tips in the future.
Before applying the wheel wax, make sure the surface of the exhaust tips is clean and dry. Apply a small amount of the wax to a clean microfiber cloth or applicator pad, and then gently work it into the surface of the metal. Be sure to cover the entire tip evenly, using a liberal amount of wax.
Allow the wax to cure for a few minutes, or as recommended by the product manufacturer. Once the wax has dried, use a clean microfiber cloth to buff the surface of the exhaust tips. This will help remove any excess wax and give the tips a shiny, polished finish.
For the best results, it’s recommended to use a high-quality wheel wax product that utilizes a balanced blend of sealants and protectants. This will ensure that your exhaust tips are not only protected but also looking their best.
Some wheel wax products also offer an added effect of creating a hazy, “brilliant” look on the metal. This effect can give your exhaust tips a unique and eye-catching appearance.
If your exhaust tips are made of brass/copper or bare steel, be sure to follow the product recommendations provided by the manufacturer. Some wheel waxes may not be suitable for use on these types of metals. In this case, it’s best to use a metal-specific cleaner or polish to properly clean and protect the exhaust tips.
Exhaust Tips Cleaning Product List
When it comes to deep cleaning and protecting your exhaust tips, there are a few key products that you will need. Below is a list of recommended products that will help you achieve professional results.
- Exhaust tip cleaner: This is the main product you will need for removing carbon buildup and other contaminants from your exhaust tips. Look for a cleaner that is specifically designed for exhaust tips, as it will be formulated to effectively remove tough stains and residues.
- Polishing compound: After cleaning your exhaust tips, a polishing compound can be used to restore shine and remove fine scratches and swirl marks. Choose a high-quality polishing compound for best results.
- Microfiber towels or applicator pads: These are essential for applying the cleaning products and polishing compound to your exhaust tips. Microfiber towels are great for general cleaning, while applicator pads are ideal for applying polish.
- Protective sealant: Once your exhaust tips are clean and shiny, it’s important to protect them from future contamination. A protective sealant will create a barrier between your exhaust tips and the elements, making it easier to clean and maintain them in the future.
- Wheel cleaner: If your exhaust tips have accumulated brake dust or other stubborn deposits, a wheel cleaner can help to remove them. Look for a non-acidic cleaner to avoid damaging the metal.
- Alkaline cleaner: In some cases, a more powerful cleaner may be required for heavily neglected or dirty exhaust tips. An alkaline cleaner can be used to break down stubborn grime and carbon buildup.
- Wire brush or steel wool: For more stubborn carbon buildup or stains, a wire brush or steel wool can be used to scrub the surface of the exhaust tips. Be cautious when using these tools, as they can scratch the metal if not used properly.
By using the products listed above and following a step-by-step cleaning guide, you can achieve a clean and polished look for your exhaust tips. Remember to always read and follow the instructions provided by the manufacturers of the products you choose to use.

