
Cleaning your Waterpik® Water Flosser regularly is essential for maintaining optimal oral health and ensuring its longevity. Over time, mineral deposits, mold, and bacteria may build up in the unit, compromising its effectiveness and hygienic properties. By following these simple step-by-step instructions, you can keep your Waterpik® Water Flosser clean and well-maintained.
Before beginning the cleaning process, make sure your Waterpik® unit is turned off and unplugged. Start by removing the reservoir and emptying any remaining water. Wash the reservoir and the lid with warm, soapy water, rinsing thoroughly afterward. If the lid has mineral deposits or mold, soaking it in a mixture of vinegar and water for 5-10 minutes can help remove stubborn stains.
Next, clean the handle by wiping it down with a soft, damp cloth. Pay special attention to the area around the buttons and the prongs that connect to the tip, as these can collect debris and bacteria. If the prongs are stuck or damaged, consult the manual for instructions on how to care for your specific Waterpik® model.
After cleaning the handle, run water through the unit by turning it on and letting the water flow through the flosser tip. This will help flush out any remaining debris or residue. It is recommended to use distilled or mineral-free water to prevent mineral buildup and damage to the unit over time.
Once the water has run clear, you can also run mouthwash through the unit to give it a fresh and hygienic effect. Use a soft toothbrush to clean the outside and bottom of the unit, paying attention to any areas where mold or dirt may accumulate.
Lastly, clean the flosser tip by removing it from the handle and rinsing it thoroughly with warm water. If the tip has mineral deposits, you can soak it in a mixture of vinegar and water for a few minutes to help loosen and remove the buildup. Make sure to securely replace the tip back onto the handle after cleaning.
By performing these cleaning steps regularly, you can keep your Waterpik® Water Flosser in top condition and ensure that it continues to provide optimal oral health benefits. Remember to consult the user manual for any specific cleaning instructions for your model, and replace the flosser tip and reservoir containers as recommended. With proper care and maintenance, your Waterpik® Water Flosser will continue to contribute to your overall dental hygiene for years to come.
- Gather Your Materials
- Step 1: Power Off and Unplug Your Waterpik®
- Step 2: Remove the Water Reservoir
- Step 3: Clean the Handle and Reservoir
- Step 4: Clean the Waterpik® Prongs and Valve
- Step 5: Soak the Water Reservoir (Optional)
- Step 6: Reassemble Your Waterpik®
- Step 7: Perform Routine Care
- Disassemble the Water Flosser
- Clean the Water Flosser Components
- The Waterpik® Tips
- The Water Reservoir
- The Handle and Cord
- The Internal Parts
- Reassemble and Test the Water Flosser
- How to Clean Waterpik Mold
- FAQs
- Prepare a Cleaning Solution
Gather Your Materials
Before you begin cleaning your Waterpik® Water Flosser, gather the following materials:
- A clean, empty sink or countertop
- A soft toothbrush or small cleaning brush
- A small amount of mild dish soap or vinegar
- A bowl or cup (optional)
Step 1: Power Off and Unplug Your Waterpik®
Before performing any cleaning or maintenance, make sure your Waterpik® is turned off and unplugged.
Step 2: Remove the Water Reservoir
To clean the Waterpik® handle, you will need to remove the water reservoir. Refer to your specific model’s instructions for how to do this. Most models have a release button or lever that allows you to easily detach the reservoir from the handle.
Step 3: Clean the Handle and Reservoir
Fill the sink or a bowl with warm water and a small amount of mild dish soap or vinegar. Use the soft toothbrush or small cleaning brush to scrub the handle and reservoir, paying special attention to any areas with visible mold or buildup. Rinse the handle and reservoir thoroughly with warm water to remove any soap or vinegar residue. Wipe them dry with a clean, white cloth or towel.
Step 4: Clean the Waterpik® Prongs and Valve
If your Waterpik® has prongs or a valve, make sure to clean these parts as well. Gently scrub the prongs and valve with the toothbrush or cleaning brush, using the mild dish soap or vinegar solution. Rinse them thoroughly and wipe them dry.
Step 5: Soak the Water Reservoir (Optional)
If you want to give your water reservoir a deep clean, you can soak it in a mixture of distilled white vinegar and water. Fill a bowl or cup with equal parts vinegar and water, and place the reservoir in the mixture. Let it soak for 5-10 minutes, then rinse it thoroughly and wipe it dry.
Step 6: Reassemble Your Waterpik®

Once all the parts of your Waterpik® are clean and dry, you can reassemble the unit. Follow the manufacturer’s instructions for replacing the water reservoir and any other components.
Step 7: Perform Routine Care
To prevent mold and other buildup from accumulating again, it’s important to perform regular maintenance on your Waterpik®. This includes emptying and wiping down the water reservoir after each use, running plain water through the unit for about a minute to flush out any remaining debris, and occasionally replacing the tips or flossers.
Now that you know the steps for cleaning your Waterpik® Water Flosser, you can ensure that it stays clean and effective for a long period of time.
Disassemble the Water Flosser
To properly clean your Waterpik® Water Flosser and maintain its optimal performance, it is important to disassemble it. Follow these steps to disassemble your Water Flosser:
- Make sure the Water Flosser is turned off and unplugged from the power source.
- Remove the reservoir by gently lifting it up and away from the unit. Set it aside.
- Eject the tip by pressing the release button located on the handle of the Water Flosser. Dispose of the old flossing tip and prepare a new one if necessary.
- Depending on the model of your Water Flosser, gently remove any attachments such as a tongue cleaner or orthodontic tip.
- If there is any leftover water in the unit, turn it upside down to drain out the remaining water.
By disassembling your Water Flosser, you can access all the parts that need thorough cleaning to prevent any buildup of mold, mildew, or other deposits:
- The reservoir: Wash the reservoir with warm soapy water or a mild cleanser. Rinse it well to remove any soap residue. For a deeper clean, you may also soak it in a mixture of vinegar and water for a few minutes.
- The flosser handle and prongs: Wipe the handle and prongs with a damp cloth or run them under water to remove any leftover toothpaste or other debris. Pay special attention to the areas around the on/off switch and water control buttons.
- The internal components: Unfortunately, the internal components of the Water Flosser cannot be easily accessed for cleaning. However, they generally do not require frequent cleaning since the water is continuously run through them during use.
For a more visual guide on disassembling and cleaning your Water Flosser, you may also watch a helpful video provided by the manufacturer or seek assistance from customer care if you encounter any issues.
By following these steps and regularly cleaning your Water Flosser, you’ll ensure that it remains hygienic for your oral health and well-maintained for long-term use. Remember to also replace the flossing tip as needed and follow any additional cleaning instructions provided with your specific Water Flosser model.
Clean the Water Flosser Components
When it comes to cleaning your Waterpik® Water Flosser, it’s important to take care of each component to ensure its effectiveness and longevity. Here’s what you need to know:
The Waterpik® Tips
The tips are the main point of contact with your teeth and gums, so they require regular cleaning. After each use, remove the tip from the unit and rinse it with warm water to remove any leftover food particles or buildup. For a more thorough clean, soak the tip in a mixture of water and vinegar or follow the manufacturer’s instructions for cleaning. Depending on your oral care routine, you may want to replace the tips every 3 to 6 months.
The Water Reservoir
The water reservoir holds the water and cleaning solution for the Waterpik®. After each use, empty the reservoir and rinse it thoroughly with warm water to remove any leftover mouthwash or cleaning solution. If necessary, you can also use a soft brush to scrub away any mold or buildup. To keep your reservoir in good condition, it’s also recommended to fill it with distilled water or follow the manufacturer’s instructions for cleaning.
The Handle and Cord

When cleaning the handle and cord, make sure to unplug the unit first. Wipe down the handle with a damp cloth or sponge, using soap or a mild cleaner if necessary. Avoid submerging the handle in water. To clean the cord, wipe it down with a cloth or sponge dampened with soap and water. Allow the handle and cord to air dry completely before using the Waterpik® again.
The Internal Parts
Cleaning the internal parts of your Waterpik® Water Flosser will help maintain its performance. Depending on your model, you may need to perform a monthly deep clean or follow the manufacturer’s instructions. To deep clean, mix 2 tablespoons of vinegar with 1 cup of water. Fill the reservoir with the mixture and run it through the unit for 1-2 minutes, ensuring the solution is expelled through the tip. Empty the reservoir and run another cycle with plain water to remove any vinegar taste. Always follow the manufacturer’s instructions for your specific Waterpik® model.
By regularly cleaning and taking proper care of your Waterpik® Water Flosser, you can ensure the health and hygiene of your oral care routine.
Reassemble and Test the Water Flosser
Once you have thoroughly cleaned all the individual parts of your Waterpik® Water Flosser, it’s time to reassemble the unit and make sure everything is working properly.
- Reassemble the Water Flosser: Start by placing the clean tip back onto the handle. Make sure it is securely attached.
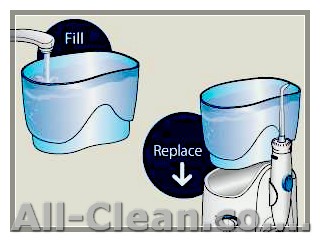
- Refill the Water Reservoir: Fill the water reservoir with clean water. You can use cool or lukewarm water, but do not use hot water as it can damage the unit.
- Turn on the Unit: Press the on/off button to turn on the Water Flosser.
- Test the Water Flosser: Place the tip in your mouth and lean over the sink to allow the water to drain out. Turn the unit on and select your desired pressure setting. Point the tip into the sink and press the pause button to start the water flow. Check if the water streams are consistent and strong.
If you notice any issues with the water flow or pressure, refer to your user manual for troubleshooting assistance or contact the Waterpik® customer support team.
Remember that it is important to clean your Waterpik® Water Flosser on a regular basis to prevent any buildup of mold, mildew, or other particles that can affect its performance. We recommend cleaning the unit after each use for optimal care.
With this step-by-step guide, you’ll now know how to properly clean and maintain your Waterpik® Water Flosser to keep it in a safe and hygienic condition. Follow this routine cleaning process to ensure your device stays in good working order.
How to Clean Waterpik Mold
If you notice mold or mildew growing on your Waterpik Water Flosser, it’s important to take immediate action to prevent any potential health hazards. Follow these steps to effectively clean your Waterpik and remove any mold:
- Watch our video: Before you begin, watch a video tutorial or read the manual to familiarize yourself with the cleaning process specific to your Waterpik model.
- Turn off and unplug the unit: Make sure your Waterpik is turned off and disconnected from the power source.
- Empty and clean the water reservoir: Remove the water reservoir and empty any remaining water. Wash it with warm water and a few tablespoons of mild dish soap. Rinse it thoroughly and wipe it down with a clean cloth.
- Internal parts cleaning: Fill a container with equal parts water and white vinegar. Submerge the water flosser handle and any other removable parts into the solution and let them soak for at least 15 minutes. Then, rinse them with clean water and wipe them dry.
- Clean the prongs: Use a small brush or toothbrush to clean the prongs. Make sure to remove any mold or debris. These prongs are essential for creating the water pressure that powers your Waterpik.
- Wash the exterior: Wipe down the exterior of the Waterpik with a damp cloth soaked in a mild cleaning solution. Make sure to clean all the nooks and crannies.
- Rinse and replace: Rinse all the parts with clean water and towel dry them. Reassemble the unit and replace the water reservoir.
- Test and prevent: Turn on your Waterpik and let water flow through it for a few seconds. If you notice any strange taste or smell, repeat the cleaning process. To prevent mold growth in the future, clean your Waterpik at least once every three months. Also, consider using an antimicrobial mouthwash like Listerine in the water reservoir to help combat mold.
Following these steps will ensure the effectiveness and hygienic use of your Waterpik water flosser. Regular cleaning will help prevent any mold deposits and keep your Waterpik in peak condition.
FAQs
Here are some frequently asked questions about cleaning Waterpik and preventing mold:
- Can I put my Waterpik in the dishwasher? No, Waterpik should not be put in the dishwasher as it may cause damage to the internal parts.
- How often should I clean my Waterpik? We recommend cleaning your Waterpik at least once every three months, or more frequently if you notice any mold or mildew growth.
- Can I use other brands of mouthwash in my Waterpik? While we recommend using Listerine, you can use other brands of mouthwash as long as they are specifically formulated for oral health.
- Do these cleaning steps apply to Oral-B water flossers as well? No, these cleaning steps are specific to Waterpik water flossers. If you have an Oral-B water flosser, refer to the user manual for proper cleaning instructions.
By following these tips, you can keep your Waterpik clean and ensure optimal performance and hygiene.
Prepare a Cleaning Solution
Before cleaning your Waterpik® Water Flosser, you will need to prepare a cleaning solution. The cleaning solution should be a mild, non-abrasive cleanser that is safe to use on oral care devices. One popular option is to mix equal parts water and mild dish soap, but you can also use a mixture of water and hydrogen peroxide or water and white vinegar, if preferred.
To prepare the cleaning solution, follow these steps:
- Fill a small bowl or sink with warm water.
- Add the cleaning solution to the water according to the instructions on the cleanser’s packaging. Use enough cleanser to create a soapy solution.
- Stir the solution with a spoon or your hand to mix it well.
The cleaning solution is now ready to use for cleaning your Waterpik® Water Flosser.
Note: When choosing a cleaning solution, avoid using bleach, chlorine, or other harsh chemicals, as these can damage the Water Flosser.


