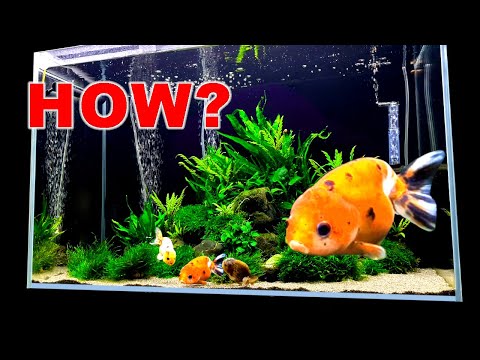

If you have a goldfish aquarium, it’s important to keep it clean in order to provide a healthy environment for your fish. Regular cleaning helps to remove particles such as excess food, waste, and algae, which can build up over time and affect the water quality. To tackle this task, having the right tools and following a systematic approach can make the process easier and more efficient.
First, choose a cleaning day that is convenient for you and your goldfish. It’s recommended to clean the aquarium at least once a month, although some aquariums may require more frequent cleaning depending on the number of fish, the size of the tank, and the types of equipment used. During the cleaning process, you will need a gravel cleaner, a bucket, a sponge or clean cloth, and a water dechlorinator.
Start by assembling all the cleaning essentials near the aquarium. Make sure to unplug any electrical equipment such as filters or heaters. Begin by removing a portion of the water from the tank using a gravel cleaner or syphoning tube. This will help to eliminate any debris or sludge that may have settled on the bottom or in the substrate.
Next, use a sponge or clean cloth to wipe down the inside walls of the aquarium, as well as the filter intake tube and any other equipment. Be careful not to disturb the goldfish while performing this step. If you notice any slimy spots or algae, concentrate your cleaning efforts on those areas to ensure they are properly removed.
After cleaning the tank, it’s time to change some of the water. Fill a bucket with fresh water and treat it with a water dechlorinator. Tap water often contains chemicals such as chlorine or chloramine, which can be harmful to fish. Adding a few drops of a dechlorinator will neutralize these chemicals, making the water safe for your goldfish.
Now it’s time to address the gravel in your goldfish aquarium. Use a gravel cleaner or siphon to remove any excess debris from the substrate. Move the cleaner along the gravel, being careful not to disturb the goldfish or any decorations. Take your time and ensure that the gravel is well-cleaned before moving on to the next step.
Finally, it’s time to replace the water you removed earlier. Slowly pour the treated water back into the aquarium, being careful not to disturb the goldfish or create strong currents. Aim for a water level that reaches about two-thirds of the tank’s height. Check the temperature of the water using a thermometer and adjust, if necessary, to match the goldfish’s ideal temperature range, which is typically between 65 to 75 degrees Fahrenheit (18 to 24 degrees Celsius).
Once everything is done, take a step back and enjoy the view of your clean goldfish aquarium. Remember to wash your hands well after handling any aquarium equipment or water. With regular cleaning and maintenance, your goldfish will thrive in a clean and healthy environment.
- Step-by-Step Guide: Cleaning a Goldfish Aquarium
- 1. Gather the Essentials
- 2. Prepare the Aquarium
- 3. Clean the Aquarium
- 4. Clean the Decorations and Gravel
- 5. Reassemble the Aquarium
- 6. Introduce the Fish
- 7. Maintenance and Care
- Prepare the Necessary Equipment
- Empty the Aquarium
- Clean the Glass and Decorations
- Change the Water
- Trim Aquatic Plants
Step-by-Step Guide: Cleaning a Goldfish Aquarium
Goldfish aquariums require regular cleaning to maintain a healthy environment for your fish. By following these step-by-step instructions, you can ensure that your goldfish aquarium stays clean and your fish stay happy.
1. Gather the Essentials
- Bucket or container for storing water
- Siphoning tube
- Distilled water
- Aquarium-safe cleaning supplies (such as vinegar)
- Aquarium-safe decorations and gravel
- Aquarium thermometer
- Filter media (if applicable)
2. Prepare the Aquarium
- Turn off all electronic devices (such as filters and heaters).
- Remove any live plants or decorations and set them aside.
- Using the siphoning tube, start syphoning water from the aquarium into the bucket. Be careful not to suck up any gravel or fish.
3. Clean the Aquarium
While the water is being syphoned out, you can start cleaning the aquarium itself.
- Wipe the inside of the aquarium walls with a soft cloth to remove any algae or stains.
- If there are stubborn stains or mineral deposits, you can use a mixture of vinegar and water to clean them.
- Rinse the aquarium thoroughly with distilled water to remove any residue.
4. Clean the Decorations and Gravel

Now it’s time to clean the decorations and gravel.
- For non-porous decorations, such as plastic plants, you can use aquarium-safe cleaning supplies or wash them with warm water and a mild detergent.
- Porous decorations, such as rocks or driftwood, should be rinsed with warm water and scrubbed gently to remove any algae or debris.
- If the gravel is dirty, you can rinse it with warm water or use an aquarium siphon to clean it more thoroughly.
5. Reassemble the Aquarium
Once everything is clean, you can start putting the aquarium back together.
- Place the decorations back into the aquarium, making sure they are secure and arranged to your liking.
- Put the cleaned gravel back into the aquarium.
- Fill the aquarium with distilled water, making sure to leave enough space for your fish to swim comfortably.
6. Introduce the Fish
Before introducing the fish back into the aquarium, make sure the water is at the proper temperature and that the filtration system is working.
- Use a thermometer to check the water temperature. Goldfish prefer temperatures between 65-75°F (18-24°C).
- If needed, wait until the water is properly heated or cooled before adding the fish.
- Gently place your goldfish back into the aquarium, ensuring they are not in shock from the temperature change.
7. Maintenance and Care
Now that your goldfish aquarium is clean and your fish are back in their home, you need to take proper care of the aquarium to ensure their continued health and happiness.
- Monitor the water quality regularly, and conduct partial water changes (about 30%) every 1-2 weeks to keep the water clean.
- Feed your goldfish a balanced diet and avoid overfeeding.
- Keep an eye out for any signs of illness or stress in your fish.
- Trim any excess vegetation to maintain a clean and spacious environment for your goldfish.
- Regularly clean the filter media and replace it as needed.
By following this step-by-step guide, you can ensure that your goldfish aquarium is properly cleaned and maintained, providing a healthy and enjoyable life for your fish.
Prepare the Necessary Equipment
Before you start cleaning your goldfish aquarium, it’s important to gather all the necessary equipment to ensure that the process goes smoothly. Here are the items you’ll need:
- Undergravel filter: This is a common type of filtration system used in goldfish tanks. Make sure it is in good working condition.
- Glass cleaner or vinegar: To clean the panes of the aquarium and remove any algae or stains.
- Aquarium gravel vacuum: This device will help you clean the substrate and remove any debris or waste that has settled on the bottom.
- Bucket: You’ll need a clean bucket to hold the water that you remove from the tank during the cleaning process.
- Water conditioner: This is necessary to remove chlorine and other harmful chemicals from tap water before adding it back to the tank.
- Thermometer: To ensure that the water temperature is suitable for your goldfish.
- Scrub brush or sponge: Use this to clean any decorations that may have algae or other debris on them.
- Net: You’ll need a net to catch and remove your goldfish from the tank temporarily.
- Clean cloth or paper towels: To wipe down the inside of the tank and dry it before adding fresh water.
- Water testing kit: This will help you monitor the water quality and ensure that it is suitable for your goldfish.
Once you have all the necessary equipment, you’re ready to start cleaning your goldfish aquarium.
Empty the Aquarium
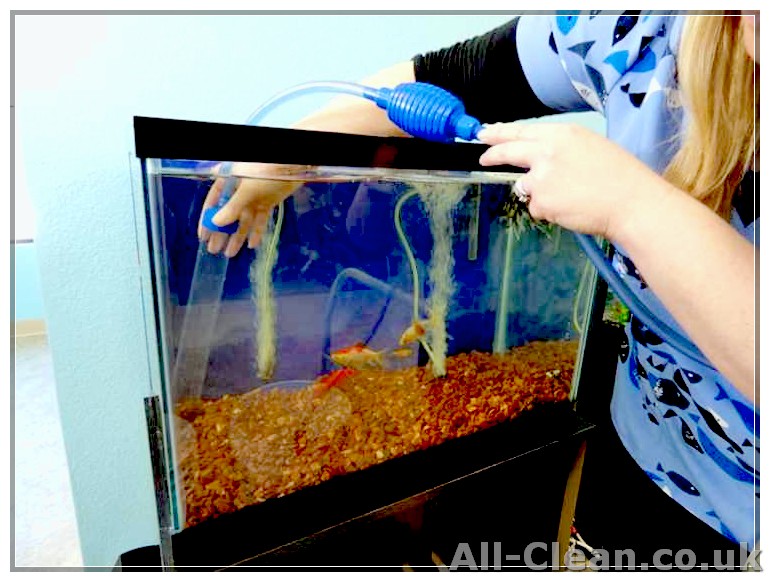
Emptying the aquarium is one of the most important steps in cleaning a goldfish aquarium. This step ensures that you remove old water and any waste or debris that may have accumulated in the tank.
Here’s what you need to do:
- Turn off the aquarium equipment: Before you start emptying the tank, turn off the heater, pump, and any other equipment that you have running. This will prevent any accidents and ensure that the water doesn’t drain too quickly.
- Remove the water: Use a siphon or a gravel vacuum to remove most of the water from the aquarium. Start at the bottom of the tank and work your way up, making sure to remove debris and waste as you go along. You can direct the water flow into a sink or a bucket.
- Clean the decorations: Take out any decorations or plants from the aquarium and give them a good rinse. Use a soft brush or sponge to gently scrub off any algae or stains. Be careful not to use any harsh chemicals or scrub too hard, as this can damage the decorations.
- Clean the filter: If your goldfish aquarium has a filter, now is the time to clean it. Follow the manufacturer’s instructions on how to remove and clean the filter. Generally, you will need to rinse the filter media in dechlorinated water to remove any accumulated debris.
- Scrub the tank walls: Use a clean sponge or an aquarium-safe algae scrubber to clean the inside walls of the tank. Be careful not to scratch the glass or acrylic. If there are stubborn algae spots, you can use a razor blade or a specific algae scraper to remove them.
- Clean the gravel or substrate: If you have gravel or substrate in your goldfish aquarium, use a gravel vacuum to remove any waste or debris from it. Gently move the vacuum in a back-and-forth motion to ensure that you clean the entire surface.
Once you have emptied and cleaned the aquarium, you can move on to the next step of refilling and treating the water in your goldfish aquarium.
Remember, regular aquarium maintenance is essential for keeping your goldfish healthy and happy. Cleaning the tank on a weekly basis will help to remove excess waste and maintain a clean environment for your goldfish to thrive.
Clean the Glass and Decorations
One of the most important steps in cleaning a goldfish aquarium is to clean the glass and decorations. This ensures a clear and healthy environment for your goldfish to thrive in.
Here are the steps to clean the glass and decorations:
- Start by gathering all the necessary supplies. You will need a glass cleaner (such as vinegar or an aquarium-safe cleaner), a sponge or scrub brush, and a bucket of water.
- Remove any large decorations or plants from the aquarium and place them in a separate container.
- Using a sponge or scrub brush, clean the glass panes of the aquarium. If there is any stubborn algae or bacterial matter, you may need to scrub a bit harder. Be careful not to scratch the glass.
- Once the glass is clean, rinse it thoroughly with clean water. You can use a siphon or a bucket to remove the dirty water.
- If you are using a glass cleaner, make sure to read the instructions and use it accordingly. Some cleaners may require you to let it sit for a few minutes before rinsing.
- To clean the decorations, you can scrub them using a sponge or brush. Be gentle so as not to disturb any live plants or delicate decorations.
- Rinse the decorations with clean water to remove any residue or cleaning solution. If necessary, you can use an aquarium-safe dechlorinator to remove any harmful chemicals.
- Inspect the decorations for any signs of damage or wear. If any decorations are broken or damaged, it is best to replace them.
- Once everything is clean and rinsed, you can place the decorations back in the aquarium.
Cleaning the glass and decorations of your goldfish aquarium is an important part of maintaining a healthy and clean environment. By following these steps regularly, you can ensure that your goldfish will live in a clean and enjoyable space.
Change the Water
- Keep a look out for signs that your goldfish’s water needs to be changed, such as cloudiness, strong odors, or excessive algae growth.
- Rather than doing a complete water change, it’s best to do regular partial water changes to maintain the balance in the aquarium.
- Start by assembling all the necessary equipment you’ll need for the water change: a clean bucket, a siphon or gravel vacuum, a dechlorinator, and a container for the removed water.
- Switch off any equipment in the aquarium, like heaters or filters, to prevent them from running dry and getting damaged during the water change.
- First, use the siphon or gravel vacuum to remove any excess debris or waste from the substrate. This will help to prevent it from releasing harmful contaminants into the water.
- Next, carefully remove about 25% of the old water from the aquarium. You can use a siphon or a clean hose to do this.
- When adding new water, make sure it is at the same temperature as the water in the aquarium. Goldfish prefer cooler water, so avoid using hot water.
- Add a dechlorinator to the new water to remove any chloramines or chlorine that may harm your goldfish. Follow the instructions on the dechlorinator bottle for the correct dosage.
- Gently pour the dechlorinated water back into the aquarium, taking care not to disturb the fish or the substrate too much.
- Finally, switch the equipment in the aquarium back on, and observe your goldfish to ensure they are swimming and behaving normally in their clean, fresh water.
Trim Aquatic Plants
Trimming aquatic plants is an essential task in maintaining a clean and healthy environment for your goldfish. Over time, plants may become overgrown and can obstruct the viewing area of your aquarium. Trimming them regularly ensures that your goldfish can enjoy a clear view and have enough space to swim.
Step 1: Gather the Essentials
Before getting started, make sure you have the necessary equipment and supplies. You will need a pair of sharp scissors or pruning shears specifically designed for aquatic plants. Also, prepare a clean cloth and a small container of water to soak the trimmed plant parts.
Step 2: Identify the Plants that Need Trimming
Take a close look at your aquarium and identify the plants that are looking overgrown or are obstructing the view. Hardy plant species such as Java fern, Anubias, or Amazon swords often require regular trimming.
Step 3: Carefully Trim the Plants
Start by removing the plant from the aquarium using gentle hands. Place it on a clean surface. Using the scissors or pruning shears, carefully trim the excess foliage. Be cautious not to damage the healthy parts of the plant while trimming.
Step 4: Remove any Dead or Dying Leaves
While trimming the plant, look for any dead or dying leaves. These should be removed as they can rot and release harmful bacteria into the water.
Step 5: Soak the Trimmed Plant Parts
After trimming, place the trimmed plant parts in a small container of clean water. This will help the plants recover and also prevent any shock that might occur when they are placed back in the aquarium.
Step 6: Clean the Aquarium
While the plants are soaking, take the opportunity to clean the aquarium. Use a gravel vacuum to remove any dirt or debris from the bottom of the tank. Scrub the glass sides of the aquarium with a cloth and a mild vinegar solution to remove any algae or hard water stains.
Step 7: Refilling the Tank
Once the trimming and cleaning are complete, you can now refill the tank with fresh water. Make sure to treat the tap water to remove any chlorine or other contaminants that might be harmful to the fish.
By following these steps and regularly trimming your aquatic plants, you can maintain a clean and healthy aquarium environment for your goldfish to thrive in. Enjoy the beauty of your underwater world!


