

If you use your computer frequently, you know how important it is to keep your keyboard clean. Over time, dust, dirt, and crumbs can build up between the keys, making it difficult to type. Luckily, there are several ways to clean your keyboard effectively. In this article, we will provide you with a step-by-step guide on how to clean your computer keyboard and keep it in top condition.
Before you start cleaning your keyboard, it’s essential to shut down your computer and unplug the keyboard from the USB port. This step will prevent any accidental damage to your computer and ensure your safety during the cleaning process. Once you’ve done that, it’s time to gather the necessary materials for the cleaning process.
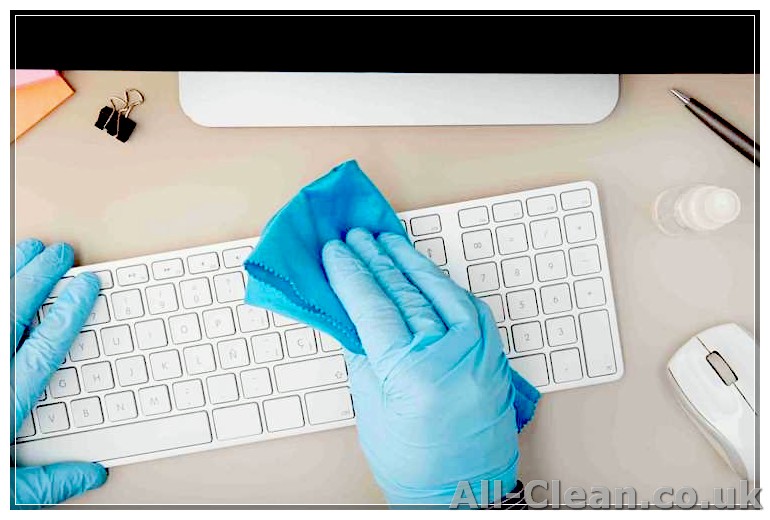
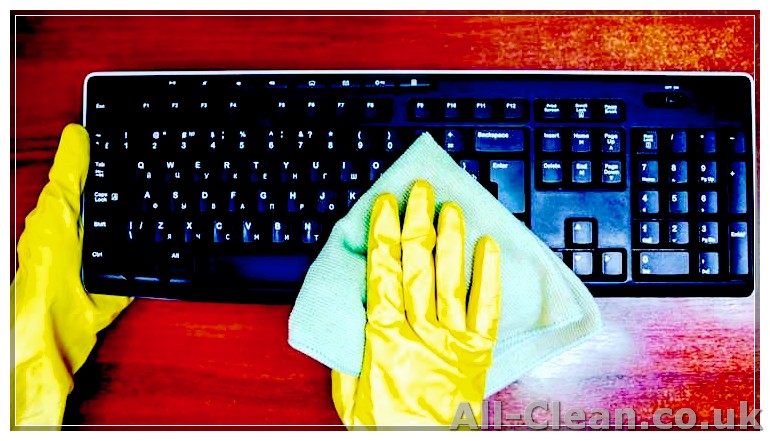
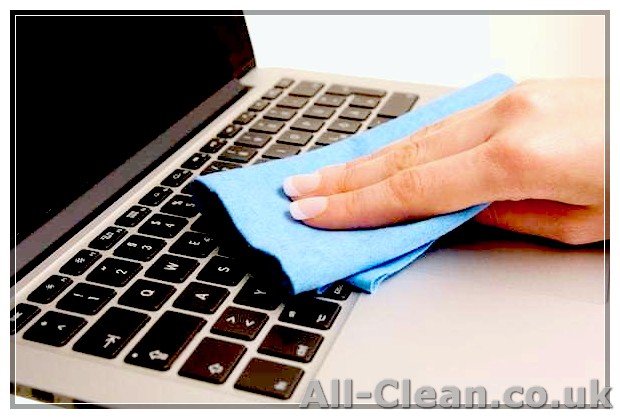
The easiest way to clean the surface of your keyboard is to wipe it with a damp cloth. You can use water or a gentle cleaning solution, like soapy water, to dampen the cloth. Gently wipe the keys and the surface of the keyboard, making sure to remove any dirt or grime. Be careful not to get the cloth too damp, as excess moisture can cause damage to the keyboard.
If you have a wireless keyboard or a keyboard with keys that are difficult to remove, you can use a vacuum cleaner with a brush attachment to remove any dust or crumbs between the keys. Alternatively, you can use a can of compressed air to blow the dust away. Just make sure to hold the can upright and use short bursts of air to avoid damaging the keyboard.
For keyboards with removable keys, such as mechanical keyboards, you have the option to remove the keys and clean them individually. This method allows for a more thorough cleaning, as you can reach the areas between the keys that are difficult to access otherwise. Use a keycap puller or a small flat tool, like a flathead screwdriver or a knife, to gently lift the keys off the keyboard. Once the keys are removed, clean them with a damp cloth or wash them with warm soapy water. Make sure to dry the keys thoroughly before reattaching them to the keyboard.
After cleaning your keyboard, it’s important to establish a regular cleaning routine to keep it in good condition. You can use a microfiber cloth to wipe the surface of your keyboard daily to remove any dust or dirt that may accumulate. Additionally, avoid eating or drinking near your keyboard to prevent any spills or crumbs from getting between the keys. Regularly vacuuming or blowing out the keyboard will also help to keep it clean and functional.
In summary, cleaning your computer keyboard doesn’t have to be a daunting task. By following these step-by-step instructions, you can easily remove dirt, dust, and crumbs that may be lurking between the keys. Remember to shut down your computer before cleaning, gather the necessary materials, and choose the cleaning method that suits your keyboard type. With regular maintenance, you can keep your keyboard clean and durable, ensuring a smooth and comfortable typing experience every time.
Gathering Supplies for Cleaning
Before you start cleaning your keyboard, you should gather all the necessary supplies. Here’s a list of the materials you’ll need:
- Keyboard cleaning gel or another suitable material
- Lint-free wipes or microfiber cloth
- Isopropyl alcohol (optional)
- Cotton swabs or small brushes
If you have a mechanical keyboard, you may also need a keycap puller for removing the keycaps. Additionally, some gaming keyboards may have special features or needs, so be sure to consult the user manual or contact the manufacturer for any specific recommendations.
A key point to remember is that for most keyboards, including wired, wireless, gaming, and laptop keyboards, it’s important to disconnect them from the computer before cleaning. This ensures that no moisture or liquids get into the computer and cause damage.
Now, let’s dive into a summary of the cleaning process and explore each step in more detail.
Cleaning the Keyboard
- Gather the necessary materials before starting the cleaning process. You will need a microfiber cloth, a can of compressed air, a small brush, and some specialist cleaning solution.
- Start by turning off your computer or disconnecting your wireless keyboard to avoid any accidental keystrokes that may cause harm.
- Take a closer look at your keyboard and assess what type of material it is made of. Different keyboards may require different cleaning methods.
- If you have a wired keyboard, unplug it from your computer. For wireless keyboards, remove the batteries.
- Use the can of compressed air to blow away any loose particles or debris from between the keys. This will help remove any dry dust or crumbs that may have accumulated.
- Use a small brush, such as a toothbrush or a specialized keyboard brush, to gently brush away any stubborn dirt or particles. Make sure to brush in between and around the keys.
- If your keyboard has a spill-resistant design, you can use a slightly dampened microfiber cloth with a small amount of specialist cleaning solution to wipe the keys. Be careful not to use too much solution, as excess moisture can damage the keyboard.
- If your keyboard does not have a spill-resistant design, it is best to avoid using any liquid cleaners. In this case, simply use a dry microfiber cloth to wipe away dirt and smudges.
- For keyboards with keycaps that are removable, you can easily remove them and clean them separately. Follow the manufacturer’s manual for instructions on how to remove and clean the keycaps.
- After cleaning, if you notice any discolored or sticky keys, you can use a mix of warm water and mild soap or a specialist cleaning solution to restore the appearance.
- Once you have finished cleaning the keys, let them dry completely before reattaching them to the keyboard.
- Finally, reconnect your wired keyboard or insert the batteries back into your wireless keyboard. Turn on your computer or connect your wireless keyboard, and your clean keyboard is ready to use!
Drying and Reassembling the Keyboard
After cleaning your keyboard, the next step is to dry it and reassemble it properly. Follow these simple steps to ensure that your keyboard is ready to use again:
- Turn off your computer: Before drying and reassembling your keyboard, it is important to turn off your computer or disconnect the keyboard if it is wired.
- Dry the keyboard: Use a clean cloth or towel to gently dry the keyboard. Ensure that all the moisture is removed to avoid any damage to the electrical components.
- Avoid using heat: Do not use hair dryers or other heat sources to dry your keyboard, as this may cause warping or damage to the keys.
- Let it air dry: Allow your keyboard to air dry completely before reassembling it. This may take several hours, so be patient.
- Reassemble the keyboard: Once your keyboard is dry, you can reassemble it by placing the keys back in their original positions. Make sure each key is securely attached to the keyboard.
- Test the keys: After reassembling the keyboard, test each key to ensure they are functioning properly. If any keys are not working, you may need to clean them again or consider seeking professional help.
By following these easy steps, you can effectively clean and restore your keyboard to its original condition. Regular keyboard cleaning is important to maintain its performance and longevity. Now that you know how to clean your keyboard, you can enjoy typing on a clean and hygienic surface!
Summary
Keeping your computer keyboard clean is essential for maintaining its performance and longevity. Dust, dirt, and other particles can accumulate between the keys, affecting the overall feel and function of the keyboard. In this guide, we’ll discuss the most effective ways to clean your computer keyboard, whether it’s wired or wireless.
Use a Microfibre Cloth
- A microfibre cloth is an excellent tool for cleaning a computer keyboard because it has fine fibers that can pick up dust and dirt without scratching the surface.
- Gently sweep the cloth between the keys to remove any visible particles. This method is especially useful for keyboards with low-profile or laptop-style keys.
- If the keys are particularly dirty, you can dampen the cloth with a small amount of water or a mild cleaning solution. Remember to wring out excess moisture before cleaning.
Compressed Air and Brushes
- Compressed air and small brushes are ideal for removing dust and other debris from hard-to-reach areas, such as under the keys or around the edges of the keyboard.
- Hold the keyboard upside down and use compressed air to blow away any loose particles. Be careful not to tilt the canister too much, as the moisture can damage the keyboard.
- Use a soft brush or a clean paintbrush to sweep away any stubborn dust or crumbs. Make sure to clean the bristles regularly to avoid spreading more dirt.
Specialist Cleaning Products
- If you have a mechanical keyboard or a keyboard with removable keycaps, you can consider using specialist cleaning products.
- There are cleaning solutions specifically designed for mechanical keyboards, such as hyperx keyboard cleaner, which can help restore the original feel and performance of the keys.
- Follow the manufacturer’s manual or instructions provided with the cleaning product to ensure proper usage and avoid damaging the keyboard.
Water and Liquid Cleaners
- Water or liquid cleaners should generally be avoided when cleaning a computer keyboard, especially if it’s not waterproof or if it’s wireless.
- If you still want to use liquid cleaners, make sure to apply them to a cloth or sponge first and then gently wipe the keys and the surface of the keyboard.
- Dry the keyboard thoroughly after cleaning to prevent any moisture from seeping into the internal components and causing damage.
By following these cleaning techniques, you can keep your computer keyboard clean and in optimal condition. Remember to disconnect wired keyboards and remove batteries from wireless keyboards before cleaning to avoid any electrical or connectivity issues. Regular cleaning will not only make your keyboard look better but also ensure smooth and accurate keystrokes.


