
Seat belts are an important safety feature in any vehicle, but over time they can become dirty and stained. Whether it’s spilled coffee, food crumbs, or just general dirt and grime, keeping your seat belts clean is essential for both hygiene and appearance. In this ultimate guide, we’ll walk you through the 7 easy steps to follow to clean your seat belts thoroughly and effectively.
Step 1: Gather the necessary items. To clean your seat belts, you’ll need a mild cleaner, warm water, a soft towel or sponge, and a toothbrush. You may also want to gather some additional items like a stain remover or upholstery protectant.
Step 2: Start by removing any excess dirt or debris. Use a soft brush or your fingers to gently brush off any loose particles from the seat belts. Be sure to focus on the areas where the belts retract, as these spots can accumulate more dirt and grime.
Step 3: Prepare a cleaning solution. Mix a mild cleaner with warm water in a small bucket or bowl. Follow the instructions on the cleaner for the appropriate dilution ratio.
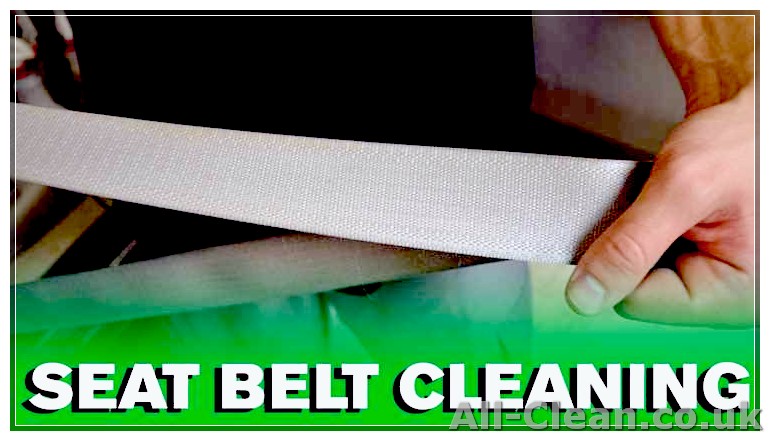
Step 4: Apply the cleaning solution to the seat belts. Dip a soft towel or sponge into the cleaning solution and gently scrub the seat belts, starting from the top and working your way down. Be thorough, paying attention to both sides of the belts and any stains or odors.
Step 5: Use a toothbrush to tackle tough stains. For stubborn stains, a toothbrush can be a useful tool. Gently scrub the stained area in a circular motion, being careful not to apply too much pressure that could damage the seat belts.
Step 6: Wipe down the seat belts with a clean towel. Once you’ve thoroughly cleaned the seat belts, use a clean towel to wipe away any excess moisture and cleaner. The seat belts should be left damp but not dripping wet.
Step 7: Let the seat belts air dry. Hang the seat belts up or lay them flat in a well-ventilated area to dry overnight. Avoid using heat or direct sunlight, as this can cause the belts to fade or shrink. Once the seat belts are completely dry, give them a final wipe-down with a dry towel to remove any remaining moisture.
By following these 7 easy steps, you can effectively clean your seat belts and keep them looking and smelling fresh. Regular seat belt cleaning not only improves the appearance of your vehicle’s interior, but it also helps to protect the belts and extend their lifespan. So, take the time to clean your seat belts at least two to four times a year, and enjoy a safer, cleaner, and more comfortable ride.
- Why Cleaning Seat Belts Is Important
- Step One: Preparation
- What You Will Need:
- Setup:
- Step Two: Pull The Belt All The Way Out
- Step Three: Spot Cleaning
- 1. Gather the necessary materials
- 2. Close the clamps
- 3. Apply the spot cleaning solution
- 4. Gently scrub the stain
- 5. Wipe away the excess solution
- 6. Repeat if necessary
- 7. Let it dry
- Step Four: Soap and Water Solution
- Step Five: Drying The Seat Belts
- Step Six: Finishing Touches and Maintenance
- 1. Pat the Belts Dry
- 2. Inspect for Stains and Dirt
- 3. Use a Zipper Lubricant
- 4. Keep the Belts in a Safe Position
- 5. Regularly Wipe Down the Belts
- 6. Avoid Harsh Cleaning Solutions
- 7. Protect Your Seat Belts
Why Cleaning Seat Belts Is Important
Keeping your seat belts clean is essential to maintain their functionality and prolong their lifespan. There are several reasons why cleaning seat belts should be a regular part of your car maintenance routine.
- Moldy and mildew-free: Seat belts can become moldy and develop mildew if not cleaned regularly. These harmful substances can lead to health issues and unpleasant odors in your vehicle. Cleaning the seat belts helps to prevent the growth of mold and keep them fresh.
- Protection against stains: Seat belts are exposed to various types of stains, such as food spills, coffee, or makeup. Proper cleaning helps to remove these stains and keeps your seat belts looking clean and presentable.
- Eliminates odors: Over time, seat belts can absorb odors from sweat, food, and other sources. Regular washing helps to remove these odors and keep your car smelling fresh.
- Prevents transfer of dirt and moisture: Dirty seat belts can transfer dirt and moisture to your clothes, causing stains and discomfort. Cleaning seat belts ensures that they remain free from dirt and moisture, providing a clean and comfortable driving experience.
- Prolongs the lifespan: Regular cleaning and maintenance can extend the lifespan of your seat belts. By keeping them clean and free from dirt and debris, you reduce the chances of them getting damaged or worn out quickly.
As you can see, cleaning your seat belts is an important task that should not be overlooked. It helps to keep them in good condition, free from stains and odors, and ensures that they function properly when you need them the most.
Step One: Preparation
Before you start cleaning your seat belts, it is important to prepare the necessary materials and set up your work area properly. By following this step, you can ensure that the cleaning process goes smoothly and efficiently.
What You Will Need:
- A soft-bristle brush
- A mild detergent or fabric cleaner
- A clean cloth or sponge
- A bucket of warm water
- A spray bottle filled with water
- A clean towel or paper towels
- Optional: a small fan or hairdryer
Setup:
- Start by reading the manufacturer’s instructions for cleaning seat belts. This will help you understand any specific guidelines or precautions you need to follow.
- Find a well-ventilated area to work in, preferably outdoors or in a garage with good airflow. This will help prevent any odors from lingering inside your vehicle.
- Protect the surrounding interior of your car by placing towels or plastic bags over the seats and below the seat belts. This will catch any dripping water or cleaning solution.
- Ensure that the seat belts are fully extended before starting the cleaning process. This will make it easier to access all areas of the belts and prevent any tangling.
- Inspect the seat belts for any stains or moldy areas. If you notice any significant stains or mold, it is best to consult a professional cleaner to avoid damaging the seat belts.
- If there are any loose dirt or debris on the seat belts, gently brush them off with a soft-bristle brush before proceeding.
- Check for any loose or broken clamp mechanisms on the seat belts. If you find any issues, it is important to get them fixed before cleaning to avoid any further damage.
By following these preparation steps, you can ensure that your seat belts are ready to be thoroughly cleaned from any dirt, stains, or odor that may have accumulated over time.
Step Two: Pull The Belt All The Way Out
Once you have set up your cleaning area, it’s time to start cleaning the seat belts. The second step is to pull the belt all the way out of its retractor. Be sure to handle the belt with care to avoid any damage or injury.
When you have pulled the belt out completely, inspect it for any signs of dirt, stains, or mold. If you notice any moldy or mildew spots, it’s important to address them as soon as possible to prevent further growth. Mold and mildew can not only be unsightly, but they can also cause unpleasant odors and even health issues.
Before you start cleaning the seat belt, make sure you have all the necessary supplies on hand. You will need a mild soap or fabric cleaner, warm water, a soft-bristle brush or sponge, a microfiber towel, and optionally, a toothbrush or cotton swabs for hard-to-reach areas.
Start by wetting the seat belt with warm water to loosen any dirt or debris. Then, apply a small amount of mild soap or fabric cleaner to the belt. Gently scrub the belt using the soft-bristle brush or sponge, paying extra attention to any stubborn stains or mold spots.
Be careful not to scrub too hard or use any abrasive cleaners, as this could damage the seat belt material. You want to clean the seat belt thoroughly without causing any harm.
After scrubbing, rinse the seat belt with warm water to remove any soap residue. You may need to repeat this step a few times to ensure all the soap is gone.
Next, use a microfiber towel to gently wipe off any excess water from the seat belt. Make sure to dry both sides of the belt to prevent the growth of mold or bacteria.
If you notice any lingering odor on the seat belt after cleaning, you can try a few different methods to eliminate it. One simple option is to sprinkle baking soda on the belt and let it sit for a few hours or overnight. The baking soda will help absorb any odors, and you can then vacuum or wipe it off.
Another option is to use a fabric refresher or odor eliminator specifically designed for car interiors. Follow the instructions on the product for best results.
Once the seat belt is clean and dry, you can retract it back into its original position. Make sure to guide the belt carefully to avoid any twists or tangles. It should move smoothly without any stiffness or clamps.
In conclusion, pulling the seat belt all the way out is the second step in the seat belt cleaning process. By following these easy steps and using the right cleaning techniques, you can keep your seat belts clean, fresh, and odor-free. Remember to always take care when handling seat belts and use the appropriate cleaning supplies for better results.
Step Three: Spot Cleaning
When it comes to seat belts, there are bound to be some stains that can’t be removed with a simple wipe. That’s where spot cleaning comes in handy. In this step, we’ll provide you with some tips on how to effectively spot clean your seat belts.
1. Gather the necessary materials
Before you begin, make sure you have the following materials:
- Clamps
- A general towel
- Spot cleaning solutions
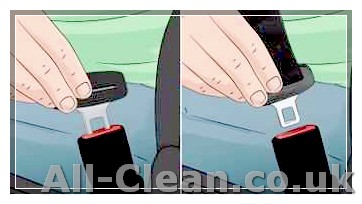
2. Close the clamps
First, close the clamps on the seat belts to hold them in place. This will make it easier for you to spot clean without the belts moving around.
3. Apply the spot cleaning solution
Take a small amount of the spot cleaning solution and apply it directly onto the stained area of the seat belt. Be sure to follow the instructions on the cleaning solution for the best results.
4. Gently scrub the stain
Using a towel or brush, gently scrub the stain in a downward motion. Be careful not to apply too much pressure, as this could damage the seat belt.
5. Wipe away the excess solution
Take a clean towel and wipe away any excess cleaning solution. Make sure to pat the area dry instead of rubbing, as this will help to prevent odors from developing.
6. Repeat if necessary
If the stain is particularly stubborn, you may need to repeat the spot cleaning process a few times. Be patient and continue until the stain is gone.
7. Let it dry
After spot cleaning, leave the seat belt to air dry. It’s important to ensure that the belt is completely dry before using it again, as a damp belt can attract bacteria and odors.
In conclusion, spot cleaning your seat belts is an important step in keeping them clean and fresh. By following these seven easy steps, you can effectively remove stains and keep your seat belts looking their best. Remember to always stay safe and clean!
Step Four: Soap and Water Solution
Now that you have vacuumed off any loose dust and dirt from your seat belts, it’s time to move on to Step Four: Cleaning with a soap and water solution. This step is important for removing any leftover stains, odors, or moisture that may be trapped in the seat belts.
To clean your seat belts, you will need a mild dish soap, warm water, and a clean cloth or sponge. Fill a bucket or basin with warm water and add a few drops of dish soap. Mix the soap and water together until it forms a soapy solution.
- Start by extending the seatbelt all the way out, making sure to securely clamp it to avoid it from retracting back.
- Dip your cloth or sponge into the soap and water solution, making sure to wring out any excess liquid.
- Gently scrub the seatbelt with the cloth or sponge, starting from the top and working your way down to the bottom. Pay extra attention to any stubborn stains or areas where sweat or other odors may have accumulated.
- Be careful not to scrub too hard, as this can damage the seatbelt material.
- Once you have scrubbed the seatbelt thoroughly, use a clean cloth or sponge to wipe away any soap residue.
- Rinse the cloth or sponge with clean water and wipe down the seatbelt again to remove any remaining soap.
- Allow the seatbelt to air dry fully before retracting it back into the car. This will ensure that no moisture is left behind, which can lead to mold or mildew growth and create an unpleasant odor.
It’s also worth noting that using a mixture of water and fabric cleaner designed for car interiors can be effective for removing any stubborn stains or odors. Just make sure to follow the instructions on the cleaner and test it on a small, inconspicuous area of the seatbelt before applying it to the entire belt.
By following these steps, you can keep your seat belts clean and fresh, ensuring that your car’s interior remains safe and well-maintained. And with just a little extra time and effort, your seat belts will be looking as good as new!
Step Five: Drying The Seat Belts
After cleaning the seat belts, it is important to dry them properly to avoid any mold or mildew. Here are the steps to follow:
- Gather your materials: clean dry towels.
- Start by removing the excess moisture: Use the clean dry towels to gently blot the seat belts. Be sure to remove as much moisture as possible.
- Hang the seat belts: Find a suitable location, such as a clothesline or a sturdy rod, to hang the seat belts. Make sure they are hung straight and without any folds or twists.
- Allow the seat belts to air dry: Leave the seat belts hanging until they are completely dry. Depending on the temperature and humidity, this may take several hours or overnight.
- Check for any leftover moisture: Once the seat belts feel dry to the touch, gently feel along the entire length to ensure there is no moisture remaining.
- Inspect for any stains or residue: If you notice any stains or residue that didn’t come off during the cleaning process, you can spot clean them using a mild upholstery cleaner and a soft brush. Be sure to test the cleaner in an inconspicuous area first to avoid any damage.
- Return the seat belts to their original position: Once the seat belts are thoroughly dry and clean, you can return them to their original position in your vehicle. Make sure they are retracting and functioning properly.
Properly drying the seat belts is an important step to ensure they stay clean and free of mold or mildew. By following these steps, you can ensure that your seat belts are fresh and ready to use.
Step Six: Finishing Touches and Maintenance
After completing the cleaning process, it’s important to take some additional steps to ensure that your seat belts stay clean and in good condition. Here are some tips for finishing touches and ongoing maintenance:
1. Pat the Belts Dry
Before retracting the seat belts, make sure they are completely dry. You can use a clean towel to gently pat them down and remove any excess moisture. This will help prevent mold or mildew from forming.
2. Inspect for Stains and Dirt
Take a close look at the seat belts and make sure that all stains and dirt have been removed. If you notice any remaining spots, repeat the cleaning process for those areas.
3. Use a Zipper Lubricant
If you find that the seat belts are not retracting smoothly, use a zipper lubricant to improve their functionality. Apply a small amount of lubricant to a clean towel and wipe it along the entire length of the belts.
4. Keep the Belts in a Safe Position

When not in use, it’s important to keep the seat belts in a safe position to avoid any damage. Make sure they are fully extended and hang down by the sides of the car seats. This will also make it easier to buckle up when getting back into the car.
5. Regularly Wipe Down the Belts
To maintain the cleanliness of your seat belts, regularly wipe them down with a damp cloth. This will help remove any dust, sweat, or other dirt that may accumulate over time.
6. Avoid Harsh Cleaning Solutions
When cleaning your seat belts, always use mild cleaning solutions and avoid harsh chemicals or abrasive cleaners. These can cause damage to the fabric or hardware of the belts.
7. Protect Your Seat Belts
To further protect your seat belts from dirt and stains, consider using seat belt covers or pads. These can be placed over the belts and easily removed for washing.
By following these simple steps and practicing regular maintenance, you can keep your seat belts clean and in good condition for years to come.


