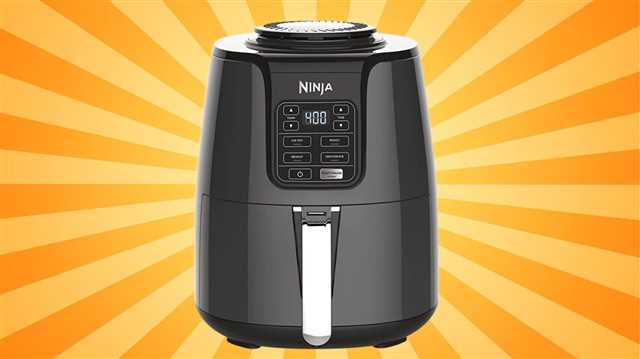
![Easy Steps to Clean and Restore Your Ninja Air Fryer to Its Original Glory - 2023 Guide [2023]](/wp-content/images/easy-steps-to-clean-and-restore-your-ninja-air-fryer-to-its-original-g.jpg "How to Clean and Restore Your Ninja Air Fryer to Its Original Glory - 2023 Guide")
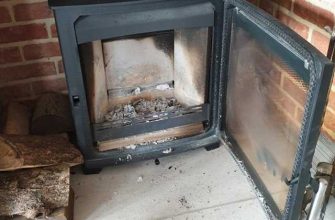
If you’re a fan of tasty and healthy cooking, you probably know the joys of using an air fryer. This versatile kitchen gadget can cook all your favorite dishes with less oil, giving them a crispy and delicious taste. However, like any cooking appliance, your Ninja Air Fryer needs regular cleaning to keep it in top shape.
Cleaning your Ninja Air Fryer is easier than you may think. The first step is to unplug the fryer and let it cool down completely. Once it’s cooled, wipe the exterior with a damp cloth to remove any dust or dirt that may have accumulated. For more stubborn stains or baked-on grease, you can use a mild liquid cleaner and a soft brush to scrub the surface.
When it comes to cleaning the interior of your Ninja Air Fryer, there are a few different ways to go about it. If your fryer has a removable crisper, you can simply take it out and wash it with warm soapy water. For models without a removable crisper, you can use a sponge or a brush to clean the inside of the fryer, being careful not to get any water or liquid in the heating element.
Another essential part of cleaning your Ninja Air Fryer is cleaning the lid and the baskets. For the lids, wipe them down with a damp cloth. For the baskets, you can soak them in warm soapy water and scrub them clean, or you can even place them in the dishwasher if your fryer is dishwasher safe. Just make sure to follow the manufacturer’s instructions for your specific model.
One trick to getting rid of stubborn stains and odors is to use baking soda. Simply make a paste with baking soda and water and apply it to the stained areas. Let it sit for a few minutes, then scrub it off with a brush or sponge. This method is particularly effective for removing tough stains and odors.
By following these easy steps, you can keep your Ninja Air Fryer clean and in top condition. Regular cleaning will not only help your fryer last longer, but it will also ensure that your food is cooked to perfection every single time. So why not give your Ninja Air Fryer the cleaning it deserves and enjoy delicious and healthy meals without any hassle?
Image source: Ninja
- Step 1: Preparing for Cleaning
- Step 2: Cleaning the Exterior
- 1. Gather Your Cleaning Supplies
- 2. Unplug and Cool Down
- 3. Wipe Down the Exterior
- 4. Use a Cleaning Solution
- 5. Clean Those Difficult Nooks and Crannies
- 6. Polish with a Microfiber Cloth
- 7. Let it Dry Completely
- Step 3: Cleaning the Interior
- Step 4: Restoring to Its Original Glory
- 1. Clean the Whole Cooker
- 2. Restore the Air Fryer Baskets
- 3. Handle the Digital Control Panel with Care
- 4. Reassemble and Test
- Video:
- HOW TO CLEAN AIR FRYER | BEST WAY TO DEEP CLEAN NINJA 15 in 1 | Easy Method to clean your Air Fryer
Step 1: Preparing for Cleaning
- Start by unplugging the Ninja air fryer to ensure your safety throughout the cleaning process.
- Let the fryer and its components cool down before you begin cleaning.
- Read the latest instructions provided by Ninja for the best cleaning tips and techniques.
- Gather all the necessary cleaning materials, such as sponges, dish soap, cleaner, and cleaning agent.
- Wash your hands thoroughly before handling any parts of the air fryer.
To get started with the actual cleaning process, follow the steps below:
- Remove the cooking basket and the crisper plate from the fryer. These are the parts that have direct contact with food, so it’s essential to clean them thoroughly.
- Fill your sink or a large dish with warm, soapy water and soak the basket and crisper plate for a few minutes to loosen any stubborn food residues.
- While the parts are soaking, use a damp cloth or sponge to wipe down the exterior of the air fryer, including the control panel and the lid.
- For tough stains or debris on the exterior surface, use a mild cleaner or a mixture of baking soda and water. Be careful not to use abrasive materials or harsh chemicals that could damage the fryer.
- After the soaking period, scrub the basket and crisper plate with a sponge or non-abrasive brush to remove any remaining food particles. Rinse them thoroughly with water.
- Use a damp cloth or sponge to wipe down the interior of the fryer. Pay close attention to the heating element and fan area, as these tend to accumulate grease and oil.
- If your Ninja air fryer has a dual-basket or a combo unit, clean each basket and tray separately.
- For particularly stubborn residues or grease buildup, you can use a mild cleaning agent specifically designed for air fryers.
- Make sure to dry all the cleaned parts thoroughly before reassembling the fryer.
- Once everything is dry, reassemble the air fryer according to the manufacturer’s instructions.
Cleaning your Ninja air fryer regularly will not only ensure its optimal performance but also prolong its lifespan. By following these steps and maintaining proper cleaning habits, you can enjoy tasty and healthy meals for years to come.
Step 2: Cleaning the Exterior
Once you’re done cleaning the interior of your Ninja Air Fryer, it’s time to move on to the exterior. Keeping the exterior of your air fryer clean is just as important as cleaning the inside, as it helps maintain its appearance and prolong its lifespan.
1. Gather Your Cleaning Supplies
Before you start cleaning, make sure you have all the necessary cleaning supplies. You will need:
- Dish soap or a mild cleaning agent
- Sponges or soft cloths
- A non-abrasive scrub brush
- A microfiber cloth for polishing
2. Unplug and Cool Down
Before you begin cleaning the exterior, make sure to unplug your Ninja Air Fryer and let it cool down completely. This will prevent any accidental burns or electrical hazards while cleaning.
3. Wipe Down the Exterior
Start by wiping down the exterior using a damp sponge or cloth. This will remove any loose dirt or debris on the surface. Be sure to pay extra attention to any areas where food may have splattered or dripped during cooking.
4. Use a Cleaning Solution
If there are any tough stains or grease on the exterior, you may need to use a mild cleaning solution. Mix a small amount of dish soap or a mild cleaning agent with warm water in a bowl. Dip a sponge or cloth into the solution, wring out the excess, and gently scrub the stained areas.
5. Clean Those Difficult Nooks and Crannies
Use a soft brush or a toothbrush to clean those tight or hard-to-reach areas, such as the buttons, hinges, and crevices. This will ensure that the whole exterior is clean and free from any residue.
6. Polish with a Microfiber Cloth
After cleaning, use a dry microfiber cloth to polish the exterior of your Ninja Air Fryer. This will give it a shiny and polished look. Make sure to wipe in the direction of the grain on stainless steel surfaces for the best results.
7. Let it Dry Completely
Allow the exterior of your air fryer to air dry completely before plugging it back in. This will prevent any moisture from damaging the electrical components.
Cleaning the exterior of your Ninja Air Fryer is a relatively simple process that can be done regularly to maintain its appearance and functionality. Follow these easy steps, and your air fryer will be back to its original glory in no time!
Step 3: Cleaning the Interior
Once you’ve cleaned the exterior of your Ninja Air Fryer, it’s time to move on to the interior. Follow these easy steps to ensure a thorough cleaning:
- Start by unplugging your Ninja Air Fryer to ensure your safety while cleaning.
- Remove the baskets and plates from the interior of the air fryer.
- Wash the baskets and plates with warm, soapy water, or place them in your dishwasher for an even easier clean-up.
- While the baskets and plates are being cleaned, you can focus on the interior of the air fryer.
- Dampen a sponge or cloth with warm, soapy water and wipe down the interior of the air fryer. Pay extra attention to any tough stains or debris that may be present.
- If there are any remaining tough stains, you can try using a non-abrasive cleaning agent to help remove them. Make sure to follow the manufacturer’s instructions and test the cleaning agent on a small, inconspicuous area first.
- For the most difficult-to-reach areas, use a small brush or toothbrush to scrub away any debris. You can also use a Q-tip or cotton swab to get into small nooks and crannies.
- Once you’ve cleaned the interior to your satisfaction, wipe it down with a damp cloth to remove any remaining soap or cleaning agent.
- Make sure the interior is completely dry before reassembling the air fryer.
- When cleaning the exterior of your Ninja Air Fryer, always remember to keep the control panel and cord out of any water or cleaning solutions. Simply wipe them down with a damp cloth.
- Finally, plug your Ninja Air Fryer back in and you’re ready to start cooking again!
Cleaning the interior of your Ninja Air Fryer may seem like a tough task, but following these steps will ensure a thorough and speedy cleaning process. With improved cleaning materials and techniques, keeping your air fryer in its best condition is easier than ever in 2023. So, let the Ninja Air Fryer make your cooking experience a breeze, and enjoy your delicious creations!
Step 4: Restoring to Its Original Glory
Now that you’ve cleaned the individual parts of your Ninja Air Fryer, it’s time to restore it to its original glory. Follow these easy steps to bring back the shine and ensure your air fryer is ready for your next cooking adventure.
1. Clean the Whole Cooker
Start by wiping down the whole cooker with a damp cloth. Make sure to remove any leftover cleaning solution or residues from the cleaning process. Pay particular attention to the lid, handles, and any other nooks and crannies where dirt and grime may accumulate. This step will give your Ninja Air Fryer a fresh, clean look.
2. Restore the Air Fryer Baskets
If your air fryer has removable baskets, clean them thoroughly to eliminate any stubborn residues. Scrub the baskets gently with a soft brush or sponge to avoid scratching the surface. For tough build-up, you can use a baking soda and water paste or a commercial cleaner specifically formulated for air fryers. Rinse the baskets well and make sure they are completely dry before reassembling.
3. Handle the Digital Control Panel with Care
The digital control panel is a crucial part of your Ninja Air Fryer, so it’s important to clean it without damaging any components. Use a slightly damp cloth to wipe down the panel, avoiding excessive moisture to prevent any damage to the electronics. Gently remove any food residues or build-up, keeping the control panel clean and functioning properly.
4. Reassemble and Test
Once you’ve cleaned all the individual parts and restored the cooker, it’s time to reassemble everything. Place the baskets back into the air fryer and ensure they are securely in place. Double-check that the lid is properly aligned and closes tightly. Now, plug in the air fryer and test it to ensure it’s working correctly. You can run a short test cycle with no food, allowing the air fryer to heat up and circulate air. This step will help remove any remaining cleaning solution or odors.
By following these steps, you can restore your Ninja Air Fryer to its original glory without any difficulties. Keep your air fryer clean and well-maintained, and it will continue to deliver tasty and healthy meals for years to come!