
If you’re a pro at making your own candles or you enjoy the soothing and aromatic experience of wax melts, you know the importance of keeping your wax warmer clean. Regular maintenance is necessary to ensure that your warmer functions properly and to avoid any potential fire hazards. In this article, we will discuss the steps you need to take to clean your wax warmer in the most effective way, so you can continue enjoying its benefits for years to come.
Before we dive into the cleaning process, there are a few precautions you should keep in mind. First and foremost, always make sure the warmer is unplugged and cooled down to room temperature before attempting any cleaning. This will ensure your safety and the longevity of your wax warmer. Additionally, be cautious of any hardened wax that may be stuck to the surfaces inside the warmer, as it can be hard to remove.
When you’re ready to begin cleaning, gather your supplies. You will need a few towels, some warm water, mild dish soap, and a butter knife or any other non-abrasive tool to gently remove the hardened wax. If the wax has hardened too much to be easily removed, you can place the warmer in the freezer for a few hours to make it easier to scrape off.
To clean the outside of the warmer, simply wipe it down with a damp towel and mild dish soap. Be careful not to get water inside the warmer, as it can damage the electrical components. If there are any stubborn stains, you can use a mild cleaner suitable for the material of your warmer.
Now, let’s move on to the inside of the warmer. Start by removing the dish or pot that holds the wax melts. If there is any leftover melted wax, pour it into a disposable container for recycling or dispose of it according to your local waste management guidelines. Use the butter knife or non-abrasive tool to gently scrape off any hardened wax from the dish or pot.
Once the dish or pot is clean, wash it thoroughly with warm water and mild dish soap. Pay special attention to any corners or crevices where wax may have accumulated. Rinse it well and dry it completely before placing it back into the warmer.
Finally, give the outside of the warmer one last wipe down, making sure it is free from any cleanser residue. Plug the warmer back in and you’re ready to enjoy your favorite wax melts once again!
In conclusion, cleaning your wax warmer is an important step in maintaining its functionality and safety. By following the right steps and taking proper precautions, you can ensure that your investment lasts for many more enjoyable wax melting sessions. Remember to always unplug and cool down the warmer before cleaning, and be cautious with hardened wax. With these tips and tricks, you can keep your wax warmer in top condition and continue to enjoy its therapeutic and aromatic benefits for years to come.
- Stick it in the Freezer
- How to Clean a Wax Warmer Step-by-Step
- Hard Wax Warmer Cleaning Supplies
- Key Takeaways
- Ways To Clean Out Your Wax Warmer
- 1. Replacing the Wax
- 2. Using a Wax Warmer Cleaner
- 3. Boiling Water Method
- 4. Freeze and Wipe Method
- 5. Additional Cleaning Tips
- The Fire Starter
- Why Cleaning Is Important
- Tools and Supplies You’ll Need
- Cleaning Tips
- Fire Safety Precautions
- Tips and Takeaway
- 1. Start with the right supplies:
- 2. Safely remove hardened wax:
- 3. Follow a step-by-step cleaning process:
- 4. Take precautions for a safe cleaning process:
- How to Clean Your Hard Wax Warmer
- 1. Gather Your Cleaning Supplies
- 2. Take Precautions
- 3. Remove Most of the Wax
- 4. Clean the Pot
- 5. Clean the Exterior
- 6. Final Steps
- Additional Tips and Precautions
- Video:
- How To Clean A Wax Warmer
Stick it in the Freezer
One of the ways to clean a wax warmer is to stick it in the freezer. This method is effective in removing the melted wax from the warmer, making it easier to clean.
To clean your wax warmer using this method, follow the step-by-step instructions below:
- Begin by turning off the wax warmer and letting it cool down. Make sure it is not too hot to handle.
- Once the wax warmer has cooled down, remove any leftover wax from the dish or pot. You can do this by gently scraping it off with a spoon or a wax removal tool.
- Next, place the wax warmer in a plastic bag and seal it tightly. This will prevent any liquid from getting into the freezer and causing a mess.
- Place the wax warmer in the freezer and let it sit for at least one hour. The low temperature will cause the wax to harden and shrink, making it easier to remove.
- After the hour has passed, take the wax warmer out of the freezer and remove it from the plastic bag. You will notice that the wax has solidified and shrunk, making it easier to clean.
- Use a clean cloth or paper towels to wipe away the hardened wax. Make sure to wipe all surfaces, including the dish or pot and the outside of the warmer.
- If there are any stubborn bits of wax left, you can use a cotton ball or a Q-tip dipped in rubbing alcohol to remove them.
- Finally, wash the dish or pot with warm, soapy water to remove any residue. Rinse it thoroughly and dry it with a clean towel.
By following these steps, you can effectively clean your wax warmer and keep it in good condition for future use. Remember to take safety precautions when using a wax warmer, such as avoiding burns and keeping flammable items away from the heat source.
If you’re thinking about replacing your wax warmer or are looking for other ways to clean it, there are a few things to keep in mind:
- Stick to the manufacturer’s cleaning instructions if they are available.
- If you’re using a wax warmer with a removable dish or pot, it’s easier to clean and maintain.
- Consider using a wax warmer liner to make cleaning easier and avoid any spills or messes.
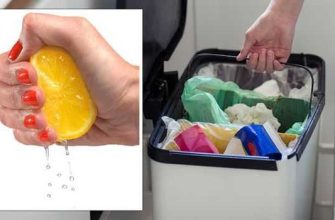
- Recycling is also an option for disposing of the melted wax. Make sure to check the recycling guidelines in your area before doing so.
So, next time you need to clean your wax warmer, give the freezer method a try. It’s a simple and effective way to remove melted wax and keep your warmer in good condition.
How to Clean a Wax Warmer Step-by-Step
Keeping your wax warmer clean is an essential part of maintaining its functionality and prolonging its lifespan. Follow these step-by-step instructions to ensure that your wax warmer stays in great shape:
- Before cleaning your wax warmer, make sure that it is unplugged and has cooled down to room temperature. Cleaning it while it is still hot can cause burns.
- Prepare your cleaning supplies, including cotton wipes or paper towels, a mild cleaner, and warm water.
- Find a suitable place to clean your wax warmer, preferably a flat and stable surface.
- Thoroughly wipe the exterior of the wax warmer with a damp cloth or wipes to remove any dust or residue.
- If your wax warmer has a removable dish or pot, carefully remove it and set it aside.
- Empty any melted wax from the dish or pot, either by pouring it into a heat-safe container or allowing it to solidify and then gently removing it with a spatula.
- If there are any hard wax residues stuck to the dish or pot, place it in a pot of boiling water for a few minutes to melt the wax. Use caution while handling hot water.
- Once the wax has melted, carefully pour out the water, ensuring that it drains away safely without splashing.
- Use a cloth or sponge to wipe the dish or pot clean, removing any remaining wax or residue.
- For additional cleaning, you can use a mild cleaner diluted in warm water. Gently scrub the dish or pot using a sponge or cloth.
- Rinse the dish or pot thoroughly with warm water to remove any traces of the cleaner.
- Wipe the exterior of the wax warmer with a damp cloth or wipes again to ensure that it is fully clean.
- Allow both the dish or pot and the exterior of the wax warmer to air dry completely before reassembling and using them again.
By following these step-by-step instructions, you can safely and effectively clean your wax warmer, ensuring that it remains in good condition and continues to perform well. Remember to always take the necessary precautions when handling hot surfaces or boiling water, and avoid using abrasive or harsh cleaners that may damage your wax warmer. Taking care of your wax warmer is an investment that will pay off in the long run, so make sure to keep it clean and well-maintained.
Hard Wax Warmer Cleaning Supplies
When it comes to cleaning your hard wax warmer, there are a few supplies that you will need to ensure a thorough and safe cleaning process. Follow these tips to gather the necessary cleaning supplies:
- Cleaning cloths or towels
- Ice
- Warm water
- Soap or liquid cleaner
- Disposable spatula
Before you begin the cleaning process, it’s important to take some precautions:
- Make sure the wax warmer is unplugged and has cooled down completely
- Wear protective gloves to avoid burns
- Place the wax warmer on a stable and heat-resistant surface
Now, let’s dive into the step-by-step process of cleaning your hard wax warmer:
- Step 1: Clean the Outside
- Step 2: Clean the Inside
- Step 3: Follow the Manufacturer’s Instructions
- Step 4: Wipe and Clean
- Step 5: Final Tips
Start by wiping the outside of the wax warmer with a damp cloth or towel. Remove any wax residue or spills to ensure a clean surface.
If there is melted wax inside the warmer, gently scrape it off using a disposable spatula. Be careful not to scratch the surface of the warmer.
Every wax warmer may have different cleaning instructions, so it’s important to refer to the manufacturer’s guidelines. Follow any additional steps or precautions mentioned in the user manual.
Use a cloth or towel soaked in warm soapy water or liquid cleaner to wipe the inside of the wax warmer. Make sure to clean all surfaces thoroughly to remove any residue.
After cleaning, wipe the inside of the wax warmer with a clean, damp cloth to remove any remaining cleaning solution. Make sure to dry it completely before using it again.
By following these steps and using the right cleaning supplies, you can keep your hard wax warmer clean and in good condition for a long time. Remember to take precautions and clean the warmer regularly to avoid any buildup or fire hazards.
Key Takeaways
- When cleaning your hard wax warmer, gather the necessary supplies such as cleaning cloths, ice, warm water, soap or liquid cleaner, and a disposable spatula.
- Before cleaning, take precautions such as unplugging the warmer, wearing protective gloves, and placing it on a stable surface.
- Follow the step-by-step process: clean the outside, scrape off any melted wax inside, follow the manufacturer’s instructions, wipe and clean all surfaces thoroughly, and ensure it is completely dry before using it again.
- Regular cleaning will help prolong the lifespan of your hard wax warmer and prevent any fire hazards or burns.
If you’re looking for additional tips or a pro cleaner’s perspective on how to clean your hard wax warmer, make sure to check out “Clean Queen’s Guide to Wax Warmer Cleaning” on our website.
Ways To Clean Out Your Wax Warmer
When it comes to maintaining your wax warmer, cleaning is an essential task that you must regularly perform. By keeping your wax warmer clean, you can ensure that it functions properly and efficiently. Here are some effective ways to clean out your wax warmer:
1. Replacing the Wax
Before you start cleaning your wax warmer, it is important to remove any leftover wax from it. Carefully remove the wax container or tray and discard the wax. If the wax is still in a usable condition, you can store it for future use in a cool and dry place.
2. Using a Wax Warmer Cleaner
If you have a wax warmer cleaner, you can use it to effectively clean the inside of your wax warmer. Follow the instructions provided with the cleaner and make sure to wipe down all surfaces thoroughly to remove any residue.
3. Boiling Water Method
If you don’t have a wax warmer cleaner, you can use the boiling water method to clean your wax warmer. Fill a pot with water and bring it to a boil. While the water is heating, remove the wax container or tray from the wax warmer. Once the water is boiling, carefully pour it into the wax well of the warmer. Let it sit for a few minutes to soften the wax. Then, use a spatula or a paper towel to remove the softened wax from the well. Repeat this process until all the wax has been removed.
4. Freeze and Wipe Method
Another method to clean your wax warmer is the freeze and wipe method. Place the wax container or tray in the freezer for a few hours until the wax becomes hard and solid. Once the wax is frozen, it will be easier to remove. Take a paper towel or a cloth and wipe away the frozen wax from the container or tray. Repeat this process until all the wax has been removed.
5. Additional Cleaning Tips
Here are some additional tips to help you clean your wax warmer effectively:
- Always ensure that the wax warmer is turned off and unplugged before cleaning.
- Allow the wax warmer to cool down completely before starting the cleaning process.
- Take precautions and avoid directly touching the wax warmer while it is still hot.
- Use warm water and mild soap to clean the exterior surfaces of the wax warmer.
- Regularly clean the wax warmer to prevent the buildup of residue and maintain its performance.
- For stubborn wax residue, you can use a cotton ball soaked in rubbing alcohol to remove it.
- Refer to the manufacturer’s guidelines for specific cleaning instructions for your wax warmer model.
By following these cleaning methods and tips, you can keep your wax warmer clean and free from any residue. Taking care of your wax warmer will not only ensure its longevity but also create a hygienic environment for your clients during their waxing sessions.
The Fire Starter
When it comes to using a wax warmer, there are a few things you need to keep in mind to ensure a safe and effective experience. One of the most important aspects is knowing how to clean your wax warmer properly. If you neglect this task, it can lead to a buildup of wax residue and other unwanted substances that can cause a fire hazard.
Why Cleaning Is Important
Wax warmers are designed to heat up wax until it melts and becomes liquid, which makes it easier to use for various purposes. However, if you don’t clean your wax warmer regularly, the melted wax can harden inside the warmer and create a fire hazard. The hardened wax can trap heat and potentially ignite, leading to a fire. Therefore, it’s crucial to clean your wax warmer after each use to remove any leftover wax and ensure its safe operation in the future.
Tools and Supplies You’ll Need
In order to clean your wax warmer effectively, you’ll need the following supplies:
- Clean towels or wipes
- Hot, soapy water
- A spatula or other similar tool to remove hardened wax
Cleaning Tips
Here are some tips to help you clean your wax warmer properly:
- Make sure the wax warmer is turned off and unplugged before you begin cleaning.
- Allow the wax warmer to cool down completely before attempting to clean it, as the melted wax can be extremely hot.
- Use a clean towel or wipe to remove any excess wax from the inside of the warmer.
- If there is hardened wax inside the warmer, gently scrape it off using a spatula or similar tool. Be careful not to damage the warmer in the process.
- Wipe the inside of the wax warmer with hot, soapy water to remove any remaining residue. Rinse thoroughly and dry it with a clean towel.
- Do not pour the melted wax down the drain. Instead, let it cool and harden, then remove it and dispose of it properly.
- If you encounter any stubborn stains or residue that won’t come off with regular cleaning, you can try using an additional cleaner specifically designed for wax warmers.
Fire Safety Precautions
To avoid fire hazards while using your wax warmer, follow these precautions:
- Do not leave the wax warmer unattended while it’s turned on or until the wax has completely melted.
- Keep flammable items, such as clothing and towels, away from the wax warmer while it’s in use.
- Ensure that the wax warmer is placed on a stable surface away from anything that could easily catch fire.
- Watch the temperature of the wax carefully and adjust accordingly. If the wax gets too hot, it can create a fire risk.
- If a fire does occur, do not attempt to put it out with water. Instead, use a fire extinguisher or smother it with a blanket or towel.
By following these tips and taking proper care of your wax warmer, you can enjoy a safe and hassle-free experience with your clients. Remember, cleaning your wax warmer regularly is not only important for fire safety, but it also helps prolong the life of your equipment, making it a worthwhile investment in the long run.
So, the next time you use your wax warmer, be sure to clean it thoroughly afterwards to avoid any potential fire hazards and keep your workspace safe.
Tips and Takeaway
Here are some tips and takeaway points to keep in mind when cleaning your wax warmer:
1. Start with the right supplies:
- Regular cleaning wipes or a damp cloth
- Ice or a freezer bag
- A pot of boiling water
- Heat-resistant spatula or a spoon
- Soap and water
2. Safely remove hardened wax:
If your wax has hardened into a solid mass, begin by placing ice or a freezer bag filled with ice on top of the hardened wax. The cold temperature will make the wax brittle and easier to remove. Once the wax is cold, use a spatula or spoon to gently break it apart and remove it from the wax warmer. Be careful not to scratch the surfaces of the warmer.
3. Follow a step-by-step cleaning process:
- Unplug the wax warmer and let it cool down completely.
- Remove the dish or pot from the warmer and empty out any remaining liquid wax.
- Wipe the inside and outside of the warmer with a regular cleaning wipe or a damp cloth.
- Wash the dish or pot with soap and water to remove any residue.
- If there are any stubborn wax stains, place the dish or pot in boiling water for a few minutes to melt the wax completely.
- Remove the dish or pot from the boiling water and use a heat-resistant spatula or spoon to scrape away any remaining melted wax.
- Once the warmer and dish or pot are clean, let them air dry before using them again.
4. Take precautions for a safe cleaning process:
- Make sure the wax warmer is unplugged and cooled down before cleaning.
- Handle the wax and hot water with caution to avoid burns.
- Dispose of the melted wax properly by following recycling guidelines.
- Be careful not to scratch the surfaces of the warmer while removing hardened wax.
- Make sure to clean the wax warmer regularly to prevent wax build-up and ensure its longevity.
- If you find it difficult to clean your wax warmer, consider investing in a new one instead of struggling with the cleaning process.
By following these tips and taking the necessary precautions, you can effectively clean your wax warmer and keep it in good condition for future use. Remember, a little effort in cleaning and maintaining your wax warmer will go a long way in extending its lifespan and making sure it functions properly.
If you have any additional thoughts, tips, or comments on cleaning wax warmers, feel free to share them below!
How to Clean Your Hard Wax Warmer
Hard wax warmers are an essential tool for estheticians and those who love to do DIY waxing at home. To ensure that your wax pot remains clean and in good condition, regular cleaning is necessary. Here are some ways to effectively clean your hard wax warmer:
1. Gather Your Cleaning Supplies
Before you begin cleaning your hard wax warmer, make sure you have all the necessary supplies. You will need:
- Warm water
- Mild soap or wax pot cleaner
- Clean towels or wipes
- Cleaning spatula
2. Take Precautions
Before cleaning your hard wax warmer, take the following precautions:
- Make sure the warmer is turned off and unplugged
- Allow the pot to cool down before cleaning
- Handle the pot with care to avoid burns
- Wear protective clothing to prevent wax from getting onto your skin
3. Remove Most of the Wax
Using a clean spatula, gently scrape off the hardened wax from the pot. Be careful not to damage the pot while doing this. Dispose of the hardened wax properly by recycling or throwing it into the trash.
4. Clean the Pot
Fill the pot with warm water and add a few drops of mild soap or wax pot cleaner. Let the water sit for a few minutes to soften any remaining wax. Then, use a clean towel or wipe to remove the softened wax and clean the pot thoroughly.
5. Clean the Exterior
While cleaning the pot, don’t forget to clean the outside of the hard wax warmer as well. Use a clean towel or wipe to remove any wax residue from the exterior surface.
6. Final Steps
After cleaning the pot and exterior, rinse the pot with clean water to remove any soap or cleaner residue. Wipe the pot dry with a clean towel. Ensure that the pot is completely dry before using it again.
Additional Tips and Precautions
- If the wax is still melted, pouring it into a heat-resistant container can make the cleanup easier.
- Be cautious with the temperature of the water used for cleaning as very hot water might damage the pot.
- Do not immerse the entire pot in water, as this can cause electrical damage.
- Regular cleaning of your hard wax warmer will help maintain its effectiveness and extend its lifespan.
- If you are a beginner, start with a wax starter kit that includes cleaning supplies.
By following these steps and taking the necessary precautions, you can keep your hard wax warmer clean and in good working condition. This will ensure a safe and effective waxing experience for both you and your clients in the future.