
When it comes to waste disposal, some of us have to deal with bins that are not only dirty but also infested with bugs and unpleasant odours. But fear not, with our step-by-step guide, you can tackle even the most disgusting bins and ensure they are clean and smelling fresh. So grab your brush and water, and let’s get started!
The first step is to stop touching the dirty bin. Nobody wants germs all over their hands! Take a brush and give the bin a thorough scrub. Make sure to cover every inch of it, including the lid and handles. Don’t forget to wear gloves to protect your hands from the mould and bacteria that may be present.
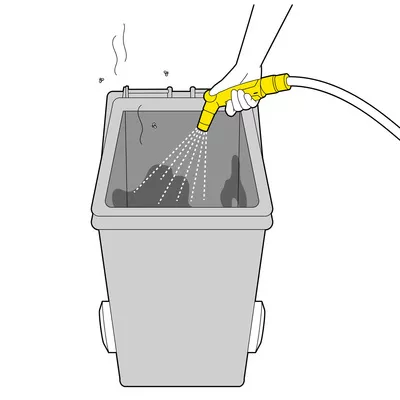
Once you’ve scrubbed the bin down, it’s time to wash it. This is where a pressure washer comes in handy. If you don’t have one, a hose with a high-pressure nozzle will work just fine. Spray down the bin with water until all the dirt and grime are gone. Make sure to get into all the nooks and crannies to remove any lingering debris.
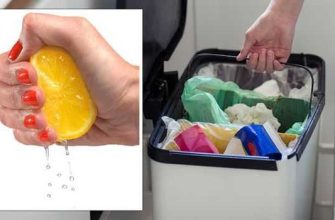
After washing the bin, give it a good rinse with clean water. This will ensure that all the cleaning agents and residue are washed away. It will also help remove any remaining odours. If you’re dealing with a particularly smelly bin, you can add a few drops of white vinegar to the rinse water for an extra fresh scent.
Now that your bin is clean, the next step is to prevent it from getting dirty again. One tip that’ll help is to line the bottom of the bin with newspaper before putting any waste in it. The newspaper will absorb any liquids and prevent them from seeping into the bin, making it easier to clean later on.
Another important step is to ensure ongoing cleanliness and fight off pests. Regularly cleaning your bin will prevent odours and discourage bugs and flies from making it their home. Simple measures like spraying the bin down with a disinfectant and using a hands-free bin washer can go a long way in keeping it clean and pest-free.
So there you have it, a step-by-step guide to properly cleaning your bin. No matter how dirty or infested it may be, following these tips and using the right tools will ensure a clean and smelling-free bin. So put on your gloves, grab your brush, and get ready to say goodbye to those nasty odours and bugs!
What’s the best way to clean a stainless steel bin?
Stainless steel bins can be a stylish and durable addition to any home or office space. However, they can also become dirty and smelly over time. Cleaning a stainless steel bin requires a little extra care to ensure it stays looking its best. Here is a step-by-step guide to help you clean your stainless steel bin effectively:
- Gather your materials: You will need a cloth or sponge, a mild cleaning solution, white vinegar, a brush (such as an old toothbrush), and water.
- Empty the bin: Before you begin cleaning, make sure the bin is empty. Dispose of any garbage or debris.
- Wipe down the bin: Use a cloth or sponge to wipe down the inside and outside of the bin. This will help remove any loose dust or dirt.
- Apply the cleaning solution: Mix a small amount of mild cleaning solution with water. Apply this solution to a cloth or sponge and wipe down the entire bin. This will help remove any stains or smudges.
- Scrub the bottom of the bin: Use a brush to scrub the bottom of the bin, where most of the dirt and grime tends to accumulate.
- Rinse the bin: Rinse the bin thoroughly with water to remove any remaining cleaning solution.
- Dry the bin: Use a clean cloth to wipe the bin dry, ensuring there is no moisture left behind.
- Prevent odours: To prevent odours, you can spray the inside of the bin with white vinegar and allow it to sit for a few minutes before rinsing.
- Clean regularly: To keep your stainless steel bin clean and smelling fresh, it is important to clean it regularly. Aim to clean it at least once a week, or more often if needed.
By following these step-by-step instructions and tips, you can quickly and effectively clean your stainless steel bin. What’s more, ongoing maintenance will help prevent the build-up of dirt and odours, ensuring your bin stays clean and smelling fresh.
How to clean your bin
Proper bin cleaning is essential to keep your living space free from germs and unpleasant odors. No one wants to work with a dirty, smelly bin.
Follow these step-by-step instructions to ensure the best and most effective bin cleaning, whether you have a stainless steel kitchen bin or a regular outdoor bin.
- Gather your materials: Before you begin, make sure you have the necessary materials to clean your bin. You’ll need a brush or scrubbing tool, a hose or bucket of water, a suitable cleaning solution, and some paper towels or a cloth for drying.
- Start with the exterior: Begin by cleaning the outside of your bin. Use a hose or a bucket of soapy water to wash away any dirt, grime, or mould that may have accumulated. If you’re using a cleaning solution, make sure it’s suitable for the material of your bin.
- Move on to the inside: Once the exterior is clean, empty the contents of your bin and give the inside a thorough wash. Use a high-pressure hose or a bucket of water to remove any leftover debris or sticky residue.
- Scrub away any stubborn stains: If there are any stubborn stains or leftover dirt, use a brush or scrubbing tool to scrub them away. Be sure to reach all corners and crevices of your bin for a deep clean.
- Prevent future odors and bugs: To prevent odors and bugs from returning, give your bin a final rinse with a solution of water and disinfectant. This will help keep germs and bacteria at bay.
- Dispose of the dirty water: Once you’ve finished cleaning, dispose of the dirty water in an appropriate drain or disposal area.
- Dry your bin: Finally, wipe down your bin with a cloth or paper towel to ensure that it’s completely dry. This will help prevent any ongoing mold or bacteria growth.
Now that you know how to clean your bin, you can say goodbye to disgusting smells and bugs! Follow these tips and do the cleaning regularly to keep your bin in top shape.
Bin cleaning by hand
Properly cleaning your bins by hand is an effective way to tackle even the most dirty and odorous waste bins. By following these step-by-step tips, you can ensure that your bins are clean and fresh, ready to be used again.
- Start by emptying the contents of your bin into a waste bag or bin liner. Make sure to dispose of any bugs or pests quickly and properly.
- Take your bin outside or find a suitable area where you can clean it without making a mess.
- Using a high-pressure water washer or a hose with a strong jet setting, rinse the bin thoroughly. This will help wash away any stuck-on dirt or mould.
- To effectively clean the inside of the bin, fill it with hot soapy water. Use a brush or sponge to scrub the bottom and sides, paying extra attention to any areas that are particularly dirty or odorous.
- After scrubbing, empty the soapy water and rinse the bin again with high-pressure water or a hose. Make sure to remove all soap residue.
- If your bin is made of stainless steel, you can use a stainless steel cleaner to give it an extra shine. Follow the instructions on the cleaner for the best results.
- To help fight ongoing odours, you can sprinkle baking soda or a pet-friendly bin deodorizer onto the bottom of the bin before putting in a new waste bag.
By following these steps, you’ll be able to maintain a clean and odour-free bin. Remember to clean your bins regularly, as they can quickly become dirty and infested with bugs if not properly maintained. With a little bit of effort, you’ll have bins that are fresh and ready to use again in no time.
Allow the bin to dry after washing it
Once you have thoroughly cleaned your bin using the step-by-step instructions outlined above, it’s important to allow it to dry completely. This will help to prevent any lingering odors or bacteria from developing.
You can choose to air dry your bin by leaving it outside or in a well-ventilated area. Alternatively, you can use a clean, absorbent cloth or towel to manually dry the bin.
Allowing the bin to dry is crucial because moisture can create the perfect breeding ground for bugs and bacteria. By ensuring that your bin is completely dry, you’ll be taking an important step towards maintaining a hygienic environment.