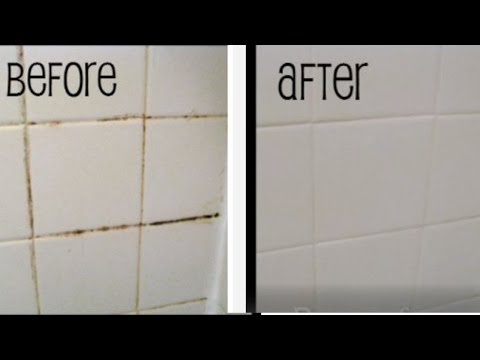

If you’ve ever noticed a yellow stain or black spots on the bathroom sealant, you’re not alone. Many people struggle with keeping their bathroom sealant clean and free from mould. But fear not! In this article, we’ll share some effective tips on how to clean mould off bathroom sealant and restore its shine, so your bathroom can look brand new again.
One of the best ways to clean mould off bathroom sealant is by using household items like vinegar and baking soda. Simply mix equal parts of vinegar and baking soda to create a paste-like consistency. Apply the paste to the mouldy sealant and let it sit for about an hour. Then, use a stiff-bristled brush to scrub away the mould. Rinse off the area with water and repeat the process if needed.
If the mould stains are stubborn and refuse to go away, you can try using bleach. Mix one part bleach with four parts water and apply it to the stained sealant. Leave it on for 15 minutes, then scrub the area with a stiff-bristled brush. Rinse with water to remove any leftover bleach. However, be cautious when using bleach, as it may damage the sealant or surrounding surfaces. Make sure to wear gloves and keep the area well-ventilated.
Another option for removing mould from bathroom sealant is using commercial products specifically designed for this purpose. One such product is Cillit Bang, which is known for its effectiveness in removing mould and mildew. Follow the instructions on the packaging to use it safely and effectively.
In addition to cleaning the mould off the sealant, it’s important to prevent it from coming back. Keep your bathroom well-ventilated to reduce moisture, as mould thrives in damp environments. Regularly clean your bathroom, paying attention to the sealant and other areas that are prone to mould growth. You can also use a silicone sealant on the bottom of your shower door to prevent moisture from seeping into the sealant.
Remember, cleaning mould off bathroom sealant may require some effort, but with the right tips and products, you can restore its shine and keep your bathroom looking fresh and clean. Follow these steps and say goodbye to mouldy sealant for good!
- What You Need
- How to Clean the Plastic Strip on a Shower Door
- 1. Regular cleaning with household staples
- 2. Use a soft sponge or cloth for gentle cleaning
- 3. Use vinegar or baking soda for tougher stains
- 4. Avoid using harsh chemicals
- 5. Dry the strip thoroughly
- 6. Replace the strip if needed
- Key Steps to Removing Mould from Silicon Sealant
- How to Clean the Plastic Strip
- Step 1: Remove the Plastic Strip
- Step 2: Prepare the Cleaning Solution
- Step 3: Clean the Plastic Strip
- Step 4: Rinse and Dry
- Related Articles
- READ MORE
- Trending
- Step 1: Remove any loose mould
- Step 2: Create a cleaning solution
- Step 3: Apply the cleaning solution
- Step 4: Let it sit
- Step 5: Scrub away the mould
- Step 6: Rinse thoroughly
- Step 7: Dry the sealant
- Step 8: Apply a silicone sealant
- ‘Does the Job’ 42p Household Staple Leaves ‘Yellow’ Shower Door Seals ‘Like New’
- Step 1: Gather the Materials
- Step 2: Remove the Mould
- Step 3: Clean and Dry
What You Need
- Sealant remover
- Bathroom cleaner
- Stiff-bristled brush or old toothbrush
- Dishwashing detergent
- Soft sponge or cloth
- Dishwasher or washing machine
- Baking soda
- Vinegar
- Lemon juice
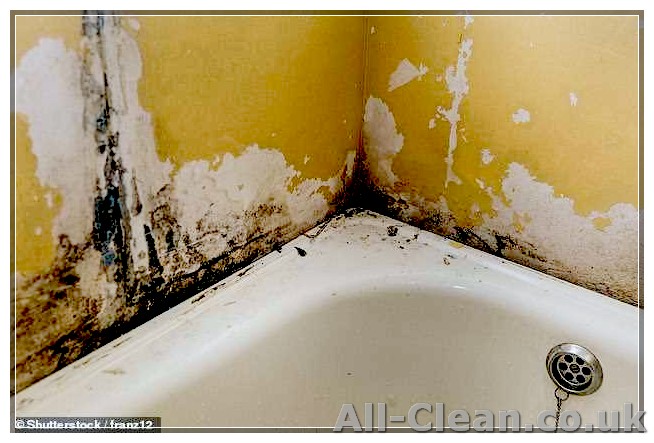
If you’re dealing with mould on your bathroom sealant, you’re not alone. Many people have faced this issue before, as the damp and humid environment in a bathroom makes it a perfect breeding ground for mould and mildew. But don’t fret! With the right products and a little bit of elbow grease, you can easily remove the mould and restore the shine to your bathroom sealant. Follow these simple steps to get rid of mould from your bathroom sealant:
How to Clean the Plastic Strip on a Shower Door
Keeping the plastic strip on your shower door clean is an important part of bathroom maintenance. Over time, it can become stained and build up dirt, leaving your shower looking less than appealing. If you’re wondering how to clean the plastic strip on your shower door, we’ve got some suggested tips to help you get rid of grime and restore its shine.
1. Regular cleaning with household staples
One of the easiest ways to keep your plastic strip clean is by regularly wiping it down with a damp cloth or sponge. You can use a mild household cleaner or a mixture of water and dish soap to remove any dirt or grime. This simple routine can prevent any build-up and keep the strip looking fresh.
2. Use a soft sponge or cloth for gentle cleaning
When cleaning the plastic strip, use a soft sponge or cloth, and avoid anything abrasive that could scratch the surface. Gently scrub the strip to remove any stains or residue, making sure to cover the entire surface.
3. Use vinegar or baking soda for tougher stains
If your plastic strip has stubborn stains or build-up, you can try using vinegar or baking soda for a more powerful cleaning solution. Mix equal parts vinegar and water, or make a paste with baking soda and water. Apply the solution to the stained areas and let it sit for a few minutes before scrubbing with a soft sponge or cloth.
4. Avoid using harsh chemicals
While it may be tempting to use strong chemicals or bleach to clean the plastic strip, it’s best to avoid them. These substances can damage the plastic and cause it to deteriorate over time. Stick to gentle cleaning agents to ensure the longevity of your shower door strip.
5. Dry the strip thoroughly
After cleaning, make sure to dry the plastic strip thoroughly to prevent any moisture from lingering. Use a clean towel or cloth to wipe away any excess water, and leave the strip exposed to air for a while to ensure it is completely dry.
6. Replace the strip if needed
If your plastic strip is severely damaged or cannot be cleaned properly, it may be time to replace it. Most hardware stores or home improvement centers sell replacement strips that you can easily install yourself.
By following these simple tips, you can keep the plastic strip on your shower door looking clean and fresh, without the need for expensive cleaning products or professional services. With regular maintenance, your shower door strip will continue to shine.
Key Steps to Removing Mould from Silicon Sealant
Mould can be a common problem in bathrooms, especially on silicon sealant. If you have noticed mould growth on your bathroom sealant, it’s important to take action as soon as possible to prevent it from spreading further. Here are some key steps to effectively remove mould from your silicon sealant:
- Gather your cleaning supplies: Before you begin, make sure you have all the necessary cleaning supplies. This may include a household cleaner, vinegar, bleach, toothbrush, sponge, soft towels, and a plastic scraper.
- Prepare the area: Open any windows or doors to keep the bathroom well-ventilated. This will help reduce moisture and prevent the spread of mould spores.
- Clean the sealant: Start by using a plastic scraper or your fingernail to remove any loose or mouldy silicone from the sealant. Be gentle to avoid damaging the surface.
- Apply a mould cleaning solution: Apply a household cleaner or a mixture of vinegar and water to the mouldy areas. Leave it on the sealant for a few minutes to break down the mould.
- Scrub the sealant: Use a toothbrush or small brush to scrub the mouldy sealant. Be thorough and make sure to reach all the nooks and crannies.
- Rinse and dry: Use a sponge or soft towel to rinse off the cleaning solution and residue. Make sure the sealant is completely dry before you proceed.
- Prevent future mould growth: To keep your silicon sealant clean and mould-free, regularly clean your bathroom and keep it well-ventilated. Use a squeegee or towel to wipe down the shower after each use to remove excess moisture.
Remember, when dealing with mould and cleaning products, always read the instructions and follow safety precautions. If you have severe mould growth or the silicon sealant is severely stained, it may be suggested to replace the sealant altogether.
How to Clean the Plastic Strip
The plastic strip that seals the shower or bathroom glass is a common area where mould can grow due to the moisture. Cleaning this plastic strip regularly is important to keep it looking its best and prevent the growth of mould and mildew. Fortunately, cleaning the plastic strip is an easy task that can be done with a few household items.
Here’s what you’ll need to clean the plastic strip:
- Warm water
- Mild soap or dishwashing detergent
- Sponge or soft cloth
- Vinegar or bleach (optional)
Step 1: Remove the Plastic Strip
If the plastic strip is removable, carefully remove it from its position. Be gentle to avoid causing any damage to the strip or the surrounding area.
Step 2: Prepare the Cleaning Solution
In a small bucket or bowl, mix warm water with a mild soap or dishwashing detergent. Stir the mixture until it creates a soapy solution.
Step 3: Clean the Plastic Strip

Dip a sponge or a soft cloth into the soapy solution and scrub the plastic strip. Pay extra attention to any areas that have mould or mildew growth.
If the mould or mildew stains are stubborn and difficult to remove, you can try using vinegar or bleach. Mix a small amount of vinegar or bleach with water and apply it to the stained areas. Allow the solution to sit for a few minutes before scrubbing it off with a sponge or cloth.
Step 4: Rinse and Dry
After cleaning the plastic strip, rinse it thoroughly with clean water to remove any soap residue. Dry the strip completely before reattaching it to the shower or bathroom glass.
It’s important to note that some plastic strips may not be removable. In this case, you can clean them in place using the same method mentioned above. Use a toothbrush to scrub hard-to-reach areas and ensure that all mould and mildew are removed.
Remember to regularly clean the plastic strip to prevent the growth of mould and maintain its appearance. By following these simple cleaning tips, you can keep your bathroom looking fresh and hygienic.
Related Articles
- How to Clean Mold from Bathroom Seals: A step-by-step guide through the process of cleaning mold off bathroom seals using vinegar and towels.
- Effective Ways to Keep Bathroom Seals Clean: Learn how to prevent mold from forming on your bathroom seals and keep them looking fresh and clean.
- Top Tips for Cleaning Bathroom Sealant: Discover new tips and tricks for cleaning bathroom sealant, from using household cleaners to specialty products.
- The Importance of Regularly Cleaning Bathroom Seals: Find out why it’s essential to maintain clean bathroom seals to prevent mold growth and maintain the integrity of your bathroom.
- How to Remove Stubborn Mold from Bathroom Sealant: If your bathroom seals are heavily stained with mold, this article will provide effective methods for removing the stubborn mold and restoring their shine.
- Common Mistakes to Avoid When Cleaning Bathroom Seals: Learn what not to do when cleaning bathroom seals to ensure you don’t damage the sealant or spread the mold further.
- The Best Cleaning Products for Bathroom Seals: Discover a comprehensive list of cleaning products that are recommended for effectively cleaning and maintaining bathroom seals.
- How to Prevent Moisture Build-up in Bathroom Seals: Find out different ways to prevent moisture from accumulating in your bathroom seals, which can lead to mold growth.
- Tips for Keeping Bathroom Seals Looking Like New: Whether you have silicone or rubber seals, these tips will help keep them looking fresh and free from mold.
- The Importance of Properly Sealing Bathroom Seals: Understand why properly sealing your bathroom seals is crucial in preventing mold and other issues from occurring.
READ MORE
If you’re dealing with mould in your bathroom, it’s important to address the issue promptly to prevent it from spreading and damaging your sealant. Moisture and lack of ventilation can contribute to the growth of mould in a bathroom, so it’s essential to keep the area clean and dry.
If you notice any mould build-up on your bathroom sealant, there are several effective ways to remove it and restore its shine. Here are some tips:
- Use a silicone sealant remover: There are specific sealant removers available that can help you get rid of mould. These products are designed to break down and remove silicone sealant, making it easier to clean. Simply follow the instructions provided with the remover and ensure you are working in a well-ventilated area.
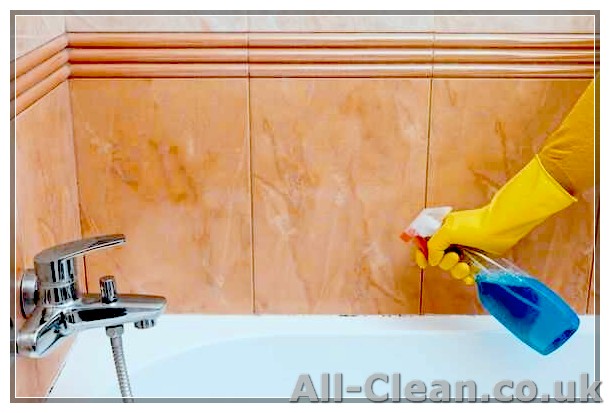
- Clean with vinegar: Vinegar is a natural cleaning agent that can help remove mould from bathroom sealant. Mix equal parts of water and vinegar in a spray bottle and spray the affected areas. Allow the mixture to sit for a few minutes before scrubbing with a soft sponge. Rinse with water and dry the area thoroughly.
- Make a paste with baking soda: Baking soda is another effective ingredient for removing mould. Mix baking soda with water to create a paste and apply it to the mouldy areas. Allow the paste to sit for a few hours or overnight before scrubbing it off with a sponge. Rinse with water and dry the area completely.
- Use a mould cleaner: If the above methods don’t work, you can try using a commercial mould cleaner. These cleaners are formulated to specifically target mould and mildew and can be effective in removing stubborn stains. Be sure to follow the instructions on the product carefully.
Remember, prevention is key to keeping your bathroom sealant mould-free. Regularly clean your bathroom and ensure proper ventilation to help reduce moisture build-up. If you have any stubborn mould stains that can’t be removed, or if you’re unsure about the best method to use, consult with a professional.
Trending
When it comes to cleaning mould off bathroom sealant, there are several steps you can take to restore its shine. Mould can build up on bathroom sealant over time, leaving it stained and unsightly. If you notice a ‘yellow’ or mouldy appearance on your bathroom sealant, it’s time to take action.
Step 1: Remove any loose mould
Before you start cleaning the sealant, it’s important to remove any loose mould. Use a stiff-bristled brush to scrub away any mould that is easily removable.
Step 2: Create a cleaning solution
Next, create a cleaning solution. You can use a mixture of vinegar and water, or if the sealant is heavily stained, you can use a bleach solution. Mix one part bleach to four parts water in a spray bottle.
Step 3: Apply the cleaning solution
Apply the cleaning solution to the mouldy sealant. If you’re using the vinegar and water solution, spray it directly onto the sealant. If you’re using the bleach solution, spray it onto a soft cloth and then apply it to the sealant.
Step 4: Let it sit
Allow the cleaning solution to sit on the mouldy sealant for about 15 minutes. This will give it time to penetrate the mould and start breaking it down.
Step 5: Scrub away the mould
Using a soft brush or a sponge, start scrubbing away the mould. If the mould is stubborn and won’t come off, you can use a toothbrush or a small scrub brush to help remove it.
Step 6: Rinse thoroughly
Once you have scrubbed away the mould, rinse the sealant thoroughly with clean water. This will remove any residue from the cleaning solution.
Step 7: Dry the sealant
After rinsing, use a clean towel to dry the sealant. Make sure it is completely dry before moving on to the next step.
Step 8: Apply a silicone sealant
If the mouldy sealant is beyond repair, you may need to remove it completely and apply a new silicone sealant. This will ensure a clean and mould-free bathroom sealant.
Following these tips will help you effectively clean mould off your bathroom sealant and restore its shine. Regular cleaning and maintenance will keep your bathroom sealant looking its best and prevent mould build-up in the future.
‘Does the Job’ 42p Household Staple Leaves ‘Yellow’ Shower Door Seals ‘Like New’
Tired of dealing with mouldy and stained shower door seals? Look no further than a simple 42p household staple that can leave your ‘yellow’ shower door seals looking ‘like new’. If there is one common problem that many homeowners face in their bathrooms, it’s the build-up of mould and mildew on shower door seals. This can not only make your bathroom look unpleasant but also pose a health risk due to the presence of mould spores.
Moisture, soap residue, and regular use can cause mould to develop on the silicone sealant around your shower doors. But with a little cleaning and some household items, you can easily remove the mould and restore the shine to your shower door seals.
Step 1: Gather the Materials
Before you start cleaning, gather the following materials:
- A sponge or cloth
- A stiff-bristled brush
- A plastic scraper or old credit card
- A cleaning solution (you can make your own by mixing equal parts of water and vinegar)
- A paste made of baking soda and water
- Plastic towels
Step 2: Remove the Mould
To remove mould from your shower door seals, follow these steps:
- Start by soaking a sponge or cloth in the cleaning solution.
- Use the sponge or cloth to wipe away any surface mould.
- If the mould is stubborn, use a stiff-bristled brush to scrub it away.
- If there are any lingering mould patches, use a plastic scraper or old credit card to gently scrape them off.
- For tougher mould stains, apply a paste made of baking soda and water to the affected area. Let it sit for at least an hour before scrubbing it off with a brush.
Step 3: Clean and Dry
Once you have removed the mould, clean the area thoroughly with the cleaning solution. Rinse with water and dry the seals with a clean towel or plastic towel.
With these simple steps, you can keep your shower door seals clean and mould-free. Regular cleaning and maintenance are key to preventing the build-up of mould and keeping your bathroom looking fresh. So, next time you see that ‘yellow’ shower door seal, reach for that 42p household staple and let it do the job!


