
Maintaining a clean and beautiful garden or driveway requires regular care and attention. One important aspect of this maintenance is keeping your decorative gravel clean and free from debris. In this article, we will provide you with some expert tips and step-by-step instructions on how to effectively clean your decorative gravel.
First and foremost, you need to choose the right products and tools for the job. A good leaf blower or a broom can be very helpful in removing fallen leaves and grass clippings from your gravel. If you have any weeds or moss, it’s best to remove them by hand using a shovel or a weeding tool.
Before you start cleaning, it’s important to check for any large debris or trash that might have accumulated on the surface. Remove these items with a rake or a shovel. Once the surface is clear, you can start with the cleaning process.
One effective method is to use a pressure washer to remove dirt and grime from the gravel. However, if you don’t have a pressure washer, you can also use a garden hose with a nozzle attachment. Make sure to use a light cleaner or detergent that is safe for outdoor use. Carefully wash the gravel surface, moving the nozzle in a back-and-forth motion to evenly distribute the water.
If you have any stubborn stains or algae growth on the gravel, you might need to use a weed killer or an algae killer. Be sure to choose a product that is safe for use around plants and follow the instructions carefully. After applying the cleaner, let it sit for the recommended time and then rinse it off thoroughly with water.
Another important step is to prevent weeds and moss from growing back on your gravel. You can do this by laying a weed membrane or landscape fabric underneath the gravel. This will help to stop weed seeds from germinating and prevent them from growing through the gravel surface.
Regular maintenance is key to keeping your decorative gravel clean and looking good. Make sure to check your driveway or garden on a regular basis for any fallen leaves, grass clippings, or other debris. Use a leaf blower or a broom to sweep them up. By following these tips and using the right tools and supplies, you can ensure that your decorative gravel stays clean and beautiful for a long time.
“Cleaning decorative gravel is an essential part of maintaining their design and surface. With these effective tips and step-by-step instructions, you will be able to keep your decorative gravel looking its best.” – gardening expert
For a more visual guide on cleaning decorative gravel, check out the video below:
- Why Cleaning Decorative Gravel is Important
- Benefits of a Clean Gravel Drive
- Cleaning Decorative Gravel: Step-by-Step Guide
- Supplies You’ll Need
- Step 1: Remove Debris
- Step 2: Choose a Cleaning Solution (optional)
- Step 3: Wash the Gravel
- Step 4: Rake the Gravel
- Step 5: Prevent Weeds
- Step 6: Regular Maintenance
- Step 1: Remove Debris from the Surface
- Step 2: Rinse the Gravel Thoroughly
- Step 3: Scrub Stubborn Stains
- 1. Gather the necessary supplies
- 2. Assess the stains
- 3. Use a mild detergent or gravel cleaner solution
- 4. Scrub the stains
- 5. Rinse the gravel
- 6. Repeat if needed
- 7. Allow the gravel to dry
- Step 4: Control Weed Growth
- 1. Use a Weed Barrier
- 2. Choose an Appropriate Weed Killer
- 3. Regularly Remove Weeds
- 4. Brush or Rinse the Gravel
- 5. Video Tutorial: Expert Tips
- Step 5: Maintain Regular Cleaning Schedule
- 1. Establish a Cleaning Routine
- 2. Gather Your Cleaning Supplies
- 3. Start with a Quick Sweep
- 4. Use a Leaf Blower for Extra Control
- 5. Wash and Remove Stains
- 6. Consider Using Cleaning Products
- 7. Maintain and Protect Surrounding Plants
- 8. Regularly Grade and Clear the Gravel
- 9. Follow Design Guidelines
Why Cleaning Decorative Gravel is Important
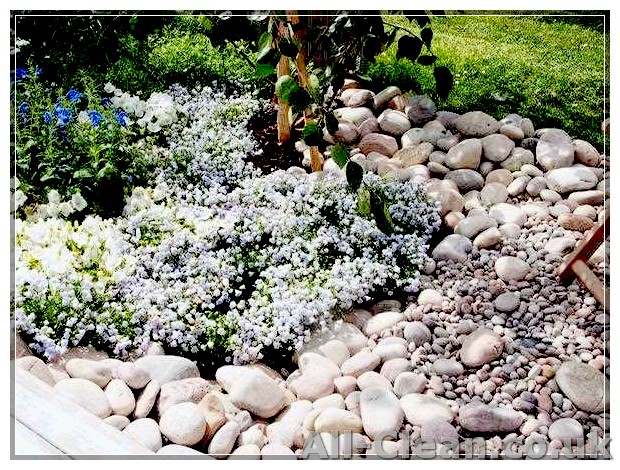
Decorative gravel is a popular choice for adding beauty and sophistication to outdoor spaces such as garden beds, driveways, and patios. However, it’s important to care for and clean your decorative gravel regularly to keep it looking its best and maintain its functionality. Here are seven reasons why cleaning decorative gravel is important:
- Maintaining the aesthetic appeal: Regularly cleaning your decorative gravel helps to preserve its vibrant color and overall appearance. Over time, dirt, dust, and debris can accumulate on the gravel surface and make it look dull and unkempt. By carefully cleaning the gravel, you can restore its natural beauty and enhance the visual appeal of your outdoor space.
- Preventing weed growth: Weeds can be a nuisance and spoil the neat and well-maintained look of your gravel area. Cleaning the gravel regularly helps to remove any weed seeds or root fragments that may have blown onto the surface. By staying on top of weed growth, you can prevent them from taking root and spreading throughout your decorative gravel.
- Preserving the gravel structure: Cleaning your decorative gravel helps to remove debris and prevent the buildup of organic matter. This is especially important if your gravel is laid in driveways or high-traffic areas, where dirt and grime can accumulate quickly. By regularly removing these substances, you can ensure that the gravel retains its intended grading and stability, preventing any damage or uneven surfaces.
- Ensuring proper drainage: Decorative gravel is often used in landscaping designs to enhance drainage and prevent waterlogging. However, if the gravel becomes clogged with dirt and debris, it can hinder proper water flow. Regular cleaning helps to clear any obstructions and allows the gravel to perform its intended function, keeping your outdoor areas dry and well-drained.
- Reducing the presence of pests: Excess debris and organic matter in decorative gravel can attract pests, such as insects and rodents. Regular cleaning helps to eliminate potential food sources and nesting grounds. By keeping your gravel clean, you can minimize the risk of pest infestations and maintain a healthy outdoor environment.
- Extending the lifespan of the gravel: By regularly cleaning your decorative gravel, you can prevent the accumulation of dirt and debris, which can cause premature wear and tear. Regular maintenance helps to protect the surface of the gravel from damage, ensuring that it lasts longer and maintains its attractive appearance for years to come.
- Creating a safer environment: Cleaning your decorative gravel not only improves its appearance but also creates a safer outdoor space. Removing debris and slippery substances, such as moss or algae, helps to reduce the risk of slips, trips, and falls. By keeping your gravel clean and free from hazards, you can provide a safer environment for yourself, your family, and your guests.
In conclusion, regular cleaning of decorative gravel is essential for maintaining its aesthetic appeal, preventing weed growth, preserving its structure, ensuring proper drainage, reducing pests, extending its lifespan, and creating a safer environment. By following simple steps and using appropriate tools and cleaning supplies, you can easily keep your decorative gravel looking its best and enjoy the many benefits it brings to your outdoor spaces.
Benefits of a Clean Gravel Drive
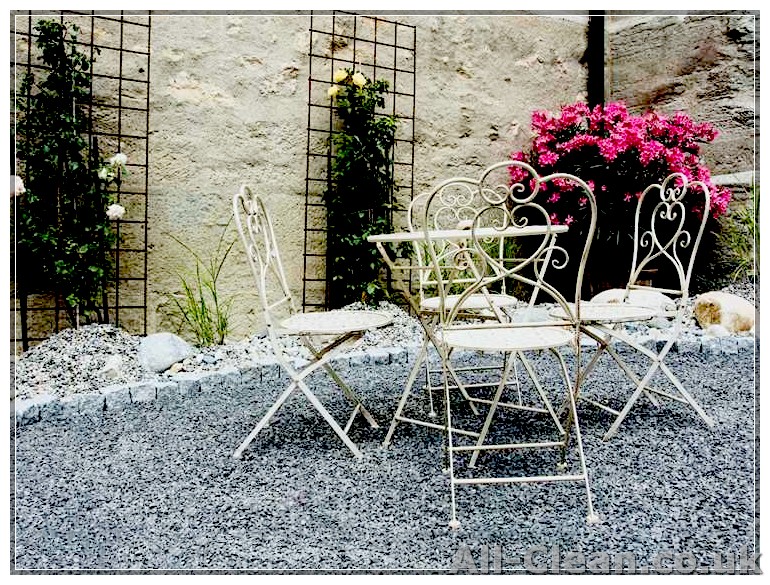
A clean gravel drive offers several benefits to homeowners. Regularly cleaning and maintaining your gravel drive can help prolong its lifespan and keep it looking neat and attractive. Here are some key benefits of a clean gravel drive:
- Prevent Weed Growth:
A clean gravel drive helps prevent weed growth. When the gravel surface is free from debris and dirt, weeds find it difficult to take root and grow. Regular cleaning removes any organic matter that can act as a breeding ground for weeds, helping to maintain a weed-free drive. - Maintain Proper Drainage:
A clean gravel drive ensures proper drainage. Accumulated debris and dirt can block the spaces between gravel particles, hindering water flow. By regularly cleaning the surface, you can prevent drainage issues and avoid potential water damage. - Enhance Curb Appeal:
A clean gravel drive adds to the overall aesthetic appeal of your home. By removing stains, dirt, and debris, you can restore the drive’s natural look and make it more appealing. A well-maintained gravel drive can greatly enhance the curb appeal of your home. - Prevent Stains and Discoloration:
Regular cleaning prevents stains and discoloration on your gravel drive. Over time, substances like oil, grease, or bird droppings can stain the gravel, making it look unsightly. By using an appropriate cleaner and washing the surface regularly, you can prevent these stains and keep your driveway looking clean and attractive. - Reduce Dust and Dirt:
A clean gravel drive helps reduce dust and dirt. Loose gravel can create dust when it is disturbed, causing inconvenience and reducing the cleanliness of your surroundings. By regularly cleaning and maintaining your gravel drive, you can minimize dust and dirt, creating a cleaner environment. - Easy Maintenance:
A clean gravel drive is easier to maintain. Regular cleaning reduces the need for extensive cleaning and repairs in the future. It is much simpler to remove debris and dirt on a regular basis than to deal with larger issues that may arise if the driveway is not cleaned regularly. - Longevity of the Gravel:
Regular cleaning and maintenance can extend the lifespan of your gravel drive. By removing debris, leaves, and fallen twigs, you can prevent organic matter from decomposing on the surface and damaging the gravel. This helps preserve the integrity and longevity of the gravel, saving you money on repairs or replacements.
By following these tips and regularly cleaning your gravel drive, you can enjoy the many benefits it brings and ensure that it remains an attractive and functional feature of your home.
Cleaning Decorative Gravel: Step-by-Step Guide
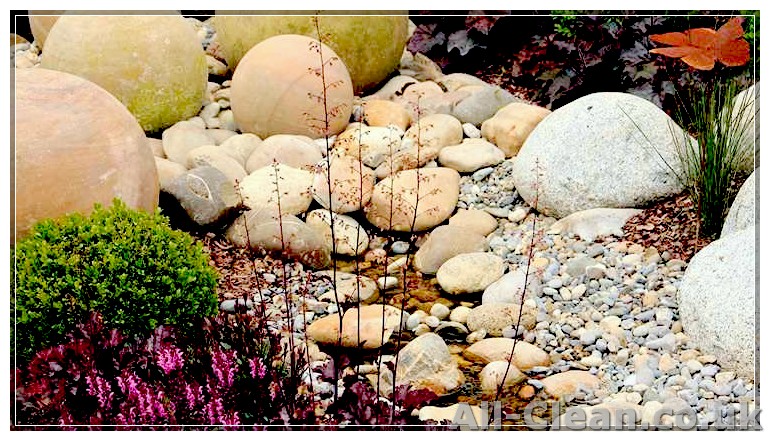
Decorative gravel can add a beautiful touch to your outdoor space, whether it’s a garden, patio, or driveway. However, over time, the gravel can become dirty and lose its visual appeal. Regular cleaning is essential to keep the gravel looking its best. Follow these step-by-step instructions to effectively clean your decorative gravel.
Supplies You’ll Need
- Rake
- Shovel
- Brush
- Hose with high-pressure nozzle
- Water
- Cleaning solution (optional)
Step 1: Remove Debris
Before you begin cleaning the gravel, remove any fallen leaves, twigs, or other debris from the surface. Use a rake or shovel to clear the area and create a clean space to work with.
Step 2: Choose a Cleaning Solution (optional)
If your decorative gravel is heavily stained or has stubborn dirt, you may want to use a cleaning solution. Look for low-dust products specifically designed for gravel cleaning. Follow the instructions on the packaging to mix the solution with water.
Step 3: Wash the Gravel
Start by applying the cleaning solution to the gravel, making sure to cover all areas. If you’re not using a cleaning solution, simply wet the gravel with water from a hose. Use a high-pressure nozzle to wash away dirt and debris.
Step 4: Rake the Gravel
After washing, use a rake to spread the gravel evenly and break up any clumps. Raking will also help to prevent weed growth and maintain a neat appearance.
Step 5: Prevent Weeds
To prevent weed growth, consider applying a weed killer to the gravel. Be sure to choose a weed killer that is safe for use around decorative gravel. Follow the instructions on the packaging for application.
Step 6: Regular Maintenance
To keep your decorative gravel looking its best, perform regular maintenance. This can include raking and brushing the gravel to remove debris and prevent weed growth. Depending on the amount of foot traffic or weather conditions, you may need to clean your gravel every 3 to 6 months.
Follow these tips to effectively clean your decorative gravel and keep it looking fresh. Regular cleaning and maintenance will ensure that your outdoor space remains beautiful for a long time to come.
Step 1: Remove Debris from the Surface
One of the first steps in effectively cleaning decorative gravel is to remove any debris from the surface. This step is important because it helps prevent the debris from getting in the way of other cleaning processes and ensures a clean and tidy appearance for your gravelled areas.
To remove debris, you can either use a leaf blower or a rake, depending on the size and type of debris you’re dealing with. If there are larger leaves or branches scattered on the surface, a rake might be more effective in collecting and removing them. For smaller debris, such as dust or fallen leaves, a leaf blower can quickly clear the surface.
If you don’t already have a leaf blower or a rake, it’s a good idea to invest in these gardening supplies as they will come in handy regularly for maintaining the cleanliness of your decorative gravel areas.
Before you start removing debris, you might want to gather some bags or rows to collect the debris in. This way, you can easily dispose of it without creating a mess. It’s also a good idea to check with an expert on whether or not the debris can be composted. If it can, you can use the bags of debris as garden supplies for your plants.
Step 2: Rinse the Gravel Thoroughly
Once you have removed any obvious debris or dead plants from the decorative gravel, the next step is to give it a thorough rinse. Rinsing the gravel will remove any built-up dirt, dust, or stains, giving your decorative gravel a fresh and clean look.
In order to rinse the gravel effectively, there are a few different methods you can use depending on the size and location of your gravel. Here are some options to consider:
- Hose or Pressure Washer: One of the easiest ways to rinse decorative gravel is by using a hose or pressure washer. Simply spray water over the gravel, making sure to cover all areas. This method is particularly effective for larger areas, such as driveways or garden paths.
- Bucket and Water: If you have a smaller area or less gravel to clean, you can use a bucket of water and a shovel. Scoop up a shovel full of gravel and pour it into the bucket. Then, fill the bucket with water and agitate the gravel to remove any dirt. Repeat this process until all the gravel has been rinsed.
- Outdoor Cleaning Solution: For stubborn stains or dirt build-up, you may want to use an outdoor cleaning solution specifically designed for gravel. These products can be easily purchased at your local home improvement store. Simply follow the instructions on the packaging to properly clean your decorative gravel.
No matter which method you choose, it’s important to thoroughly rinse the gravel to ensure it is clean and free of any debris. This will help maintain the appearance of your decorative gravel and prevent any potential damage or staining.
Once you have rinsed the gravel, you can either let it air dry or use a shovel to spread it out evenly to speed up the drying process. Be sure to check for any remaining dirt or stains and clean them up before moving on to the next step.
Step 3: Scrub Stubborn Stains
After removing loose debris and addressing any weed growth, you might still notice stubborn stains on your decorative gravel. These stains can be caused by various factors, such as leaf runoff, dirt, or oil. Luckily, there are effective ways to tackle these stains and keep your gravel looking clean and fresh.
1. Gather the necessary supplies
Before starting the stain removal process, make sure you have the following supplies:
- A stiff-bristle brush
- A bucket of water
- Mild detergent or gravel cleaner solution
- A hose with a high-pressure nozzle
2. Assess the stains
Take a close look at the stains on your decorative gravel and determine their nature. This will help you choose the most appropriate cleaning method.
3. Use a mild detergent or gravel cleaner solution
If the stains are general dirt or organic matter, such as leaf runoff, you can use a mild detergent or a gravel cleaner solution. Dilute the detergent in water according to the manufacturer’s instructions and apply it to the stained area.
4. Scrub the stains
Using a stiff-bristle brush, scrub the stained areas of the gravel. Apply moderate pressure while scrubbing to remove the stains effectively.
5. Rinse the gravel
Once you have thoroughly scrubbed the stains, rinse the gravel with a hose equipped with a high-pressure nozzle. This will help remove any remaining dirt or cleaning solution.
6. Repeat if needed
If the stains persist, you may need to repeat steps 3 to 5 until the desired results are achieved. Some stains may require multiple attempts to completely remove.
7. Allow the gravel to dry
After cleaning, allow the gravel to air dry before using the area. This will prevent any potential slips or falls on wet surfaces.
By following these simple steps and using the right cleaning supplies, you can effectively scrub stubborn stains from your decorative gravel. Remember to regularly clean and maintain your gravel to keep it looking its best.
Step 4: Control Weed Growth
Weeds can quickly overtake your decorative gravel, so it’s important to take steps to control their growth. Here are some ways how you can keep weeds in check:
1. Use a Weed Barrier
Before you lay down your decorative gravel, consider installing a weed barrier or landscape fabric. This will create a barrier that prevents weed growth while still allowing water to drain through. Simply lay the membrane over the areas where you want to place the gravel. Cut holes in the fabric for plants or other desired areas. This will help keep the weeds from growing through the gravel and make maintenance much easier in the long run.
2. Choose an Appropriate Weed Killer
If you already have weeds growing in your gravel, you may need to use a weed killer. There are many products available on the market that can effectively eliminate weeds without damaging your decorative gravel. Choose a weed killer that is safe for use on gravel and follow the instructions carefully.
3. Regularly Remove Weeds
One of the simplest ways to control weed growth is to regularly remove any weeds that pop up. Use a broom, rake, or shovel to pull out the weeds from the gravel. Be sure to remove the entire weed, including the root, to prevent regrowth. This simple step can go a long way in keeping your decorative gravel weed-free.
4. Brush or Rinse the Gravel
If you notice any weeds sprouting up between your decorative gravel, you can use a brush or a high-pressure washer to quickly remove them. Simply brush or rinse the area to dislodge the weeds, making sure to wash them away from the gravel. This will help keep the gravel bed clean and weed-free.
5. Video Tutorial: Expert Tips
In order to get a clear idea of how to effectively control weed growth in your decorative gravel, you can watch a video tutorial from an expert. There are many videos available online that demonstrate the different techniques and tools for managing weeds in a gravelled area. This can be a helpful visual guide to follow along with.
By following these steps, you can effectively control weed growth and keep your decorative gravel looking its best. Regular maintenance and weed control will ensure that your gravel remains an attractive and low-maintenance addition to your garden, driveway, or patio for years to come.
Step 5: Maintain Regular Cleaning Schedule
Maintaining a regular cleaning schedule for your decorative gravel is essential for keeping it looking its best. By staying on top of this step, you can prevent dirt, debris, and stains from building up and ensure that your space stays clean and inviting.
1. Establish a Cleaning Routine
To keep your decorative gravel in top shape, it’s important to establish a regular cleaning routine. Decide how often you will clean your gravel based on the level of foot traffic and debris in the area. Generally, a monthly or bi-monthly cleaning schedule should suffice for most spaces.
2. Gather Your Cleaning Supplies
Before you start cleaning, gather all the necessary supplies. These may include a broom, leaf blower, garden hose, water pressure washer, and any cleaning products or stain removers of your choice. Having these supplies on hand will make the cleaning process quick and efficient.
3. Start with a Quick Sweep
Begin by using a broom to sweep away any loose debris or leaves from the surface of the gravel. Make sure to clear all the visible areas, including the rows between the gravel, to achieve a thorough cleaning.
4. Use a Leaf Blower for Extra Control
If you have a leaf blower, it can be a handy tool for removing leaves and dust from your decorative gravel. Simply blow the leaves and dust out of the gravel rows, being careful not to blow the gravel out of place. This step is especially useful for larger spaces or areas with significant debris buildup.
5. Wash and Remove Stains
If your decorative gravel has stains or areas that require more attention, you can use a water pressure washer or a garden hose with a high-pressure nozzle attachment to wash and remove them. Be sure to use a low-pressure setting to avoid damaging the gravel or washing it away.
6. Consider Using Cleaning Products
If you have stubborn stains or discoloration on your decorative gravel, you can use specific cleaning products designed for this purpose. Follow the instructions on the product’s packaging and apply it to the stained areas. Allow the cleaner to sit for the recommended amount of time before rinsing it off with water.
7. Maintain and Protect Surrounding Plants
During the cleaning process, it’s essential to protect any nearby plants or greenery. Use a plastic membrane or cover them with a tarp to prevent them from getting wet or damaged by cleaning products.
8. Regularly Grade and Clear the Gravel
To maintain the overall appearance and functionality of your decorative gravel, regularly grade and clear the surface. Use a rake or grading tool to level the gravel and remove any dirt or weeds that may have collected. This will help prevent water pooling and ensure proper drainage.
9. Follow Design Guidelines

When cleaning your decorative gravel, it’s important to follow any specific design guidelines or recommendations provided by the manufacturer or designer. Each type of gravel may have different maintenance requirements based on its composition and intended use.
By following these steps and maintaining a regular cleaning schedule, you can keep your decorative gravel looking beautiful for years to come. Watch the video below for a visual demonstration of the cleaning process:


