
When it comes to renovating or repairing your home, removing old or damaged mortar from bricks is often necessary. However, this task can be challenging and time-consuming if not done correctly. To make this process easier for you, we have compiled a step-by-step guide on how to effectively remove mortar from bricks.
The first step is to gather the necessary tools and materials for the job. These include a bolster chisel, a hammer, a wire brush, safety goggles, gloves, a bucket, and a cloth. It’s essential to wear safety goggles and gloves to protect against any potential flying debris or injuries.
Next, you’ll want to start by using the bolster chisel and hammer to chip away at the mortar. Make sure to work from the top to the bottom, and be careful not to damage the brick in the process. If the mortar is hard to remove, you can wet it down with water using a spray bottle to make it easier to work with. However, avoid using too much water as it can weaken the mortar and brick.
Once you have removed as much mortar as possible with the chisel, you can switch to using a wire brush to scrub away any remaining residue. This will help to clean the bricks and remove any stubborn stains. Be sure to brush in all directions to ensure that the mortar is thoroughly removed.
If there are still small chunks of mortar left after scrubbing, you can use a muriatic acid solution to dissolve them. However, be cautious when using this potent chemical and follow the manufacturer’s instructions. Make sure to wear protective clothing and work in a well-ventilated area. Apply the acid solution to the bricks and let it sit for a few minutes before scrubbing again with the wire brush.
After you have finished removing the mortar, it’s essential to clean the bricks to remove any residue from the cleaning products. You can do this by rinsing the bricks with water and wiping them down with a cloth. Make sure to dry the bricks thoroughly to prevent any water damage or staining.
By following these step-by-step techniques and safety tips, you can effectively remove mortar from bricks and refresh the appearance of your brickwork. Whether you are a DIY enthusiast or a professional, these methods will help you achieve clean and beautiful bricks without causing damage.
- The Importance of Removing Mortar from Bricks
- Step 1: Preparing the Tools and Materials
- Tools and Equipment:
- Materials:
- Step 2: Wetting the Bricks
- Step 3: Removing the Mortar
- 1. View the Mortar
- 2. Use a Hammer and Chisel
- 3. Muriatic Acid Solution
- 4. Apply the Acid Solution
- 5. Scrub off the Residue
- 6. Rinse with Water
- 7. Repeat the Treatment if Necessary
- 8. Absorb Excess Water
- The most common causes of cement residues and how to prevent them
- 1. Improper cleaning during the grouting process
- 2. Using excessive mortar
- 3. Lack of protective measures
- 4. Inadequate cleaning after grouting
- 5. Not wearing appropriate safety gear
- 6. Allowing cement residue to dry
- 7. Using improper cleaning tools or techniques
- Poor Quality Mortar
- 1. Assess the Condition of the Mortar
- 2. Absorb Excess Moisture
- 3. Scrape the Mortar
- 4. Use a Mortar Scraper
- 5. Clean the Surfaces
- 6. Safety Precautions
- 7. Seek Professional Help
The Importance of Removing Mortar from Bricks
When you start a new construction or renovation project that involves bricks, one of the first steps you need to take is removing mortar from bricks. This step is always necessary, as bricks often come with mortar residue that needs to be cleaned without damaging the brick itself.
Removing mortar from bricks is important for several reasons. First of all, it is essential for the aesthetics of the finished project. Mortar stains on bricks can be unsightly and diminish the visual appeal of the brickwork. By removing the mortar, you can ensure a clean and polished look.
Secondly, removing mortar from bricks is crucial for the structural integrity of the construction. Mortar serves as the base for the bricks, providing stability and preventing them from shifting. If mortar residue is left over during the construction process, it can weaken the bond between the bricks and compromise the structure’s stability.
Additionally, removing mortar from bricks is necessary if you plan on reusing the bricks in another project. The presence of old mortar can make it challenging to stack the bricks securely, and it can also affect the overall quality of the new construction. By thoroughly cleaning the bricks, you ensure that they are ready for immediate use without any hindrances.
There are various techniques for removing mortar from bricks, depending on the level of residue and the desired outcome. Some common solutions include using a wire brush to scrape off the excess mortar, using a grout or masonry cleaner to dissolve the mortar, or using muriatic acid for stubborn mortar stains.
It is important to note that when using muriatic acid or any other strong chemicals, you should always wear protective gloves and eyewear to avoid any contact with the skin or eyes. Additionally, be cautious when working with muriatic acid, as it can emit strong fumes and it should always be diluted according to the manufacturer’s instructions.
Before you start removing mortar from bricks, make sure to gather all the necessary tools and materials. This may include a wire brush, a bucket of water, a trowel, a cloth, and any specific cleaning products you choose to use.
The process of removing mortar from bricks typically involves wetting the brick surface, scrubbing off the mortar residue with a wire brush, rinsing the bricks with water, and repeating these steps until the bricks are clean. The exact method may vary depending on the type of mortar and the condition of the bricks.
To avoid damaging the bricks, it is essential to use a soft-bristle brush and avoid applying excessive force when scrubbing. This is especially crucial when working with soft or delicate bricks, as they can easily chip or crack under pressure.
In some cases, if the mortar residue is particularly stubborn or if you are working on a large-scale project, it may be necessary to use power tools such as an angle grinder or a drill with a wire brush attachment. However, these should be used with caution to prevent any damage to the brickwork.
After removing the mortar, make sure to clean the bricks thoroughly to remove any dust or residue left behind. This can be done by rinsing the bricks with clean water or by wiping them with a damp cloth.
In conclusion, removing mortar from bricks is a crucial step in any construction or renovation project. It not only improves the appearance and structural integrity of the bricks but also ensures that they are ready for immediate use in future projects. By using the right techniques and tools, you can effectively remove mortar without damaging the underlying brick and achieve a clean and professional finish.
Step 1: Preparing the Tools and Materials
Before you begin removing mortar from bricks, it’s important to gather all the necessary tools and materials. Having everything prepared will help streamline the process and make it more efficient.
Tools and Equipment:
- Water – You’ll need plenty of water for rinsing and cleaning the area.
- Potent cleaning solution – Depending on the severity of the grout stains, you may need a strong cleaning solution. Muriatic acid is a common choice, but be cautious as it can be harmful if not used properly.
- Bucket – Fill a bucket with water and the cleaning solution to make it easily accessible during the process.
- Grout brush or wire brush – These brushes will help you scrub off the mortar residues effectively.
- Protective gear – Always wear gloves and goggles to avoid any risk of damaging your skin or eyes.
Materials:
- Bricks or tiles – The surface that needs to be cleaned.
- Absorbent sponge or cloth – Use this to soak up excess water and to clean the brickwork in tight areas.
Tips:
- Always read the instructions and warnings on the cleaning products you are using. Follow the guidelines carefully to ensure safety. If you’re not familiar with using a particular product, do some research beforehand.
- If you’re working on a larger project, it may be helpful to divide the area into small sections and tackle them one by one. This will make the process more manageable and prevent you from feeling overwhelmed.
- When using a wire brush or similar tool, be gentle and avoid applying too much pressure. Scrubbing too hard can damage the surface you’re working on.
- If you’re unsure about using muriatic acid or any other strong cleaning solution, start with milder options first, such as vinegar or soapy water. Test a small, inconspicuous area to see if these alternatives are effective in removing the mortar residues.
- Consider wearing a face mask to protect yourself from inhaling any dust particles or fumes that may be released during the cleaning process.
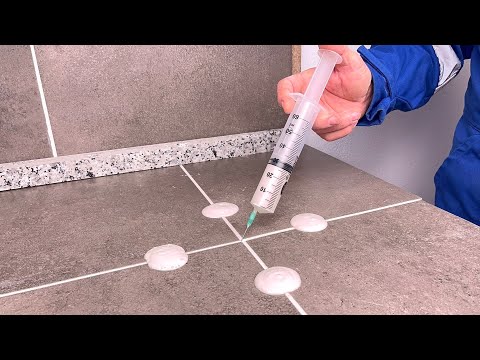
 |
Image: Cleaning brick surfaces |
By gathering all the necessary tools and materials and following these preparation steps, you’ll be ready to take action and effectively clean the mortar residues from your bricks or tiles.
Step 2: Wetting the Bricks
In order to effectively remove mortar from bricks without damaging them, it is important to wet the bricks before starting the cleaning process. This step helps to prevent any potential damage that could occur during the removal process and also provides a better view of the mortar residue.
There are a few ways to wet the bricks. One option is to use a hose with a spray nozzle attachment and lightly spray the bricks with water. Another option is to use a bucket of water and a sponge or brush to wet the bricks by hand. If you prefer, there are also commercially available products, such as a brick and mortar cleaner, that can be used for this step.
The reason for wetting the bricks is to start breaking down the mortar and make it easier to remove. When the mortar is wet, it becomes softer, and this allows for a more efficient cleaning process. Additionally, wetting the bricks improves the safety of the process by reducing the risk of airborne dust and debris.
When wetting the bricks, make sure to focus on the area where the mortar starts to look damaged or loose. This is where you will start the rest of the cleaning process, so it’s important to wet this area thoroughly.
If you are using a brush to wet the bricks, make sure to use a brush with bristles that are similar to the one you will be using to clean the mortar. This will ensure that the wetting and cleaning process is consistent, as different types of brushes may require different techniques.
After wetting the bricks, allow them some time to absorb the moisture. This usually takes a few minutes, but it can vary depending on the type of bricks and the condition of the mortar. Once the bricks have absorbed the water, they are ready for the next step in the mortar removal process.
Always remember to wear safety gear, such as gloves and goggles, when working with cleaning solutions or any materials that may cause skin irritation. Safety should always be a top priority when working on any DIY project.
To recap, wetting the bricks before removing the mortar is an important step in the cleaning process. It helps to prevent damage to the bricks, provides a better view of the mortar residue, and makes the cleaning process more efficient. There are various methods for wetting the bricks, including using water and a brush or sponge, or using commercially available products. Once the bricks are wet, they are ready for the next step in removing the mortar.
Step 3: Removing the Mortar
Now that you have prepared the bricks and gathered all the necessary tools and safety gear, it’s time to start removing the mortar. Follow these steps to clean the bricks effectively:
1. View the Mortar
Take a close look at the mortar between the bricks. Identify the areas with the most stubborn mortar residue and target them first.
2. Use a Hammer and Chisel
If the mortar is still relatively fresh, you can use a hammer and chisel to chip away at the grouting. This method is not recommended for old and hardened mortar as it can damage the bricks.
3. Muriatic Acid Solution
If the mortar is stubborn and difficult to remove with a chisel, prepare a muriatic acid solution. Mix the acid according to the instructions provided by the manufacturer. Be extremely careful when working with muriatic acid as it is a strong and corrosive substance.
4. Apply the Acid Solution
Using a brush or spray, apply the muriatic acid solution to the areas with stubborn mortar residues. Allow the acid to sit for the recommended amount of time stated on the product’s packaging. This treatment will help dissolve the hardened mortar.
5. Scrub off the Residue
After the acid has had enough time to work, use a wire brush or scraper to scrub off the softened mortar residue. Be careful not to apply too much pressure as it may damage the bricks.
6. Rinse with Water
Once you have removed the majority of the mortar residue, rinse the bricks thoroughly with water to wash away any remaining acid or debris. Make sure to protect nearby plants and the surrounding area by covering them or using a plastic shield.
7. Repeat the Treatment if Necessary
If there are still stubborn mortar residues, repeat the acid treatment and scrubbing process until the bricks are completely cleaned.
8. Absorb Excess Water
Before moving on to the next brick, make sure to absorb any excess water from the previous treatment. Use a towel or sponge to dry the brick surface thoroughly.
Now that you know the process, continue with the next brick and repeat these steps until the entire wall or project area is clean and free from mortar residues.
The most common causes of cement residues and how to prevent them
When working with mortar and grouting, it is common to encounter cement residues or stains on bricks and other surfaces. Understanding the causes of these residues and implementing preventive measures can help maintain a clean and professional result. Here are some of the most common causes of cement residues and how to prevent them:
1. Improper cleaning during the grouting process
During the grouting process, it is essential to clean the excess mortar off the brick surface before it dries. If this step is overlooked or done poorly, it can result in cement residues that are difficult to remove later. Always make sure to clean up excess mortar while it is still wet by using a damp sponge or cloth.
2. Using excessive mortar
Using too much mortar can lead to an overflow of grout onto the brick surface, causing cement residues. To prevent this, make sure to mix the appropriate amount of mortar according to the manufacturer’s instructions and apply it sparingly to prevent excess mortar from accumulating.
3. Lack of protective measures
Not using protective measures such as applying masking tape or protective sheets to adjacent surfaces can result in cement stains or residues. It is important to cover areas that should not come into contact with mortar or grout to prevent them from being affected during the application process.
4. Inadequate cleaning after grouting
After completing the grouting process, it is crucial to thoroughly clean the brick surfaces to remove any remaining residues. Neglecting to do so can result in hardened cement residues that are harder to remove. Use a brush and water to scrub the surface, or if necessary, use a specialized mortar remover or muriatic acid solution.
5. Not wearing appropriate safety gear
When dealing with cement residue removal, it is essential to prioritize safety. This includes wearing gloves, safety goggles, and a mask to protect against any potential hazards. Specifically, when using muriatic acid solution, make sure to follow the manufacturer’s safety instructions and take necessary precautions.
6. Allowing cement residue to dry
If cement residue is not dealt with immediately, it can dry and harden, making it much more challenging to remove. As soon as you notice any residue, it should be addressed promptly to prevent it from becoming a stubborn stain. Use a wire brush or specialized cleaning products to remove the residue before it fully dries.
7. Using improper cleaning tools or techniques
Using the wrong cleaning tools or techniques can cause damage to the brick surface while attempting to remove cement residue. Avoid using abrasive materials or excessive force that may scratch or chip the bricks. Instead, opt for soft-bristle brushes, non-abrasive cleaners, or specialized mortar removers that are safe for use on brick surfaces.
By following these preventive measures and taking necessary precautions, you can minimize cement residues and maintain clean, professional-looking brick surfaces during and after the grouting process.
Poor Quality Mortar
When dealing with poor quality mortar, it’s important to take extra care and precautions. Poor quality mortar can be difficult to remove and may require additional steps to ensure proper cleaning.
1. Assess the Condition of the Mortar
Before starting the removal process, closely examine the mortar to determine its condition. Poor quality mortar is often crumbling or deteriorating, making it more challenging to remove without damaging the underlying brick.
2. Absorb Excess Moisture
If the mortar is excessively wet, use a bench grinder or a hand grinder with a diamond blade to absorb the excess moisture. This will help prevent further damage to the brick during the removal process.
3. Scrape the Mortar
Using a hammer and a bolster, carefully chip away at the mortar. Start from the top of the wall or surface and work your way down to prevent loose debris from falling onto the lower sections.
4. Use a Mortar Scraper
For those hard-to-reach areas or stubborn mortar residues, a mortar scraper can be a useful tool. This handheld tool is designed to remove mortar without damaging the brickwork. Simply use the scraper to scrub off the remaining mortar residues.
5. Clean the Surfaces
After removing the mortar, make sure to clean the surfaces thoroughly. Use a solution of water and a mild cleaner to scrub away any remaining residue from the brickwork. Avoid using strong acids or harsh chemicals, as they can damage the brick.
6. Safety Precautions
Always prioritize safety when working with poor quality mortar. Wear protective gear such as safety goggles, gloves, and a dust mask to protect yourself from dust particles and debris. If using a muriatic acid solution, take extra caution and follow the manufacturer’s instructions.
7. Seek Professional Help

If the poor quality mortar is too difficult to remove or if you are unsure about the best course of action, it may be wise to seek professional help. A professional mason or contractor will have the necessary expertise and tools to tackle the job effectively and safely.
By following these steps, you can effectively remove poor quality mortar from bricks and ensure a clean and smooth surface for further grouting or other treatments.


