When it comes to keeping your footwear looking great, cleaning the bottom of your shoes is just as important as cleaning the rest. Not only does it improve the overall appearance, but it also helps to prolong the life of your shoes by preventing damage caused by dirt and debris. If you’ve ever thought about how to clean the bottom of your shoes but weren’t sure where to start, we’ve got you covered with some practical tips and tricks.
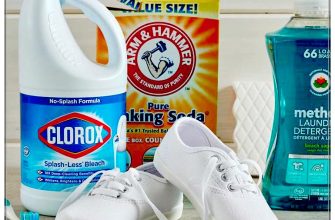
To start, you’ll need a few basic supplies, including a soft-bristled toothbrush, some dish soap, a white eraser, and a dry cloth or towel. If you’re dealing with soiling on suede or other delicate materials, you may need to use a special suede cleaner or consult a professional.
First, remove any loose dirt or stones from the bottom of your shoes using the toothbrush. This step is especially important if you’ve been walking on rough surfaces or in areas with loose particles. Next, wet the toothbrush and apply a small amount of dish soap to the bristles. Scrub the bottom of the shoes, paying extra attention to any areas that are particularly dirty or scuffed.
- Expert Tips for Cleaning the Bottom of Shoes
- Preventing Tough Stains with Impregnation Spray
- 1. Start with clean shoes
- 2. Choose the right spray
- 3. Apply the spray
- 4. Let it dry
- 5. Reapply as needed
- Removing Excess Dirt with a Sneaker Eraser
- How to Use a Sneaker Eraser
- Important Tips to Remember
- Scrubbing the Bottom Soles of Shoes
- 1. Toothpaste
- 2. Baking Soda and Vinegar
- 3. Eraser
- Final Tips
- Cleaning White Outsoles: Practical Tips
- 1. Start with a light scrub
- 2. Use baking soda or toothpaste
- 3. Try a whitening foam or eraser
- 4. Use a stain remover for tough stains
- 5. Finish with a thorough clean
- Soaking and Cleaning Soles with Dishwashing Detergent
- Best Way to Clean the Bottom of Shoes: Taking them to a Cobbler
- Steps to take when taking your shoes to a cobbler:
Expert Tips for Cleaning the Bottom of Shoes
Cleaning the bottom of your shoes can be a challenging task, but with the right tips and tricks, it can be done effortlessly. Here are some expert tips to help you keep your shoes looking clean and fresh:
- Use a toothbrush: One of the most practical ways to clean the bottom of your shoes is by using a toothbrush. The bristles of the toothbrush can effectively scrub away dirt and stains from your shoe soles.
- Remove loose dirt: Before getting started, it’s important to remove any loose dirt or debris from the bottom of your shoes. You can do this by tapping them together or using an eraser to gently wipe away the dirt.
- Try baking soda or toothpaste: If your shoe soles are particularly dirty or stained, you can try using baking soda or toothpaste. Simply apply a small amount of baking soda or toothpaste to a damp cloth and scrub the soles of your shoes. This will help remove tough stains and leave your shoes looking fresh.
- Use vinegar and water: Another effective method for cleaning the bottom of your shoes is by using a mixture of vinegar and water. Mix equal parts vinegar and water in a bowl and dip an old toothbrush into the solution. Scrub the soles of your shoes with the toothbrush to remove dirt and grime.
- Soak your shoes: For those with extremely dirty shoe soles, consider soaking them in a mixture of warm water and detergent. Let the shoes soak for about 15-20 minutes before scrubbing them with a brush. This will provide a thorough cleaning and remove any stubborn dirt.
- Wipe with a damp cloth: After cleaning the bottom of your shoes, it’s important to wipe them with a damp cloth to remove any excess dirt or cleaning agents. This will leave your shoes looking clean and prevent any residue from being transferred to the floor or carpets.
- Giving your shoes a final buff: To give your shoes a final touch, use a dry cloth to buff the soles. This will remove any remaining dirt or stains and leave your shoes looking shiny and clean.
By following these expert tips, you can easily clean the bottom of your shoes and keep them looking fresh and new. Whether you have leather soles or rubber outsoles, these techniques can be used to effectively remove dirt and stains. Remember to take care of your footwear by regularly cleaning the bottom of your shoes to ensure they stay in great condition.
Preventing Tough Stains with Impregnation Spray
When it comes to keeping the bottom of your shoes clean and free from tough stains, prevention is key. One effective way to prevent stains and discoloration is by using an impregnation spray. Impregnation sprays create a protective barrier on your shoes, making it easier to clean them in the future. Here are some tips on how to use impregnation spray to keep your shoes looking their best:
1. Start with clean shoes
Before applying the impregnation spray, make sure your shoes are clean and free from any dirt or debris. Wipe the soles and other areas of your shoes with a damp cloth or brush to remove any loose dirt.
2. Choose the right spray
There are different impregnation sprays available, so make sure to choose the one that is suitable for the material of your shoes. For example, there are specific sprays for suede, leather, and fabric shoes. Read the instructions carefully to ensure that you’re using the right spray for your shoes.
3. Apply the spray
Hold the spray can about 6-8 inches away from your shoes and apply an even coat of the impregnation spray. Make sure to cover the entire surface of the shoes, including the soles. Pay extra attention to the areas that come in contact with the ground, as they are more prone to staining.
4. Let it dry
After applying the impregnation spray, allow your shoes to dry completely before wearing them. This will ensure that the spray has fully soaked into the material and created a protective barrier.
5. Reapply as needed
Impregnation sprays may wear off over time, especially with regular use and exposure to different elements. To maintain the protective barrier, you may need to reapply the spray after a certain period of time or after washing your shoes. Follow the instructions on the spray for the recommended reapplication frequency.
By following these tips and using an impregnation spray, you can help prevent tough stains and discoloration on the bottom of your shoes. This not only keeps your shoes looking great, but also makes cleaning them much easier in the long run. Give it a try and see the difference it makes!
Removing Excess Dirt with a Sneaker Eraser
If your shoes are covered in dirt and you want to start cleaning the bottom, a sneaker eraser is a handy tool to have. This eraser is specially designed to remove smelly, caked-on dirt and stains from the bottom of your shoes.
How to Use a Sneaker Eraser

- Start by removing excess dirt from the bottom of your shoes. Use a brush or your hands to gently brush off any loose dirt or debris.
- If there is any wet or sticky dirt, sprinkle some smelly-powder or an impregnation powder on the bottom of your shoes to absorb the moisture and make it easier to remove.
- Take the sneaker eraser and firmly rub it across the bottom of your shoes. Pay special attention to the areas with dirt clumps or stains. Keep rubbing until the dirt starts to loosen and come off.
- If there are any stubborn stains or dirt that the eraser can’t remove, you can use a mild soap or cleaning solution specifically made for shoes. Spray or apply the solution directly onto the sole of the shoes and use a soft brush or cloth to scrub away the dirt.
- After scrubbing, rinse the bottom of your shoes with water to remove any remaining cleaning solution and dirt. Make sure to dry them thoroughly before wearing them again.
Important Tips to Remember
- Always remove excess dirt and debris before cleaning the bottom of your shoes. This will make the cleaning process easier and more effective.
- If your shoes are wet, let them dry completely before attempting to clean them. Wet shoes can be more difficult to clean and may become damaged if cleaned improperly.
- Use a sneaker eraser specifically designed for cleaning shoes. These erasers are made with materials that are safe for different types of shoe soles and won’t cause any damage.
- Keep in mind that this technique may not work for all types of shoes. Some materials, like suede or heavier fabrics, may require different cleaning methods. If you’re unsure, consult the manufacturer’s instructions or seek advice from experts.
By using a sneaker eraser to remove excess dirt from the bottom of your shoes, you can prevent soiling on other surfaces and keep your shoes looking fresh. Remember to always give your shoes a thorough cleaning once in a while to keep them in good condition.
Scrubbing the Bottom Soles of Shoes
When it comes to cleaning the bottom soles of your shoes, scrubbing is often necessary to remove stubborn dirt and grime. There are several effective methods you can try:
1. Toothpaste
One popular cleaning agent to use is toothpaste. Apply a small amount of toothpaste to a toothbrush and scrub the bottom soles of your shoes in a circular motion. This will help to remove dirt and give your shoes a fresh look. Be sure to give yourself enough time to scrub thoroughly, as this will make the cleaning process easier.
2. Baking Soda and Vinegar
Another option is to create a mixture of baking soda and vinegar. Mix equal parts baking soda and vinegar to form a paste, then apply the paste to your shoe soles. Scrub gently with a toothbrush or sponge, focusing on any tough stains or discolouration. This method can help soften any particles stuck on the soles of your shoes and remove tough dirt.
3. Eraser
If you’re dealing with light soiling or scuff marks, an eraser can be a quick and easy solution. Use a pencil eraser or a special shoe eraser to rub away any dirt or marks on the bottom soles of your shoes. This method is especially useful for cleaning delicate materials like suede.
Final Tips
Before beginning any scrubbing, it’s important to wash your shoes and remove any loose dirt or debris. Always wet your shoes with water before applying cleaning agents. Additionally, it’s recommended to test any cleaning method on a small and inconspicuous area of your shoe first to ensure it doesn’t cause damage or discolouration. Lastly, when scrubbing, be cautious of the type of material your shoe soles are made of, as some methods may be more suitable for certain materials than others.
Remember, the best method to clean the bottom soles of your shoes will depend on the material and how dirty they are. It may be worth trying different methods to see which one works best for you.
Do you have any tips or tricks for cleaning the bottom soles of shoes? Let us know in the comments below!
Cleaning White Outsoles: Practical Tips
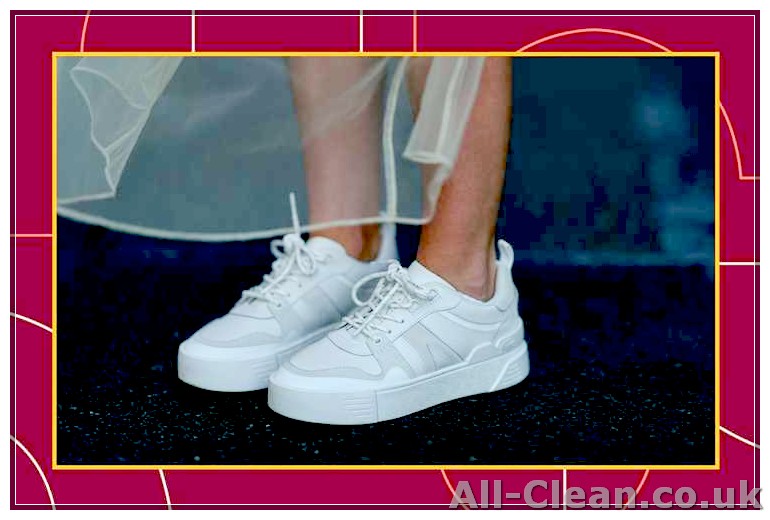
When it comes to cleaning the bottom of your shoes, the material they’re made of can make a big difference. If you have white outsoles, you might find that they easily get dirty and can be challenging to clean. But not to worry, we have some practical tips to help you keep your white outsoles looking fresh and clean.
1. Start with a light scrub
Before you begin, remove any excess dirt or debris from the outsoles. You can use a toothbrush or a dry cloth to gently brush away any loose dirt or clumps. This step will make the cleaning process easier and more effective.
2. Use baking soda or toothpaste
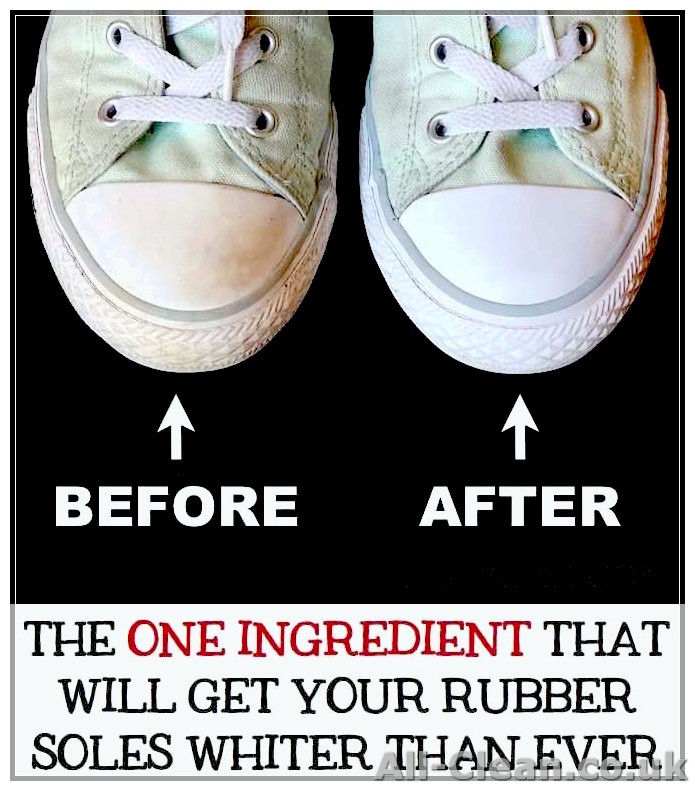
Baking soda or toothpaste can work wonders when it comes to whitening and cleaning white outsoles. Mix a small amount of baking soda or toothpaste with water to create a paste. Apply the paste to the outsoles and use a toothbrush to scrub in a circular motion. This will help remove stubborn stains and bring back the white color.
3. Try a whitening foam or eraser
If baking soda or toothpaste doesn’t do the trick, you can try using a whitening foam or eraser specifically designed for cleaning shoes. Apply the foam or use the eraser to scrub the outsoles, focusing on the stained areas. Leave it on for a few minutes, then wipe away with a damp cloth. This method can be especially effective for removing scuff marks.
4. Use a stain remover for tough stains
If you’re dealing with tough stains that won’t come off with baking soda or whitening foam, you can use a stain remover specifically made for shoes. Apply the stain remover according to the instructions on the package, and let it sit for the recommended time. Afterward, use a cloth or brush to gently buff away the stain. Repeat if necessary.
5. Finish with a thorough clean
Once you’ve removed the stains, it’s important to give the outsoles a final clean to ensure all the cleaning products are removed. Use a damp cloth to wipe away any remaining residue or cleaning agents. If necessary, rinse the outsoles with water and dry them thoroughly before wearing the shoes again.
It’s worth noting that the effectiveness of each cleaning method may depend on the material of the outsoles. Some materials may require different cleaning techniques, so always refer to the manufacturer’s guidelines if available.
By following these practical tips, you can keep your white outsoles looking great and extend the life of your shoes. Remember to take care of the bottom of your shoes, as they can have a significant impact on the overall appearance and longevity of your footwear.
Soaking and Cleaning Soles with Dishwashing Detergent
When it comes to washing the bottoms, or soles, of your shoes, using dishwashing detergent can be a practical and effective method. Not only does it help to remove dirt and grime, but it can also prevent discolouration and keep your sneakers looking their best. Here are some tips on how to clean your shoe soles using dishwashing detergent:
- Start by removing any clumps of dirt or leftover debris from the soles. Use a soft brush or cloth to carefully brush away any loose dirt.
- Next, mix a small amount of dishwashing detergent with warm water in a bowl or basin. The ratio should be about 3 parts water to 1 part detergent.
- Soak the soles of your shoes in the detergent solution for about 10-15 minutes. This will help to soften any tough stains or dirt that may be stuck on the soles.
- After soaking, use a soft brush or cloth to gently scrub the soles, paying extra attention to any stubborn stains. Be sure to scrub in a circular motion to effectively remove the dirt.
- Rinse the soles thoroughly with clean water to remove any detergent residue. Repeat the process if necessary.
- If you’re dealing with tougher stains or marks, you can also try using a mixture of baking soda and water to create a paste. Apply the paste to the stains and let it sit for a few minutes before scrubbing it away.
Once you’ve finished cleaning the soles, be sure to dry them completely before wearing the shoes again. You can either air dry them or use a clean towel to pat them dry.
Remember, prevention is key when it comes to keeping the soles of your shoes clean. Try to avoid walking on rough or dirty surfaces as much as possible, and consider using a protective spray or impregnation to keep your shoes looking their best for longer.
If you have particularly smelly shoes, you can also sprinkle some baking soda on the soles and let it sit overnight to absorb any unwanted odors. Simply brush off the powder in the morning.
If you’re unsure about using dishwashing detergent on your specific type of shoe sole, it’s always best to consult the manufacturer’s instructions or ask a professional cobbler for advice.
Best Way to Clean the Bottom of Shoes: Taking them to a Cobbler

When it comes to cleaning the bottom of your shoes, there are many tips and tricks that you can try on your own. However, if you want the best results and don’t want to risk damaging your shoes, taking them to a cobbler is the way to go.
Why should you take your shoes to a cobbler? Well, cobblers are experts in shoe repair and maintenance, and they have the tools and knowledge to clean the bottom of your shoes properly. They can remove any clumps, stains, or leftover dirt that regular cleaning methods might not be able to tackle.
Steps to take when taking your shoes to a cobbler:
- Inspect your shoes: Before taking your shoes to a cobbler, make sure you inspect them thoroughly. Look for any loose or damaged parts that might need fixing.
- Remove any loose dirt: Use a soft brush or cloth to gently remove any loose dirt or particles from the bottom of your shoes. This will make the cleaning process easier for the cobbler.
- Wipe with a damp cloth: Dampen a cloth with water and gently wipe the soles of your shoes. This will remove any surface-level dirt or stains and prepare them for a deeper cleaning.
- Visit a cobbler: Take your shoes to a trusted cobbler and explain the cleaning needs of your shoes. They will use professional-grade cleaning agents and tools to deep clean the bottom of your shoes.
- Enjoy clean shoes: Once your shoes have been cleaned by the cobbler, you can enjoy wearing them with confidence, knowing that the bottoms are spotless and well-maintained.
Taking your shoes to a cobbler is especially important if you have more delicate or expensive shoes. They will know the best methods and cleaning agents to use to ensure that your shoes are not damaged in the process.
So, the next time you notice your shoes’ soles getting dirty or soiling, don’t head straight to your cleaning supplies. Take them to a cobbler instead! They have the expertise and experience to bring your shoes’ soles back to their former glory.
Remember, prevention is always better than cure. Regularly clean and maintain your shoes to prevent long-term damage. Consider using sole protectors or powder impregnation to prevent heavy soiling and stains. And if you do encounter any tough stains or dirt particles on your shoes, don’t hesitate to take them to a cobbler for a professional cleaning.
With the help of a cobbler, you can ensure that your shoes stay in great condition and last longer. Don’t underestimate the power of professional shoe care and maintenance!
