

Cleaning your walls is an important task that can often be overlooked. Over time, dust, stains, grease, and fingerprints can build up, making your walls look dirty and dull. However, cleaning your walls doesn’t have to be a daunting task that involves repainting or damaging the paint. In fact, there are easy and effective ways to clean your walls without removing the paint and ensure they stay in great condition.
One of the best and easiest ways to clean your walls without damaging the paint is by using a simple solution of warm water and a soft cloth. Gather your cleaning equipment, such as a soft cloth or sponge, and fill a bucket or basin with warm water. You can add a small amount of mild soap or vinegar to the water for better cleaning results.
Once you have your cleaning solution ready, start by dusting the walls using a soft cloth or duster. This will remove any loose dust or dirt that may be on the surface. Then, dip your cloth or sponge into the warm water, wring it out so it’s not dripping, and gently wipe the walls starting from the top and working your way down. Be sure to clean the entire surface of the wall, paying extra attention to any stains or marks.
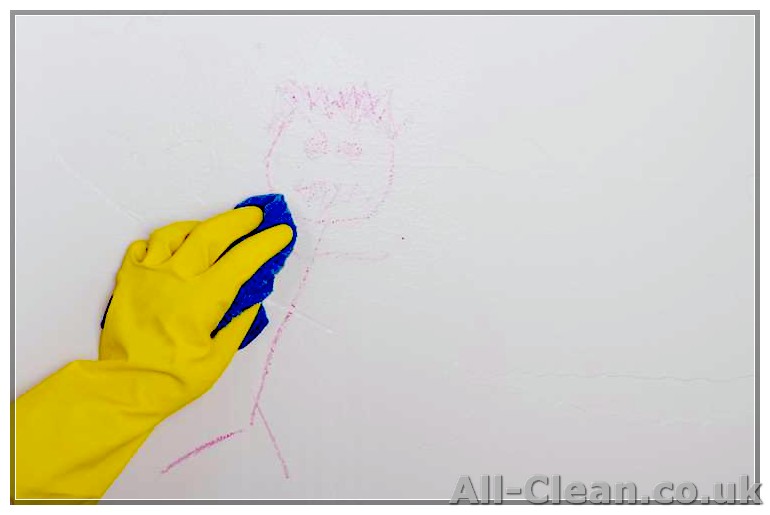
If you’re dealing with stubborn stains or grease on your walls, you might want to try using a magic eraser or a solution of water and a small amount of dish soap. Simply wet the magic eraser or cloth with the soapy water, gently rub the stain in a circular motion, and then rinse the area with clean water. Just be careful not to scrub too hard or use any abrasive cleaners, as these can damage the paint finish.
Once you’ve finished cleaning the walls, it’s important to thoroughly dry them to prevent any water or moisture damage. Use a dry cloth or towel to wipe off any excess water, and then allow the walls to air dry for a few hours. If you’re in a hurry, using a fan or opening windows can help speed up the drying process.
In conclusion, cleaning your walls doesn’t have to be a difficult or time-consuming task. By following these simple instructions and using the right cleaning solutions, you can easily clean your walls without removing the paint or damaging the surface. Just remember to take care when using any cleaning products and to test them on a small, inconspicuous patch of wall first. With a little bit of care and attention, you can keep your walls looking clean and fresh for years to come.
- How to Clean Walls Without Removing Paint
- 1. Gather the necessary equipment
- 2. Prepare the cleaning solution
- 3. Test a small patch
- 4. Remove dust and dirt
- 5. Clean with the soapy water
- 6. Rinse with clean water
- 7. Dry and shine the walls
- Gather the necessary cleaning supplies
- Prepare the walls for cleaning
- Test a small area before proceeding
- Clean the walls using a gentle cleaning solution
- Dry the walls properly to prevent damage
- Easy Way to Ensure Your Walls Aren’t Damaged
How to Clean Walls Without Removing Paint
If you want to clean your walls without removing the paint, there are a few instructions you can follow. By taking the right approach, you can keep your walls looking good as new. Here’s how:
1. Gather the necessary equipment
Before you start cleaning, make sure you have the right tools. You’ll need:
- A bucket of warm water
- A soft sponge or cloth
- A mild soap or cleaning solution
- A clean towel or rag
2. Prepare the cleaning solution
Mix a small amount of mild soap or cleaning solution with the warm water in the bucket. Be careful not to use too much soap, as it might leave residue on the walls.
3. Test a small patch
Test the cleaning solution on a small patch of the wall that is not easily visible. This will help you ensure that the soap does not discolor or damage the paint.
4. Remove dust and dirt
Start by removing any dust or dirt from the walls. Use a dry, soft cloth or a feather duster to gently wipe down the surface. This will prevent the dirt from spreading and scratching the paint.
5. Clean with the soapy water
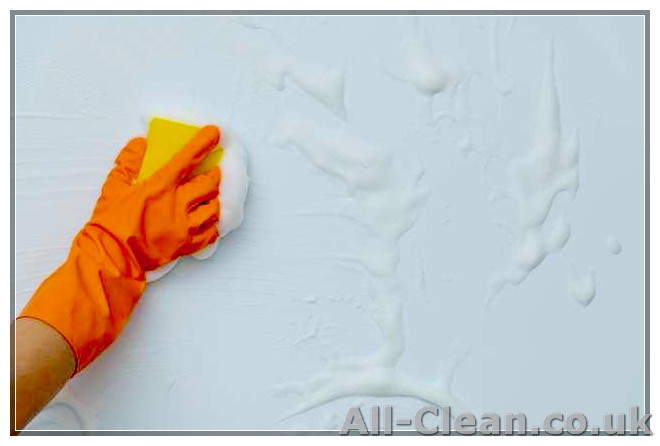
Dip the sponge or cloth in the soapy water and gently scrub the walls. Be sure to wring out any excess water to avoid dripping. Start at the top and work your way down, paying extra attention to any dirty or stained areas.
6. Rinse with clean water
After cleaning with the soapy water, wipe the walls with a dampened cloth or sponge to remove any soap residue. This step is crucial to prevent any staining or damage to the paint.
7. Dry and shine the walls

Finally, use a clean towel or rag to dry the walls completely. This will prevent any water from pooling and causing damage. You can also gently polish the walls to give them a nice shine.
By following these instructions, you can clean your walls without removing the paint. With a little care and the right technique, your walls will stay looking fresh and vibrant, without the need for frequent repainting.
Gather the necessary cleaning supplies
Before you start cleaning your walls, it’s important to gather all the necessary cleaning supplies. With the right tools, you can ensure that your walls are cleaned effectively without damaging the paint. Here is a list of the supplies you will need:
- A bucket of warm water
- Mild dish soap or vinegar
- A sponge or soft cloth
- A soft-bristle brush or toothbrush
- A magic eraser or cleaning cloth
These items will help you remove any dirt, dust, or staining on your walls. If you have any particularly dirty spots, a magic eraser or cleaning cloth can come in handy. These tools are designed to clean walls without removing paint, making them safe to use on most surfaces.
Furthermore, if you’re dealing with scuffs or marks on your walls, you may want to consider using a small amount of toothpaste. Apply the toothpaste to a cloth and gently rub it over the affected area. This can help remove any unsightly marks without causing any damage to the paint.
It’s important to note that before you begin cleaning, you should dust your walls with a soft cloth or duster. This will remove any loose dirt or debris, making the cleaning process more effective.
Once you have all your supplies gathered, it’s time to start cleaning. Make sure to read and follow the instructions on the cleaning products you choose to use. Different products may have different usage guidelines, so it’s important to use them as directed for the best results.
Cleaning your walls is a simple task that can be done with minimal equipment. With the right supplies and techniques, you can keep your walls looking fresh and clean without the need for repainting.
Prepare the walls for cleaning
Before you start cleaning your walls, it’s important to take a few steps to ensure that the process goes smoothly and doesn’t cause any damage. Proper preparation will help in making the cleaning task easier and reduce the likelihood of patchy or damaged walls, which may require repainting. Here’s what you’ll need:
- A bowl of warm water
- Dish soap or a gentle cleaning solution
- A soft cloth or sponge
- A flashlight (optional)
1. Gather all the necessary supplies and equipment. Having everything you need on hand will minimize the time and effort spent on getting additional items while cleaning.
2. Dust the walls. Use a soft cloth or a feather duster to remove any dust or cobwebs from the surfaces. This step will prevent the dust from spreading and smearing when you clean the walls.
3. Spot-clean any stains or grease. Use a dampened cloth or sponge and a mild dish soap or cleaning solution to gently scrub the stained areas. Be careful not to press too hard, as excessive scrubbing can damage the wall finishes.
4. Test a small area. If you’re not sure how your wall will react to the cleaning solution, it’s a good idea to test it on a small, inconspicuous area first. This will help you determine whether the solution is safe to use on the entire wall.
5. Follow the manufacturer’s instructions. If you’re using a specific cleaning solution, make sure to read and follow the instructions provided. This will ensure that you’re using the product correctly and maximizing its effectiveness.
6. Protect your floors and furniture. Place a drop cloth or old towels on the floor and move any furniture away from the walls. This will prevent any water or cleaning solutions from damaging your belongings.
7. Shine a flashlight. Use a flashlight to check the walls for any dirt or stains that might have been missed. This step is especially important if you’re cleaning a white or light-colored wall, as dirt and stains are more likely to stand out.
By following these simple steps, you can prepare your walls for cleaning without causing any damage. This will make the cleaning process much easier and ensure that your walls are left looking clean and fresh.
Test a small area before proceeding
Before you start cleaning your walls, it’s important to test a small area to ensure that your cleaning solution doesn’t damage or remove the paint. This is especially important if you have delicate or older paint finishes.
To test a small area, follow these tips:
- Gather your cleaning supplies. You’ll need a soft cloth, a bowl of warm water, and a mild soap.
- Dampen the cloth with the soapy water and wring out any excess liquid.
- Choose a small, inconspicuous area of the wall, such as a corner or behind a piece of furniture.
- Gently scrub the test area with the damp cloth, using light pressure. Be careful not to scrub too hard, as this could damage the paint.
- After a few seconds of scrubbing, inspect the test area. If the paint has been removed or damaged, stop immediately.
- If the paint looks unharmed, gently wipe away any soap residue with a clean, damp cloth and allow the test area to dry.
Once the test area is fully dry, you can proceed with cleaning the rest of your walls. If the paint was damaged or removed during the test, you may need to explore other cleaning solutions or consult a professional for advice.
Remember, it’s always better to be cautious when cleaning painted walls. Taking the time to test a small area can prevent you from making a costly mistake and ensure that your walls aren’t damaged or stained in the process.
Clean the walls using a gentle cleaning solution
To clean your walls without removing paint, you’ll need a gentle cleaning solution and some soft cleaning materials. Follow these steps to ensure your walls aren’t damaged during the cleaning process:
- Start by dusting the entire wall surface with a soft cloth or feather duster. This will remove any loose dirt or debris.
- Next, mix a gentle cleaning solution by combining equal parts water and vinegar. Vinegar is a natural and effective cleaner that won’t harm your paint.
- Wet a soft cloth with the vinegar solution and gently wipe the walls from top to bottom. Be sure to wring out the cloth well so that it’s only slightly damp.
- If you have any stubborn stains or marks on your walls, you can try using a Mr. Clean Magic Eraser. Wet the eraser with water and gently scrub the stained area. However, use this method sparingly, as the eraser can potentially remove some of the paint if too much pressure is applied.
- Rinse the walls with clean water after cleaning to remove any residual cleaning solution. Use a clean, slightly damp cloth to wipe away the vinegar solution.
- If the walls are still dirty or stained, you can try using a mild toothpaste. Apply a small amount of toothpaste to a soft cloth and gently rub the stained area. Rinse with water and wipe dry.
Following these tips will help ensure that your walls are clean without causing any damage to the paint. If you have any other questions or need further assistance, feel free to ask!
Dry the walls properly to prevent damage
After you’ve finished washing your walls with vinegar or a gentle soap solution, it is important to dry them thoroughly to prevent any potential damage. Here are some tips for properly drying your walls:
- Use a soft cloth or towel: A soft cloth or towel is the best choice for drying walls. It will not scratch or damage the paint.
- Avoid using a hairdryer: Although using a hairdryer might speed up the drying process, it can also cause the paint to bubble or peel.
- Allow sufficient time for drying: Give your walls ample time to air dry. This will help prevent any water stains or streaks from forming.
- Check for areas with excess moisture: Before declaring your walls fully dry, make sure to inspect for any areas that might still be dampened. Use a flashlight to spot any moisture that might be lingering.
- Utilize proper ventilation: Open windows or turn on fans to promote air circulation and facilitate the drying process. This will also help prevent any mold or mildew growth.
By following these tips, you can ensure that your walls are thoroughly dried without causing any damage. This will help maintain the shine and quality of your paint, allowing your walls to look their best.
Easy Way to Ensure Your Walls Aren’t Damaged
When it comes to cleaning your walls, you want to ensure that you don’t accidentally remove the paint or cause any damage. Here is an easy method that will help you clean your walls without any worry:
- Gather the necessary items: Before you begin, gather the following items: a bucket or container, warm water, mild soap or vinegar, two clean cloths or sponges, a flashlight, and a dry towel.
- Prepare the cleaning solution: Mix a small amount of mild soap or vinegar with warm water in a bucket or container. This solution will effectively clean your walls without causing any damage.
- Test in an inconspicuous area: Before applying the cleaning solution to the entire wall, test it in a small, inconspicuous area to ensure that it doesn’t discolor or damage the paint. Use a damp cloth and gently scrub the area to see if any issues arise.
- Clean the walls: Once you’ve tested the solution and are confident that it won’t cause any problems, it’s time to clean the walls. Dip one of the cloths or sponges into the cleaning solution and wring out any excess liquid. Gently scrub the dirty areas of the wall, paying extra attention to any stains or marks.
- Dry the walls: After cleaning, use the second cloth or sponge dampened with clean water to go over the walls again. This step will help remove any soap or vinegar residue. Finally, use a dry towel to carefully dry the walls.
Following these instructions will ensure that your walls are clean and free from dirt and grime without causing any damage to the paint. By taking a few simple steps, you can maintain the look of your walls and keep your room looking fresh and clean.


