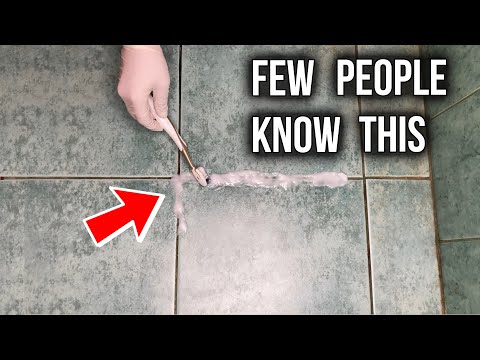

If you have tiled floors or walls, you know how easily grout can become dirty and stubborn to clean. The humidity in bathrooms and high-traffic areas tends to soak into grout and leave it looking dirty and black. Fortunately, there are simple and effective techniques to clean grout without scrubbing, saving you time and effort.
One of the easiest methods is to use a mixture of warm water and baking soda. This eco-friendly substance is powerful enough to cut through dirt and grease, yet gentle enough to not damage your tiles. Simply mix equal parts of warm water and baking soda to form a paste, then apply it to the grout with a cloth or sponge. Let it sit for a few minutes, then scrub gently and wipe away the dirt.
If your grout is particularly stubborn or moldy, you can try using lemon juice or white vinegar. These acidic cleaners are known for their ability to remove stains and brighten grout. Simply mix equal parts of lemon juice or white vinegar with warm water, then apply it to the grout and let it sit for a few minutes. Scrub gently with a brush or sponge, then rinse thoroughly with water.
Another alternative is to use a commercial grout cleaner, such as Tilex. These cleaners are specifically formulated to remove dirt, grime, and stains from grout. Simply follow the instructions on the bottle, being careful to wear gloves and ensure proper ventilation in the area where you are cleaning.
Once you have thoroughly cleaned your grout, it is important to maintain its cleanliness and condition. Regularly wiping down your tiles with a damp cloth or mop can help prevent dirt and dust from settling into the grout. Additionally, consider sealing your grout to keep it looking cleaner for longer. Grout sealer creates a protective barrier that prevents staining and makes it easier to clean in the future.
In conclusion, cleaning grout without scrubbing can be made simple and effective with the right techniques. Whether you choose to use natural ingredients like baking soda and lemon juice, or opt for commercial cleaners, the key is to be thorough and consistent in your cleaning routine. By following these methods, you can easily maintain clean and beautiful grout in your home.
- Use Baking Soda and Vinegar
- What You’ll Need:
- Instructions:
- Try Hydrogen Peroxide and Baking Soda Paste
- How it works
- Ingredients and materials
- Instructions
- Tips and reminders
- Consider Steam Cleaning
- How to Clean Stubborn Grout Mold
- 1. Oxiclean Powder and Water Solution
- 2. Clorox Bleach and Water Mixture
- 3. Vinegar and Baking Soda Paste
- Prepare a Bleach Solution
- What you’ll need:
- Step-by-Step Instructions:
Use Baking Soda and Vinegar
Baking soda and vinegar are the ultimate combination when it comes to cleaning grout without scrubbing. This simple and effective technique is perfect for tackling dirty grout lines on your floors and walls.
What You’ll Need:
- Baking soda
- Vinegar
- Water
- A spray bottle
- A scrub brush or toothbrush
Instructions:
- Mix equal parts baking soda and water to create a paste. The paste should be thick enough to stick to the grout lines.
- Apply the baking soda paste to the grout lines, making sure to cover them completely.
- Spray vinegar onto the baking soda paste. You will notice a fizzy reaction as the two ingredients interact.
- Let the mixture sit for about 5-10 minutes. This will give the baking soda and vinegar time to penetrate and break up any dirt or stains.
- Use a scrub brush or toothbrush to scrub the grout lines. The combination of baking soda and vinegar will help to loosen and lift away dirt and grime.
- Rinse the area with water to remove any remaining paste and residue.
- For tough stains or heavily soiled grout, you may need to repeat the process or let the mixture sit for a longer period of time.
This baking soda and vinegar method is an excellent way to clean grout without the need for harsh chemicals or scrubbing. It is eco-friendly and safe for use on a variety of surfaces, including tile and flooring. The combination of baking soda and vinegar creates a powerful cleaning agent that is effective at removing dirt, mold, and stains.
Just remember to always follow proper safety precautions when working with vinegar or any cleaning solution. Avoid mixing vinegar with bleach or other chemicals, as this can create harmful fumes. Additionally, be sure to test the cleaning solution on a small, inconspicuous area before using it on your entire grout area to ensure that it does not cause any damage or discoloration.
So the next time you find yourself faced with dirty grout and don’t want to spend hours scrubbing on your hands and knees, try this easy and effective baking soda and vinegar cleaning method. You’ll be amazed at how well it works and how much time and effort it can save you!
Try Hydrogen Peroxide and Baking Soda Paste
If you’re looking for an effective and scrub-free way to clean grout, try using a hydrogen peroxide and baking soda paste. This simple mixture can help remove dirt, grime, and stains from your grout lines without requiring excessive scrubbing.
How it works
Baking soda is a natural cleaner and deodorizer that can help lift dirt and stains from grout. When combined with hydrogen peroxide, which is a mild bleach, the paste becomes even more effective at breaking down tough stains.
Ingredients and materials
- Baking soda
- Hydrogen peroxide
- A small bowl or container
- A spoon or spatula for mixing
- An old toothbrush or scrub brush
- A cloth or sponge
- Warm water
Instructions
- In a small bowl or container, mix equal parts hydrogen peroxide and baking soda to create a paste.
- Apply the paste to the grout lines, making sure to cover the areas that need cleaning.
- Allow the paste to sit on the grout for at least 15 minutes. This will give the hydrogen peroxide and baking soda time to penetrate the stains and loosen dirt.
- After the paste has had time to work, use an old toothbrush or scrub brush to scrub the grout lines. Apply some pressure and scrub in a circular motion to effectively lift dirt and grime.
- Rinse the grout lines with warm water to remove the paste and any loosened dirt.
- Wipe the grout lines dry with a cloth or sponge.
Tips and reminders
- Before applying the paste, remove any loose dirt or dust from the grout lines by sweeping or vacuuming.
- For best results, use warm water to help activate the cleaning properties of the hydrogen peroxide and baking soda.
- If your grout is especially dirty or stained, you may need to repeat the process or let the paste sit for a longer period of time.
- Keep in mind that hydrogen peroxide is a mild bleach and can potentially lighten the color of your grout. Test the mixture on a small, inconspicuous area of grout before applying it to the entire surface.
- If you’re cleaning unsealed grout, be aware that it may absorb liquids more easily and could become dirtier faster. Consider applying a grout sealant after cleaning to help maintain its cleanliness.
- Avoid using bleach or bleach-based products on colored grout, as it can cause fading or discoloration.
- If you prefer a more environmentally friendly option, you can substitute hydrogen peroxide with vinegar in the paste mixture. Vinegar is a natural cleaning agent that contains acetic acid, which can help dissolve dirt and stains.
With this hydrogen peroxide and baking soda paste, you can now clean your grout lines without all the scrubbing and pain. Enjoy cleaner and brighter tiles in just a few simple steps!
Consider Steam Cleaning
If you’re tired of spending hours scrubbing and still not getting the desired results, steam cleaning may be the perfect solution for you. Steam cleaning is an effective and easy way to clean grout without all the hassle of scrubbing. Here’s why:
- Steam cleaning uses high-temperature steam to break down grease and dirt on the grout surface. The heat helps to loosen the dirt and make it easier to remove.
- This method is suitable for various types of grout material, whether it’s on the floor, wall, or countertop. It works on both colored and black grout.
- Unlike traditional cleaning methods, steam cleaners can reach deep into the grout, removing dirt and stains that other methods may miss.
- Steam is a natural and chemical-free substance, making it an eco-friendly option for cleaning your grout.
- Steam cleaning not only removes dirt and grime but also helps to kill germs and bacteria. The high temperature of the steam sterilizes the grout, ensuring a clean and hygienic surface.
To steam clean your grout, you’ll need a steam cleaning machine. Make sure to choose a powerful machine that can produce hot steam. Fill the machine with water and wait for it to heat up. Once it’s ready, hold the nozzle close to the grout and let the steam do its job.
For more stubborn stains, you can add a small amount of vinegar or rubbing alcohol to the water tank. These substances can help to break down tough grime and make the cleaning process more effective.
After steaming, wipe away the dirt and moisture with a clean cloth. Remember to work in small sections to ensure that you’re not leaving any dirty spots behind.
Overall, steam cleaning is one of the easiest and most effective methods for cleaning grout. It saves you from the pain of scrubbing on your knees and eliminates issues like mold and mildew growth. Whether you’re working on tiled floors or in the bathroom, steam cleaning can tackle everything, leaving your grout looking fresh and clean.
How to Clean Stubborn Grout Mold
Cleaning grout mold can be a challenging task, especially when it’s stubbornly lodged between tiles. Fortunately, there are some effective techniques that can help you remove grout mold without excessive scrubbing. In this article, we will discuss three simple and effective methods for tackling stubborn grout mold.
1. Oxiclean Powder and Water Solution

One of the easiest ways to clean stubborn grout mold is by using Oxiclean powder. Oxiclean is a powerful cleaning agent that helps break down grime and mold. To use Oxiclean, mix the powder with water according to the instructions on the packaging. Then, apply the solution to the grout lines and let it sit for about 10-15 minutes. Afterward, scrub the grout with a brush or cloth to remove the mold. Rinse the area with water to remove any residue.
2. Clorox Bleach and Water Mixture
Another effective method for removing stubborn grout mold is by using a Clorox bleach and water solution. To make this mixture, dilute one part Clorox bleach with three parts water in a bucket. Saturate a cloth or sponge in the solution and scrub the grout lines. Let the bleach solution sit on the grout for about 10-15 minutes. Then, rinse the area thoroughly with water. Be careful when using this method, as bleach can discolor some types of grout or damage colored tiles.
3. Vinegar and Baking Soda Paste
If you prefer a natural and non-toxic method for cleaning grout mold, vinegar and baking soda can be a great option. Mix white vinegar and baking soda in a bowl to create a paste-like consistency. Apply the paste to the moldy grout and let it sit for about 15 minutes. The vinegar helps break down the mold, while the baking soda acts as a scrubbing agent. Scrub the grout with a brush or cloth, then rinse the area with water.
It’s important to note that preventing grout mold is as crucial as removing it. To prevent future mold growth, consider sealing your grout lines with a water-resistant sealant. This will help protect the grout from moisture and make it easier to clean in the future.
In conclusion, cleaning stubborn grout mold doesn’t have to be a time-consuming and difficult task. By using the above-mentioned techniques and products like Oxiclean, Clorox bleach, and vinegar, you can effectively remove grout mold without excessive scrubbing. Remember to take preventive measures, such as sealing the grout, to minimize the chances of mold growth in the future.
Prepare a Bleach Solution
One of the most effective ways to clean grout without scrubbing is by using a bleach solution. Bleach is a powerful cleaner that can remove tough stains and kill bacteria and mold growth on the grout.
What you’ll need:
- Bleach
- Water
- Spray bottle
- Toothbrush or grout brush
- Gloves
- Mask
Step-by-Step Instructions:
- Start by making a bleach solution. Mix 1 part bleach with 3 parts water in a spray bottle. Be sure to wear gloves and a mask to protect your skin and respiratory system.
- Before applying the bleach solution, clean the grout with warm soapy water to remove any surface dirt or debris.
- Spray the bleach solution onto the grout lines, making sure to saturate them thoroughly. Avoid spraying onto tiles or windows, as bleach can damage these surfaces.
- Let the bleach solution sit on the grout for about 15 minutes to allow it enough time to work its magic. This will help to reduce scrubbing.
- After the 15 minutes is up, start scrubbing the grout lines with a toothbrush or grout brush. The bleach solution will have loosened the grime, making it easier to remove.
- Rinse the grout lines with clean water to remove any remaining bleach solution.
- If there are any stubborn stains or moldy areas, you can make a paste by mixing baking soda and lemon juice or vinegar. Apply the paste to the stains and let it sit for a few minutes before scrubbing.
- Once you’re done scrubbing, rinse the grout lines thoroughly with clean water to remove any residue.
- Use a towel to dry the grout, making sure there is no moisture left behind.
Remember to always follow the instructions on the bleach bottle and take proper safety precautions. Bleach can be a strong and harsh substance, but it is usually the best option for cleaning stubborn grout stains and removing mold.
It’s worth noting that sealing your grout after it has been thoroughly cleaned and dried can help to prevent future stains and make the cleaning process easier. Sealing fills in the small pores of the grout, making it less likely for dirt, mold, and stains to become embedded. There are many grout sealers on the market, so be sure to choose one that is suitable for your specific tile and grout type.
So, if you’re tired of scrubbing and want an effective and scrub-free way to clean your grout, give the bleach solution a try. Just be sure to take the necessary precautions and follow the instructions for a safe and successful cleaning process.


