
Keeping your computer running smoothly and efficiently is essential for optimal performance. One of the key ways to achieve this is by regularly maintaining and cleaning your PC hardware. Luckily, there are simple ways to keep things spic and span, which makes the whole process much easier.
One of the most important tools for cleaning your PC hardware is a can of compressed air. This handy tool is necessary for cleaning out dust and other debris that can accumulate in various parts of your computer. It’s particularly useful for cleaning keyboards, where dust and crumbs can easily become trapped. To clean your keyboard, simply turn off your system, hold the can about two inches away, and blow the compressed air in between the keys. This will help remove any unwanted particles and keep your keyboard in top shape.
Another important tool for the cleaning process is a small brush, such as a soft-bristle paintbrush. This can be used to clean dust and dirt from harder-to-reach areas, such as the inside of your computer case or around the fans. By carefully using the brush, you can remove any build-up that may be impacting the performance of your system. Just be sure to turn off your computer and unplug it from the power supply before beginning any cleaning process.
When it comes to cleaning the inside of your computer case, there are a few steps you need to follow. First, unscrew the case and carefully remove it. Once you’ve done this, you can use the compressed air to blow out any dust or debris that may have collected on the internal components, such as the CPU or motherboard. Just be sure to hold the can of compressed air upright and use short bursts to evenly distribute the air. This will help protect your hardware from any potential damage.
Don’t forget about the external components of your computer as well. Items like your monitor, mouse, and keyboard can also benefit from regular cleaning. For monitors, use a soft cloth or microfiber cloth to gently wipe away any dust or smudges. For mice and keyboards, you can use a small amount of rubbing alcohol on a cloth to sanitize the surfaces. Just be sure to let the alcohol dry completely before using the mouse or keyboard again.
By following these best practices for maintaining and cleaning your PC hardware, you can greatly extend the life of your computer and prevent any potential issues. Remember to always turn off your system and unplug it from the power supply before beginning any cleaning process. Additionally, be sure to use the proper tools and be careful when handling delicate components. With regular maintenance and cleaning, you can keep your computer running smoothly and efficiently for years to come.
- Simple Steps To Clean Your PC Fans
- Step 1: Prepare the necessary tools
- Step 2: Power off your computer
- Step 3: Remove the fan
- Step 4: Clean the fan
- Step 5: Reassemble and test
- Essential Tools And Best Practices
- Cleaning Internal Components
- 1. Power Off and Unplug
- 2. Use Compressed Air
- 3. Scrub Off Stubborn Dust
- 4. Deep-Clean Your Components
- 5. Be Cautious with the Power Supply
- 6. Clean the Hard-to-Reach Areas
- 7. Replace Components When Needed
- Final Tips
- Cleaning External Components
- 1. Shut off your computer
- 2. Gather the necessary tools
- 3. Start with the case
- 4. Clean the computer peripherals
- 5. Pay attention to the power supply
- 6. Clean the optical drive
- 7. Take care of the cooling system
- 8. Clean the CMOS battery
Simple Steps To Clean Your PC Fans
Cleaning your PC fans is an essential step in maintaining the longevity and performance of your computer. Over time, dust and debris can build up on the fans, causing them to work less efficiently and potentially overheat. In this guide, we will outline simple steps to help you clean your PC fans effectively.
Step 1: Prepare the necessary tools

Before you start cleaning your PC fans, gather the necessary tools. You will need a screwdriver (to unscrew the fan from the case), compressed air or an air blower, cotton swabs or Q-tips, and isopropyl alcohol (70% or higher).
Step 2: Power off your computer
Before cleaning any electronic components, it is crucial to power off your computer and unplug it from the power source. This will ensure your safety and prevent any accidental damage to the hardware.
Step 3: Remove the fan
Locate the fan that needs cleaning and unscrew it from the case. Be careful when doing this, as some fans may have cables connected to them. Gently disconnect these cables before proceeding.
Step 4: Clean the fan
Once the fan is removed, you can begin cleaning it. Use compressed air or an air blower to remove any dust or debris buildup on the fan blades. Make sure to hold the fan steady to prevent it from spinning during the cleaning process.
If there is stubborn dirt or residue on the fan, moisten a cotton swab or Q-tip with isopropyl alcohol and gently clean the affected areas. Be cautious not to get any liquid on the motor or electrical components of the fan.
Step 5: Reassemble and test
After cleaning the fan, allow it to dry completely before reassembling it. Once dry, carefully reattach the fan to the case and secure it with screws. Make sure all cables are properly connected before turning on your computer.
Once your computer is powered on, test the fan to ensure it is working correctly. Listen for any unusual noises or vibrations that may indicate further cleaning or maintenance is necessary.
By following these simple steps, you can effectively clean your PC fans and maintain their optimal performance. Regular cleaning and maintenance will help prevent dust buildup and increase the longevity of your computer.
Essential Tools And Best Practices
- To perform maintenance on your PC, you will need a few essential tools. These include a soft cloth or microfiber cloth, canned air or an air compressor, a small brush or toothbrush, cotton swabs, rubbing alcohol, thermal paste, and a screwdriver set.
- When cleaning hard-to-reach areas inside your PC, an ideal tool to use is canned air or an air compressor. This allows you to blow away dust and dirt from areas that are difficult to reach with a cloth or brush.
- Before performing any maintenance tasks on your computer, take the time to properly shut it down and unplug it from the power supply. This will prevent any potential damage to the components and ensure your safety.
- If you have any questions or concerns about cleaning or maintaining your PC, it is always best to consult the user manual or contact the manufacturer for assistance. They can provide you with guidance specific to your computer model.
- It is also important to note that some components may require a more in-depth cleaning or reseating process. For example, the CPU or graphics card may need to be removed and cleaned separately. Be sure to follow the manufacturer’s instructions for these specific components.
- When deep-cleaning your PC, be sure to start by cleaning the larger components first, such as the motherboard and power supply. These components tend to gather the most dust and dirt and can greatly impact the performance and longevity of your computer if not properly cleaned.
- If you’ve never cleaned your PC before, it is a good idea to take a few pictures of the inside of your computer before you start. This will help you remember how all the components are connected and where they should go when you’re done cleaning.
- If you’re not comfortable with taking apart your computer or cleaning the internal components yourself, it is best to take it to a professional repair center. They have the expertise and tools necessary to clean and replace components properly.
- Keeping your PC clean not only improves its performance but also helps to maintain warranties. If you’re unsure about how to clean a certain component or if it will void your warranty, it is always best to consult the manufacturer or a professional before proceeding.
- When cleaning electronic components, such as the motherboard or graphics card, it is important to use tools that are specifically designed for electronic use. Avoid using tools with metal blades or sharp edges, as they can damage the delicate components.
- Virtually all computer components can be cleaned using a soft cloth or canned air. Although, for more stubborn dirt or grime, you may need to use a small brush or cotton swab dipped in rubbing alcohol. Just be sure to use the alcohol sparingly and allow it to dry completely before reassembling your PC.
- If you’re heading into the world of computer maintenance and cleaning, it’s important to know that not every tool is needed for every task. Depending on the component or area you’re cleaning, you may only need a few specific tools.
- For example, when cleaning a mouse, you will typically only need a soft cloth and maybe some alcohol to wipe down the surface. On the other hand, cleaning a hard drive or other internal components will require more tools and steps to ensure proper cleaning.
Cleaning Internal Components
Keeping the internal components of your PC clean is essential to ensure optimal performance and prevent damage. Dust and debris can accumulate over time, causing the hardware to overheat and potentially fail. Here are some essential tips to help you maintain and clean the internal components of your PC.
1. Power Off and Unplug
Before you start cleaning, make sure you power off your PC and unplug it from the power supply. This is a basic safety recommendation to avoid any electrical shocks or damage to your hardware.
2. Use Compressed Air
Compressed air is a fast and effective way to remove dust and debris from the hard-to-reach areas of your PC. Hold the canister upright and carefully blow away the dust from components such as fans, heat sinks, and the power supply. Make sure you don’t hold the canister too close to the components to avoid any potential damage.
3. Scrub Off Stubborn Dust
If compressed air is not sufficient to remove stubborn dust or dirt, you can use a soft brush or cotton swab to gently scrub the components. Be careful not to apply too much pressure or scrub too vigorously, as this may damage the sensitive parts of your PC.
4. Deep-Clean Your Components
For a more thorough cleaning, you may need to take some components apart. This is, however, recommended only if you are familiar with PC hardware and have the necessary tools. Components such as fans, heat sinks, and even the motherboard can be deep-cleaned using cotton swabs and rubbing alcohol. Make sure you follow proper guidelines and reseat the components correctly after cleaning.
5. Be Cautious with the Power Supply
The power supply is an essential component of your PC, and it should be handled with extra care. Avoid opening the power supply unit yourself, as it contains high-voltage components that can be dangerous to handle. If you have any questions or issues regarding the power supply, it’s better to consult a professional for assistance.
6. Clean the Hard-to-Reach Areas
Avoid letting dust and debris accumulate in areas that are hard to reach, such as the area around the CPU socket or the space between your graphics card and motherboard. Use compressed air or a small brush to clean these areas regularly. Keeping these areas clean can prevent overheating and other potential issues.
7. Replace Components When Needed
In some cases, components may become too worn out or damaged to be effectively cleaned. If you notice that a certain component is not functioning properly or is causing issues, it may be necessary to replace it. Make sure you have the necessary knowledge and tools to safely replace components.
Final Tips
- Always turn off your PC and unplug it before cleaning.
- Remember to clean your mouse and keyboard regularly, as they can accumulate dust and debris.
- Keep the area around your PC clean to prevent extra dust from entering the internal components.
- Be thorough when cleaning, but be careful not to damage any sensitive parts.
- Consider cleaning the CMOS battery if your PC is experiencing issues with date and time settings.
By following these essential steps and tips, you can ensure that your PC’s internal components stay clean and functioning properly, preventing overheating and prolonging the life of your hardware.
Cleaning External Components
Keeping the external components of your computer clean is just as important as maintaining the internal hardware. Dust and dirt can accumulate on these surfaces, which can affect the overall performance of your system. Here are some essential tips for cleaning the external components of your PC:
1. Shut off your computer
Before starting the cleaning process, make sure your computer is shut off. This will prevent any accidental power-on or damage to the hardware.
2. Gather the necessary tools
For cleaning the external components, you will need some basic tools such as a microfiber cloth, compressed air can, q-tips, and rubbing alcohol. These tools will help you remove dust, smudges, and stains from your computer.
3. Start with the case
The computer case is the center area where all the components are housed. Take a microfiber cloth and gently wipe the case to remove any dust or dirt. If there are any hard-to-reach areas, you can use a q-tip dipped in rubbing alcohol to clean them.
4. Clean the computer peripherals
Clean your keyboard, mouse, and monitor using a microfiber cloth. If you notice any stubborn stains, you can lightly dampen the cloth with water or rubbing alcohol. Make sure to dry them thoroughly before using them again.
5. Pay attention to the power supply
The power supply is an essential component of your computer system. Use compressed air to blow away any dust or dirt from the power supply’s fan and the surrounding area. This will prevent overheating and ensure optimal performance.
6. Clean the optical drive
If your computer has an optical drive, it needs to be cleaned regularly too. Use a can of compressed air to blow away any dust or debris from the drive’s tray and the surrounding area. You can also use a q-tip lightly dampened with rubbing alcohol to clean the drive’s lens if needed.
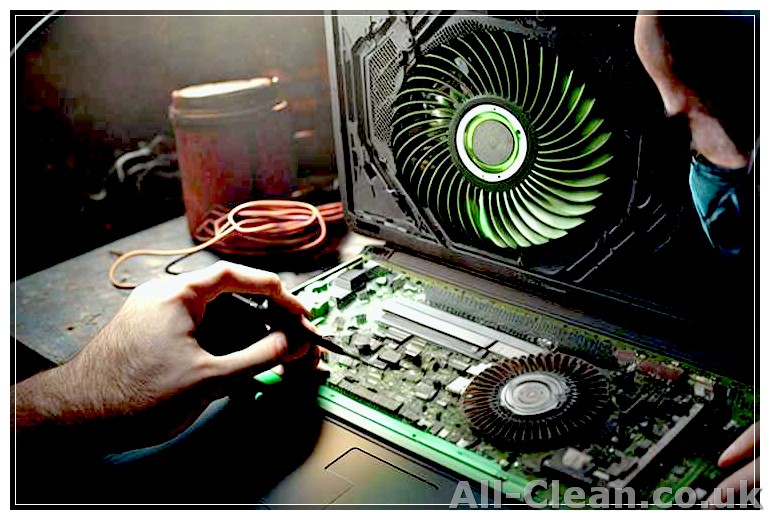
7. Take care of the cooling system
The cooling system, including the CPU fan and heatsink, can become clogged with dust over time. Unscrew the side panel of your computer case to access these components. Use compressed air to blow away any dust or debris, making sure to hold the fan blades in place to prevent them from spinning. You can use a q-tip to scrub away stubborn dust if necessary. Replace the side panel once you’re done.
8. Clean the CMOS battery
The CMOS battery is responsible for storing important system information. It is usually located on the motherboard. Use a q-tip dipped in rubbing alcohol to clean the battery’s metal contacts, ensuring a good connection. Be careful not to spill any liquid onto the motherboard.
By following these simple cleaning practices, you can ensure that your computer’s external components are well-maintained and free from dust, dirt, and stains. This will not only keep your PC looking spic and span, but also prevent any hardware issues that may arise due to overheating or poor contact.


