

When working with epoxy resin, it is important to clean your mixing containers and cups properly after each use. This not only ensures that your next mixture will be free from any unwanted traces of the previous one, but it also helps in extending the life of your tools.
After the epoxy resin has cured and hardened, it is time for cleaning. First, make sure to put on a pair of gloves to protect your hands from any hot water or chemicals. Extra caution should be taken when dealing with hot water, as epoxy resin doesn’t react well to heat.
Start by using a soapy water solution to thoroughly clean the inside of the mixing containers and cups. If there are any epoxy traces that won’t easily peel off, you can use rubbing alcohol to remove them. Once the containers and cups are clean, rinse them with water and let them air dry.
If you are working with reusable mixing containers and cups, it is a good idea to keep them separate from your other tools to prevent any cross-contamination. You can store them in a clean and dry place until your next project.
When it comes to disposing of excess epoxy resin or waste from cleaning, it is important to follow your local regulations. Some areas may allow you to pour the excess resin down the drain, while others may require you to dispose of it as hazardous material. It is always recommended to check with your local authorities to determine the best way to dispose of epoxy resin waste.
In conclusion, taking the time to properly clean your epoxy resin mixing containers and cups is essential for maintaining a clean and safe working environment. Following these step-by-step instructions will help you keep your tools in good condition and ensure that your next pours are free from any unwanted traces of previous mixtures.
- Preparing the cleaning solution
- Scrubbing the containers and cups
- Materials needed:
- Steps:
- Removing stubborn epoxy residue
- Rinsing and Drying
- 1. Rinse with Warm Water
- 2. Use Isopropyl Alcohol
- 3. Dishwasher
- 4. Scrub with a Soft Brush
- 5. Air Dry or Use Heat
- Conclusion
- Storing the clean containers and cups
- Cleaning Silicone Molds
- What You’ll Need
- Steps for Cleaning Silicone Molds
- Removing excess resin from the mold
Preparing the cleaning solution
Before you start the cleaning process, it’s important to prepare the cleaning solution and gather all the necessary materials. Here is a step-by-step guide on how to do it:
- Clear your workspace: Make sure you have enough room to work and gather all the materials you’ll need.
- Recommend the 2-step cleaning process: It’s quite common to recommend a 2-step cleaning process to ensure that all the epoxy resin is properly removed from the mixing containers and cups.
- Point to the mixing containers and cups: These are the main items you’ll be cleaning, so it’s important to have them ready.
- Prepare cleaning towels: Have some disposable or reusable towels on hand to wipe and clean the surfaces.
- Wipe off any excess resin: After using the containers and cups, wipe off any excess resin from the surfaces with a towel.
- Consider the studio environment: If you’re working in a studio or enclosed space, it’s important to consider the safety and environment factors. Open windows or use a fan to help with ventilation.
- Release any traces of resin: If there are any epoxy resin traces on your hands or other surfaces, use a nitrile glove or artresin’s resin release to help remove them.
- Use warm soapy water: Mix warm water with your favorite dish soap. This will be your cleaning solution.
- Wipe the containers and cups: Dip a towel into the warm soapy water and wipe the mixing containers and cups. Make sure to clean all the surfaces and corners.
- Must wipe mixing cups perfectly: Pay extra attention to the mixing cups as they tend to have leftover resin. Wiping them properly will make the cleaning process easier.
- Move ahead with rinsing: After wiping the containers and cups with the cleaning solution, rinse them with warm water.
- Consider using silicone mixing cups: If you’re dealing with a lot of epoxy resin, using silicone mixing cups can make the cleaning process easier. Resin tends to peel off silicone material more easily.
- Purchase cleaning supplies from Amazon: If you don’t have the necessary cleaning materials, consider purchasing them from Amazon or your favorite online retailer.
- Know how to dispose of waste: When you’re done cleaning, make sure to dispose of the cleaning solution, towels, and gloves properly. Follow the proper waste disposal method in your area.
- Remove cured resin: If your containers or cups have dried or cured resin on them, you may need to let them soak in warm soapy water for some time. This will help soften the resin and make it easier to remove.
- Let the containers and cups dry: After cleaning, let the containers and cups air dry before using them again.
Following this step-by-step guide will ensure that your epoxy resin mixing containers and cups are clean and ready to use for your next project.
Scrubbing the containers and cups
Once the epoxy resin has finished curing, it’s time to clean the containers and cups used for mixing. Follow this step-by-step guide to ensure that your containers are properly cleaned and ready for reuse.
Materials needed:
- Hot water
- Dish soap
- Paper towels
- Isopropyl alcohol (optional)
Steps:
- Start by removing any excess epoxy resin from the containers. You can use a plastic scraper or your gloved hands to scrape off larger pieces.
- Next, fill your sink or a bucket with hot water and add a small amount of dish soap.
- Place the containers and cups in the soapy water and let them soak for a few minutes to soften the resin.
- After soaking, use a sponge or a brush to scrub the containers and cups. Make sure to scrub all the walls and bottom of the containers to remove any remaining resin.
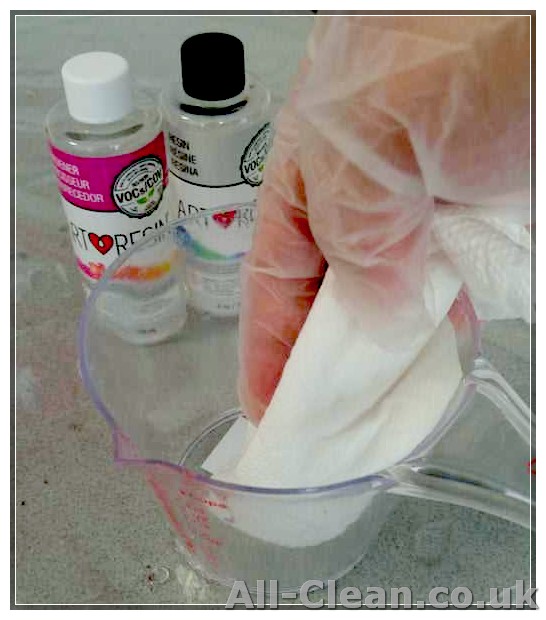
- If there are stubborn resin stains, you can use isopropyl alcohol to help dissolve and remove them. Apply a small amount of alcohol to a paper towel and scrub the stained areas.
- Rinse the containers and cups with clean water to remove any soap residue.
- Pat the containers and cups dry with paper towels or a clean towel. Allow them to air dry completely before using them again.
Remember to always work in a well-ventilated area and follow safety guidelines when working with epoxy resin. Proper cleaning and maintenance of your mixing containers and cups will help prolong their lifespan and save you money in the long run.
Removing stubborn epoxy residue
If you’ve ever worked with epoxy resin, you know how stubborn it can be to remove from mixing containers and cups. Even after wiping them down with paper towels or rinsing with water, there is often residue left behind. So, what can you do to get rid of this residue?
1. Use isopropyl alcohol: The easiest and most effective way to remove stubborn epoxy residue is to use isopropyl alcohol. Simply pour a small amount onto a cloth or paper towel and wipe the residue away. This method works great whether the residue is still wet or has dried.
2. Peel it off: If the residue is thick and dry, you can try peeling it off. Use a tool like a plastic scraper or your fingernail to gently lift the epoxy away from the container or cup. Be careful not to scratch the surface.
3. Repeat process: If the residue is very stubborn and doesn’t come off easily with the first attempt, repeat the process. Apply isopropyl alcohol again or try peeling it off once more. Persistence is key!
4. Dispose of the residue properly: Once you have removed the epoxy residue, make sure to dispose of it properly. It is best to place it in a garbage bag or container that can be sealed to prevent any accidental cure.
Remember these tips:
- Wear gloves to protect your hands
- Work in a well-ventilated area
- If using disposable cups, consider using dixie cups or other disposable containers that are easy to peal the epoxy out of
- For reusable containers, wiping them down with isopropyl alcohol as soon as possible after your project is done is the best way to prevent stubborn residue from sitting and drying
- If you have a lot of residue to remove, consider using a disposable dispenser or mixing tools that can be thrown away
- Keep in mind that some mixing containers or cups may not be able to withstand the use of alcohol or scraping, so always test a small area first
By following these tips, you’ll have a much easier time removing stubborn epoxy residue from your mixing containers and cups, whether they are disposable or reusable. Happy cleaning!
Rinsing and Drying
Once you have finished cleaning the epoxy resin mixing containers and cups, you will need to rinse them thoroughly to remove any residue. This step is critical to ensure that the containers are completely clean before you use them again. Here are a few different ways you can rinse and dry your containers:
1. Rinse with Warm Water
The easiest and quickest method is to simply rinse the containers with warm water. This will help to remove any leftover resin or cleaning agents. Be sure to rinse the containers several times to ensure they are completely clean. Once rinsed, you can dry them with a towel or let them air dry.
2. Use Isopropyl Alcohol
Another effective method is to rinse the containers with isopropyl alcohol. This can help to remove any stubborn residue or sticky spots. Simply pour some alcohol into the containers, swirl it around, and then rinse with warm water.
3. Dishwasher
If you have a dishwasher, you can also run the epoxy resin mixing containers and cups through a regular cycle. This can help to sanitize and thoroughly clean them. However, be sure to check the manufacturer’s instructions before putting the containers in the dishwasher, as some may not be dishwasher safe.
4. Scrub with a Soft Brush
If there are any stubborn residue or stains in the containers, you can scrub them gently with a soft brush or sponge. Be sure to use a non-abrasive brush or sponge to avoid scratching the surface of the containers.
5. Air Dry or Use Heat

After rinsing the containers, you can either let them air dry or use heat to speed up the drying process. For air drying, simply place the containers upside down on a clean towel or rack. If you choose to use heat, you can place them in a low-heat oven or use a hairdryer. However, be careful not to expose the containers to excessive heat, as this may cause them to warp or melt.
Conclusion
Cleaning epoxy resin mixing containers and cups is an essential part of any resin art project. Remember to always clean them after each use to ensure the best results for your next project. Whether you choose to rinse with warm water, use isopropyl alcohol, or run them through the dishwasher, keeping your containers clean and in good condition will make your resin work easier and your results better. Bookmark this guide for future reference, so you always have a resource to guide you in properly cleaning your epoxy resin mixing containers and cups.
Storing the clean containers and cups
Once you have thoroughly cleaned your epoxy resin mixing containers and cups, it’s important to store them properly so they remain in good condition for future use. Here are some tips on how to store them:
- Rinse thoroughly: After cleaning, rinse the containers and cups with water to remove any traces of cleaning products.
- Allow to dry: Make sure the containers and cups are completely dry before storing them to prevent any moisture buildup.
- Upside down: Store the containers and cups upside down to prevent dust or other debris from settling inside them.
- Use a dispenser: If possible, use a dispenser to store the containers and cups. This helps keep them organized and easily accessible.
- Purchase silicone measuring sticks: Consider purchasing silicone measuring sticks that fit into the containers. These sticks can be left in the containers while storing, saving you time and ensuring proper measurements for future use.
- Label the containers: To prevent confusion, label the containers and cups with the type of resin that has been used in them, along with the date of the last use.
- Find a designated storage area: Dedicate a specific area in your studio or craft room to store the clean containers and cups. This way, you can easily find them when needed.
By following these storage tips, you can ensure that your epoxy resin mixing containers and cups remain in good condition and ready for your next project.
Cleaning Silicone Molds
Cleaning silicone molds is an important step in the resin crafting process. When you’re done pouring resin into your molds, it’s crucial to clean them properly to ensure their longevity and keep them in good condition for future use. Cleaning silicone molds is a relatively easy task that can be done with a few simple steps.
What You’ll Need
- Silicone molds
- Warm water
- Dish soap
- Soft-bristle brush
- Lint-free towel or paper towel
Steps for Cleaning Silicone Molds
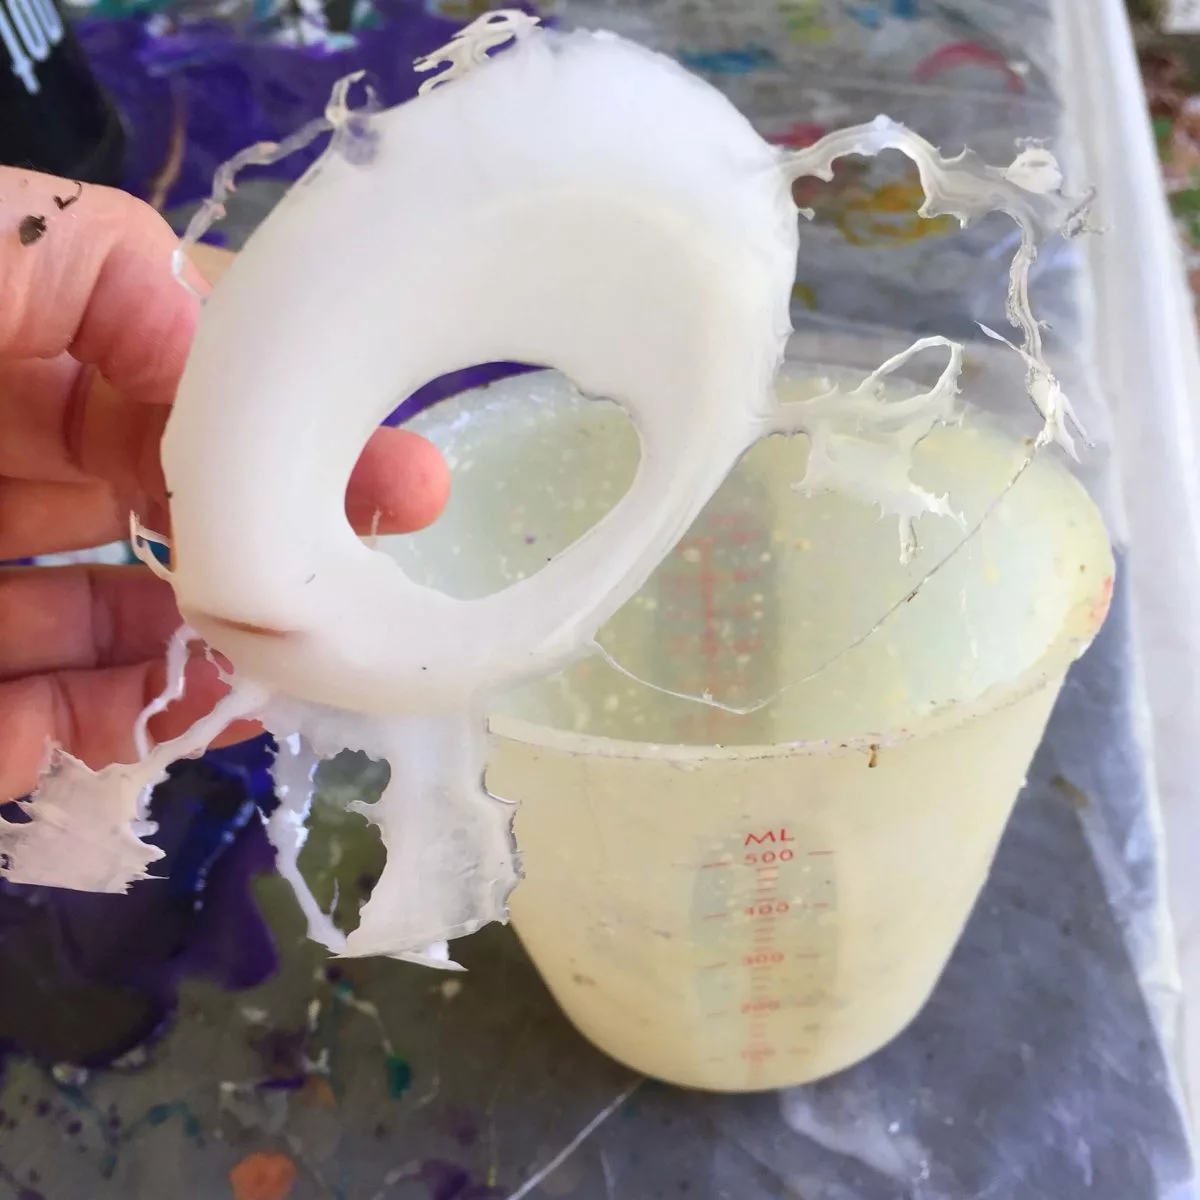
- First, carefully remove the resin pieces from the silicone molds. If there’s any excess resin left in the mold, gently scrape it off with a plastic scraper or your fingernail. Dispose of the excess resin in the garbage.
- Next, rinse the silicone molds under warm water to remove any remaining resin. Use your fingers to rub the molds and remove any stubborn residue.
- Fill a sink or basin with warm water and add a small amount of dish soap. Place the silicone molds in the soapy water and let them soak for a few minutes. This will help to loosen any remaining resin and make it easier to clean.
- After soaking, use a soft-bristle brush to gently scrub the silicone molds, paying attention to any areas where resin may have been sitting. Scrubbing the molds will help remove any leftover resin and ensure they’re clean for future use.
- Rinse the molds thoroughly under running water to remove any soap residue. Be sure to check if there are any remaining resin particles before finishing this step.
- Once the molds are clean, use a lint-free towel or paper towel to pat them dry. This will help remove excess moisture and prevent the growth of mold or mildew.
- Finally, inspect the molds to make sure they’re clean and free from any resin or soap residue. If you notice any leftover resin or sticky spots, repeat the cleaning process until the molds are completely clean.
By following these steps, you can easily clean your silicone molds and keep them in great condition for all your resin crafting projects. Remember to bookmark this article for future reference, as it will be helpful every time you need to clean your molds.
Removing excess resin from the mold
Once your epoxy resin has cured and hardened in the mold, you’ll need to remove any excess resin before cleaning the mold. Here’s a step-by-step guide on how to do it:
- First, grab a disposable dixie cup or any other small container that you don’t mind throwing away. This will serve as a reservoir for the excess resin that you’ll remove from the mold.
- Turn the mold upside down and gently tap it to release the resin. Be careful not to damage the mold or the cured resin.
- Once the excess resin starts to come out, carefully scrape it into the disposable cup using a silicone spatula or a similar tool.
- Continue tapping and scraping until you’ve removed as much excess resin as possible from the mold.
- Dispose of the excess resin in the cup according to your local waste disposal regulations. Do not pour it down the sink or drain.
- If you have any reusable mixing containers or cups, you can clean them using the method described in this article.
- For smaller surfaces or hard-to-reach areas, you can use a rubbing alcohol-soaked cloth or cotton pad to wipe off the excess resin. Repeat this process until all the resin is removed.
- Once you’re satisfied that you’ve removed all the excess resin, you can proceed with cleaning the mold using the method described in this article.
Remember to work in a well-ventilated area and to follow all safety guidelines when working with epoxy resin. It’s always better to be safe than sorry. If you’re unsure about any step or method, it’s recommended to consult the manufacturer’s instructions or seek advice from experienced users.


