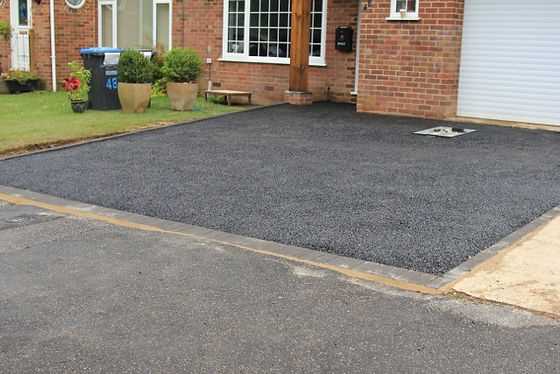

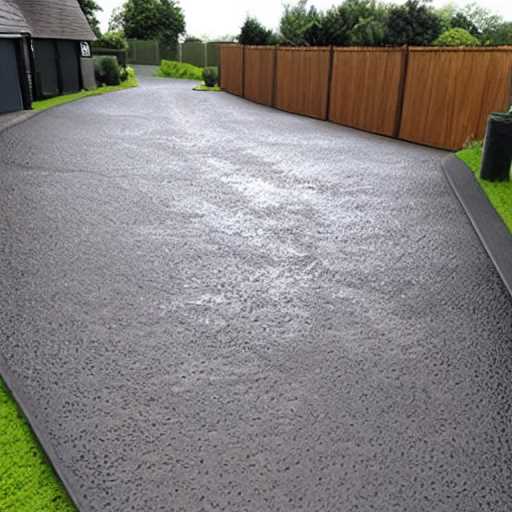
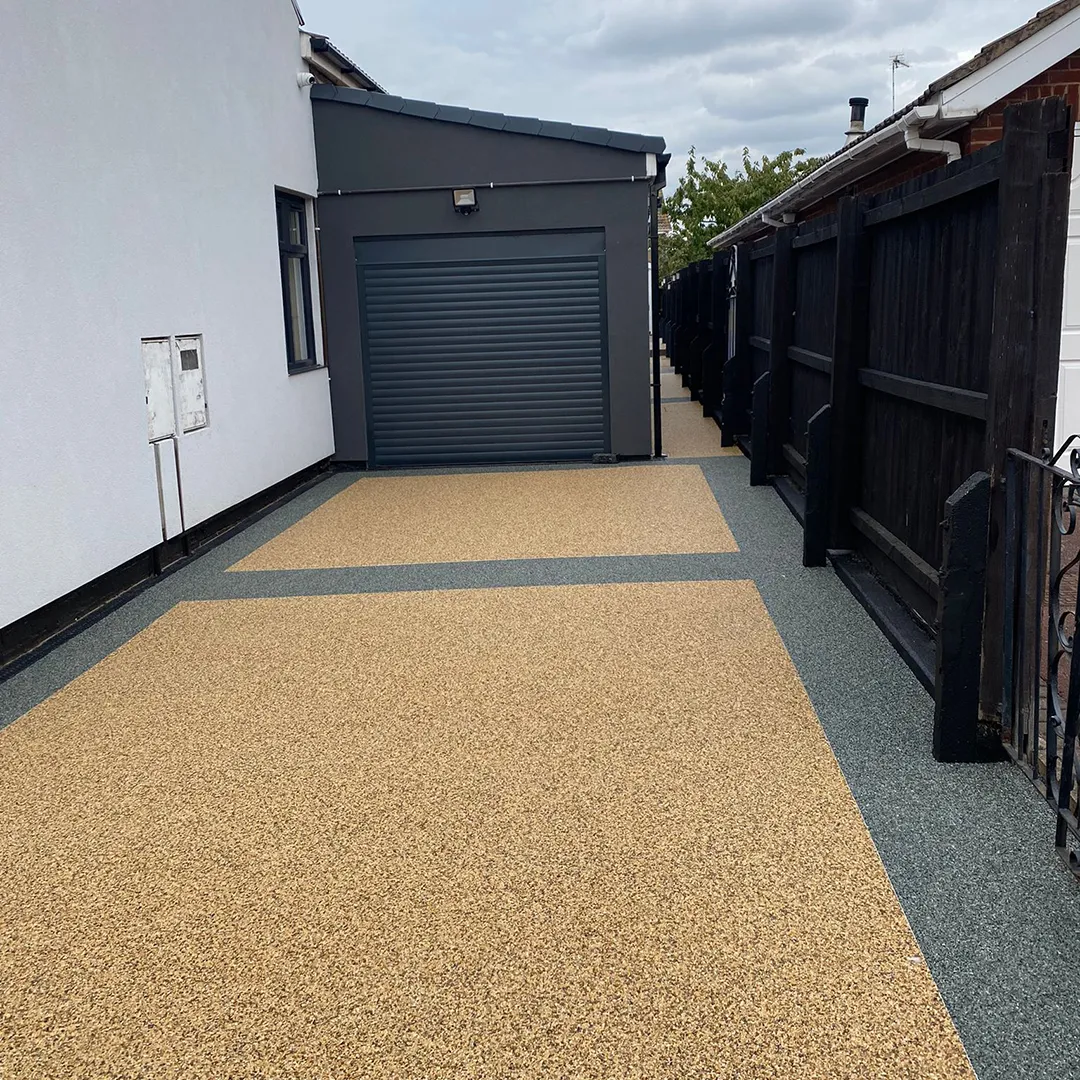
Resin driveways were rapidly gaining popularity due to their durability and attractive appearance. However, like any other surfaces, resin driveways require proper cleaning and maintenance to keep them in optimal condition.
One of the most important steps in cleaning a resin driveway is to be careful with any spills or objects that may cause marks or damage. It is crucial to remove any spillages as soon as they occur to prevent the resin from absorbing them and forming permanent stains. Regular sweeping should also be done to remove any debris or leaves that may accumulate on the surface.
In areas with frost or cool winter temperatures, it is important to properly clear the driveway of any ice or snow. Using a scraper or a suitable tool, the ice should be carefully scraped off the surface to avoid damaging the resin. Chemical solvents should be avoided, as they may cause the resin to become discolored or damaged.
For routine maintenance, it is recommended to get professional assistance from companies specializing in resin-bound driveways. They have the necessary knowledge and equipment to properly clean and maintain the driveways, ensuring maximum longevity and minimal damage. Regular cleaning and little care can go a long way in preventing potential issues and keeping the resin driveway looking its best.
If you are in Doncaster or Sheffield, there are general guidelines that can be followed for cleaning resin driveways. Firstly, any spills or marks should be promptly removed to prevent staining. Secondly, sweeping the surface regularly to remove debris and leaves is essential. Thirdly, the use of hot water can help to remove any dirt or stubborn marks effectively. Additionally, a small amount of mild detergent can be used to clean the surface, but it is important to rinse thoroughly with water afterwards to prevent damaging the resin.
In areas with weed growth, it is important to regularly remove any weeds or vegetation that may sprout between the resin-bound surfaces. Using a suitable weed killer or manually removing the weeds can prevent them from spreading and causing damage to the driveway. Regular inspection and maintenance can help identify and prevent potential issues during the early stages, saving time and money on more extensive repairs in the future.
In conclusion, taking proper care of a resin driveway is important to ensure its longevity and attractive appearance. Regular cleaning and maintenance, along with the use of suitable cleaning agents, can prevent stains, marks, and potential damage. By following the steps outlined in this guide, you can keep your resin driveway clean, free from weeds, and in optimal condition for years to come.
- Step 1: Preparing the Surface
- Step 2: Removing Loose Debris
- Step 3: Applying a Cleaning Solution
- Step 4: Scrubbing and Cleaning
- 1. Equipment needed
- 2. Scrubbing the driveway
- 3. Power washing (optional)
- 4. Clearing and cleaning after scrubbing
- 5. Safety precautions
- Step 5: Rinse and Dry
- Video:
- Satisfying Resin Driveway Clean!
Step 1: Preparing the Surface
Before beginning the cleaning process of your resin driveway, it is essential to prepare the surface properly. This will ensure that you achieve the best results and keep your driveway looking professional and well-maintained.
Here are some standard steps to follow for preparing the surface before cleaning:
- Clear the driveway: Start by removing any loose debris, such as leaves, dirt, and twigs, from the surface. You can use a broom or a leaf blower for this task.
- Remove any spills or stains: Take a little time to inspect the surface for any spills or stains. Use a suitable cleaner or detergent to remove these spots. Be sure to follow the manufacturer’s instructions and test the cleaner on a small, inconspicuous area before applying it to the entire surface.
- Sweep off moss or lichen: Moss or lichen growth can make the driveway look untidy. Use a stiff brush or a power washer to remove any moss or lichen from the surface. Be gentle while doing this to avoid damaging the surface.
- Handle oil or grease stains: If you notice any oil or grease stains, these can be challenging to remove. There are several tips and tricks you can try, such as using a degreaser or a specialized oil-stain remover. Follow the instructions carefully and apply the product as directed. In some cases, you may need to repeat the process to fully remove the stain.
- Repair any damaged areas: Inspect the surface for any cracks, holes, or other signs of damage. If you find any, it is crucial to repair them before cleaning. Use a suitable filler or resin-bound repair kit to fix these areas. Again, follow the manufacturer’s instructions and allow sufficient time for the repairs to dry and cure properly.
By following these steps, you can ensure that your resin driveway is properly prepared for cleaning. This will help you achieve maximum results and prevent any further damage to the surface. Now that your surface is ready, you can move on to the next step of the cleaning process.
Step 2: Removing Loose Debris
Before starting the cleaning process, it’s important to remove any loose debris from your resin driveway. This step is crucial as it allows for optimal cleaning and prevents any potential damage to the surface.
To remove loose debris, follow these steps:
- Begin by sweeping the entire surface using a broom. Make sure to sweep in a motion that helps gather all the loose debris towards one area.
- Afterwards, use a leaf blower or a vacuum cleaner to collect any remaining loose debris that may be difficult to remove with a broom.
- If there are any broken objects or large pieces of debris on your driveway, it’s important to remove them manually. Be careful while doing so to prevent any injuries.
- Once the loose debris has been cleared, use a hose fitted with a spray nozzle to wash away any remaining dirt or dust from the surface.
- If there are any stubborn stains, such as oil or chewing gum, on your resin driveway, you may need to use a specialized stain remover. Follow the manufacturer’s instructions for proper use.
- After the surface has been cleared of loose debris and thoroughly cleaned, you can proceed to the next step in the cleaning process.
By removing loose debris from your resin driveway, you are ensuring that the cleaning process is more effective and that your driveway stays in optimal condition. Additionally, regular upkeep and cleaning can help prevent the growth of weeds, moss, and other unwanted objects on your driveway.
Thank you for following this step-by-step guide on proper resin driveway cleaning. We hope this guide has been helpful in keeping your driveway looking its best!
Step 3: Applying a Cleaning Solution
Once the driveway has been swept and any debris has been cleared, it is time to apply a cleaning solution to remove stains and dirt that may still be present on the surface of the resin. This step is crucial for achieving optimal results and ensuring a thorough cleaning process.
There are several cleaning solutions available on the market that can be used for cleaning resin driveways. It is important to choose a solution that is suitable for your specific needs and that is safe to use on resin surfaces.
One option is to use a commercial cleaning solution that can be sprayed onto the surface of the driveway. These solutions are specially formulated to tackle tough stains and dirt, and they can be highly effective in restoring the appearance of your resin driveway.
If you prefer a more natural approach, you can also create your own cleaning solution using household ingredients. A mixture of warm water and mild household detergent can be used to create a soapy solution that is gentle yet effective for cleaning resin surfaces.
Regardless of the cleaning solution you choose, it is important to apply it to the driveway while the surface is still damp. This will help the solution spread more easily and ensure optimal cleaning results.
When applying the cleaning solution, it is important to follow the instructions provided by the manufacturer or the cleaning solution recipe. This includes using the solution at the recommended temperature and avoiding the use of harsh or abrasive solvents that can damage the resin surface.
If you are unsure about the right cleaning solution to use, or if you prefer to leave this step to the professionals, you can always seek the assistance of a professional cleaning service. They have the knowledge and expertise to choose the most suitable cleaning solution for your resin driveway and ensure that it is applied correctly.
Note: When using a cleaning solution, it is important to take necessary precautions to protect yourself and the environment. Wear protective gloves and goggles, and avoid letting the cleaning solution come into contact with plants or other sensitive objects.
By following these steps and applying a suitable cleaning solution, you can effectively clean your resin driveway and restore its appearance. Regular cleaning and maintenance is important to prevent the build-up of moss, weeds, and other debris that can cause damage to the surface over time.
If you need assistance with cleaning your resin driveway or if you have any other maintenance concerns, feel free to contact our team at FlexFlooring Ltd. We are here to help and provide you with the best advice and guidance to keep your resin driveway in optimal condition.
Step 4: Scrubbing and Cleaning
Once the dirt and grime have been loosened and lifted off the resin driveway, it’s time to give it a thorough scrubbing and cleaning to ensure a spotless finish. This step is crucial in maintaining the pristine appearance and longevity of your resin driveway.
1. Equipment needed
- A scrubbing brush or broom with stiff bristles
- A bucket of soapy water
- A power washer (optional, but recommended for maximum cleaning)
- Protective gloves
2. Scrubbing the driveway
Start by wetting the surface of the resin driveway using a power washer or a hose fitted with a jet spray. This will ensure that any loose dirt or debris is removed before you start scrubbing.
Dip the scrubbing brush or broom into the bucket of soapy water and begin scrubbing the surface of the driveway using firm pressure. Work in small sections, focusing on any areas that have stains, spillages, or moss growth. Make sure to scrub the entire surface to ensure a consistent clean.
If you encounter any stubborn stains or spills, you may need to use a specialized cleaning agent or follow specific instructions provided by the manufacturer of the resin driveway.
3. Power washing (optional)
If you have access to a power washer, it can be used to provide an extra deep clean to your resin driveway. However, it’s important to use the power washer in a controlled manner to avoid damaging the surface.
Ensure that the power washer is set to a suitable pressure level, according to the manufacturer’s guidelines. Hold the power washer at a distance from the driveway, spraying the water in a sweeping motion to avoid concentrating the pressure on one spot for too long.
Power washing can help remove embedded dirt, grime, and even tough stains more effectively, leaving your resin driveway looking brand new.
4. Clearing and cleaning after scrubbing
After you have finished scrubbing and power washing (if applicable), it’s important to clear any remaining debris or cleaning agents from the surface of the driveway.
Use a hose or power washer on a lower pressure setting to wash away any loose dirt and soap residue from the driveway. Ensure that all cleaning agents are completely rinsed off to prevent any potential damage or discoloration to the surface.
Check the surrounding areas for any spills or runoff and clean them up in accordance with local regulations and environmental best practices.
5. Safety precautions
While scrubbing and cleaning your resin driveway, always prioritize safety. Wear protective gloves to prevent any skin irritation or chemical exposure. Additionally, follow any safety instructions provided by the manufacturer of the cleaning agents or equipment you are using.
Keep the driveway clear of any objects or debris that may obstruct the cleaning process or pose a safety hazard.
By following these steps, you can ensure that your resin driveway remains in optimal condition, even during harsh winter conditions or heavy use. A clean and well-maintained driveway not only enhances the overall aesthetics of your property but also prolongs the lifespan of the resin surface.
If you have any questions or need tips related to cleaning or maintaining your resin driveway, feel free to contact our professional team at [Company Name]. We’re always happy to provide guidance and assistance.
Step 5: Rinse and Dry
After scrubbing and removing all stains and dirt from your resin driveway, it is important to rinse the surface thoroughly. This step will help to remove any remaining cleaning agents and residue from the driveway, leaving it clean and ready for the final drying process.
Here are the proper steps for rinsing and drying your resin driveway:
-
Rinse with water: Use a hose or pressure washer to thoroughly rinse the entire surface of your driveway. Start from one end and work your way to the other, making sure to cover all areas. This will help to clear away any remaining dirt and debris.
-
Dry the surface: Once the rinsing is complete, use a clean towel or mop to dry the surface of your driveway. This will help to prevent water spots and ensure that the driveway is left clean and streak-free.
-
Inspect for any missed spots: After drying the surface, take a close look at the driveway and inspect for any missed spots or areas that may need further cleaning. If necessary, repeat the scrubbing and rinsing process in those areas.
It is important to note that the conditions and weather can have an impact on the drying time. The drying process may take longer in cool or damp conditions. If you are washing your resin driveway in colder weather, be cautious of any potential frost, as it can make the surface slippery.
Regularly rinsing and drying your resin driveway is vital for its upkeep and longevity. This routine cleaning process helps to remove dirt, moss, algae, and other potential issues that can damage the surface over time. By properly handling and cleaning your driveway, you are ensuring its optimal condition and safety for your customers, family, and pets.
If you need any assistance or have any questions about cleaning and maintaining your resin driveway, Flexflooring would be pleased to help. They are experts in resin surfacing and can offer advice and guidance on the best cleaning practices for your specific needs.