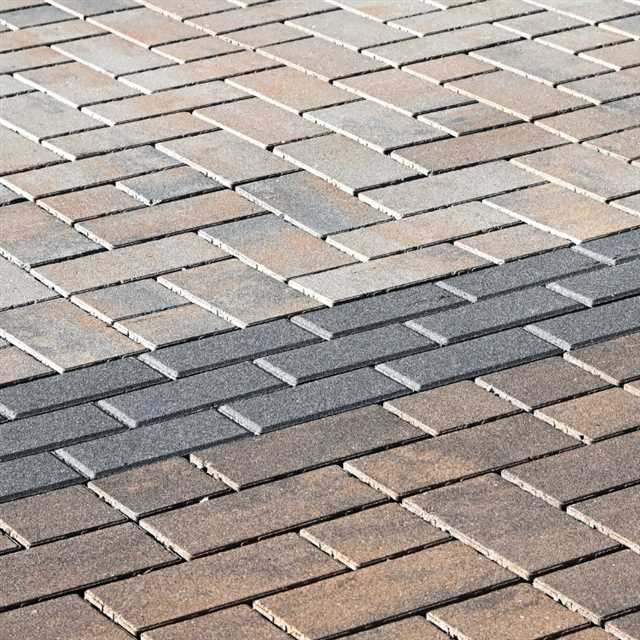

Block paving is a popular choice for driveways and patios due to its durability and clean, modern look. However, over time, dirt, moss, algae, lichens, and other stains can accumulate on the surface, making it look less attractive. Fortunately, cleaning block paving is a simple process that can be done without the need for specialist cleaners or equipment.
The first step in cleaning block paving is to remove any loose dirt and debris from the surface. You can do this by using a broom or brush to sweep away any leaves, dirt, or dust. Once the surface is free from loose dirt, you can move on to treating any moss, algae, or lichens that may be growing on the blocks.
If you notice any moss, algae, or lichens on your block paving, it’s important to treat them before they cause any further damage. You can use a moss and algae remover available from most garden centers or hardware stores. Simply apply the remover to the affected areas, following the instructions on the packaging.
Next, you’ll want to give your block paving a thorough clean. You can do this by using a pressure washer or a jet washer. Start by wetting the surface with warm water, then apply a mild detergent or soapy water. Gently scrub the surface with a brush or broom to remove any stubborn stains or dirt. Once you have scrubbed the entire area, rinse the paving with clean water using the pressure washer or jet washer.
If you notice any stubborn stains or marks on the blocks, you may need to use a specialist stain remover. These products are usually available from garden centers or hardware stores and can be applied to the affected areas to lift and remove the stains. Follow the instructions on the packaging for best results.
Finally, once your block paving is clean and free from stains, it’s important to protect it to prevent future damage. You can do this by applying a protective sealant to the surface of the blocks. This will help to keep them looking fresh and prevent the growth of moss, algae, and lichens.
In conclusion, cleaning block paving is a simple process that can be done with just a few basic steps. By following these steps, you can restore the original beauty of your block paving and keep it looking clean and attractive for years to come.
- Step 1: Gather the Necessary Tools
- Step 2: Remove Debris and Weed Growth
- Method 1: Manual Weed Removal
- Method 2: Weed Remover Treatment
- Method 3: Pressure Washer
- Method 4: Weed Brush
- Step 3: Apply a Cleaning Solution
- Step 4: Scrub the Paving Surface
- Step 5: Rinse and Seal the Block Paving
- Video:
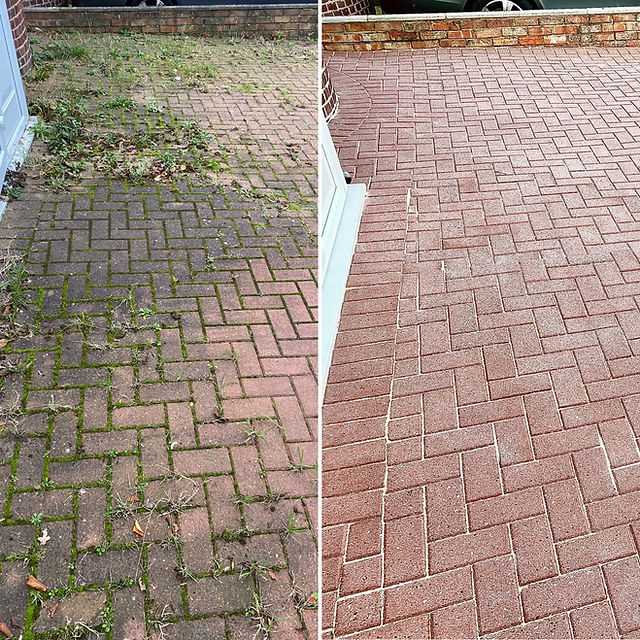
- 5 Easy Steps To Turn Old Block Paving Driveways Into NEW!
Step 1: Gather the Necessary Tools
To start the cleaning process of your block paving and restore its original beauty, you will need to gather the following tools:
- A stiff brush or a power scrubber: This will be used to remove any debris, dirt, or moss that has built up on the surface.
- A weed remover or a hoe: This is necessary if there are any weeds growing between the cracks of the paving stones.
- A bucket of soapy water: This will be used to clean the surface of the block paving.
- A cleaner or a remover for specific stains or spots: If you have any oil-based stains or other stubborn spots on your block paving, you may need a specialized cleaner or remover to treat them properly.
- A kiln-dried sand or jointing compound: This will help to fill in any gaps between the paving blocks and keep them secure.
- A hose or a pressure washer: You will need water to rinse off the cleaning solution and thoroughly wash the block paving afterwards.
- Protective clothing: It is important to wear appropriate clothing to protect yourself during the cleaning process. This may include gloves, goggles, and waterproof clothing.
- Optional: If you have large furniture or other items on your block paving, you may need to remove them or cover them to protect them from the cleaning chemicals and water.
Having these tools ready before you start the cleaning process will make it easier and more efficient. It is always better to have someone to help you, especially if you are dealing with a large block paving area. They can assist you in the cleaning process and make the task simpler and quicker to accomplish.
Step 2: Remove Debris and Weed Growth
After giving your block paving a thorough cleaning, it’s time to move on to step 2: removing debris and weed growth. This step is essential to ensure your block paving looks its best and stays in great condition.
Before you start, check the surface of your block paving for any loose debris such as leaves, twigs, or dirt. Use a broom or brush to sweep away all the loose particles. This will make it easier to spot any weeds that may have started to grow.
If you notice any weeds or plant growth between the blocks, now is the time to treat them. There are several methods you can use to effectively remove and prevent weed growth in your block paving.
Method 1: Manual Weed Removal
If you only have a few weeds, you can simply pull them out by hand. Make sure you remove the entire weed, including the root, to prevent regrowth. This can be a time-consuming process, so it’s best for small areas with minimal weed growth.
Method 2: Weed Remover Treatment
If you have larger areas or more significant weed growth, using a weed remover treatment is a better option. Look for a weed remover specifically designed for block paving or patio use. Follow the instructions on the product packaging for the best results.
Method 3: Pressure Washer
If you have a pressure washer, you can use it to dislodge and remove weeds. Start by using a medium-pressure setting and sweep the nozzle across the affected areas. Be careful not to use too much pressure, as this can damage the blocks. Afterwards, sweep away any dislodged weeds and debris.
Method 4: Weed Brush
Another option is to use a weed brush. This tool has stiff bristles that help dislodge and remove weeds. Simply brush the affected areas in a back-and-forth motion to remove the weeds. Afterwards, sweep away any debris.
Remember, preventing weed growth is just as important as removing existing weeds. Consider applying a weed preventer product after cleaning to keep your block paving weed-free for longer.
Once you’ve removed all the debris and weeds, give your block paving a final rinse with water to ensure all traces of debris and cleaning products are gone. You’re now ready to move on to the next step and restore the original beauty of your block paving.
Step 3: Apply a Cleaning Solution
Once you’ve finished rinsing off the loose dirt and weeds from your block paving, it’s time to apply a cleaning solution to remove any stubborn stains and dirt that may still be present. This step is crucial to ensure a deep and thorough cleaning of the surface.
There are various types of cleaners available in the market for block paving, ranging from simple detergents to specialized cleaners designed specifically for removing oil stains or moss. Choose a cleaner that is appropriate for your specific needs and the type of stains you want to remove.
Before applying the cleaner, make sure to read the instructions carefully, as different cleaners may have different application instructions. Some cleaners may require dilution with water, while others may need to be applied directly onto the stained areas.
If you’re dealing with tough stains or heavily soiled areas, consider using a pressure washer to apply the cleaning solution. A pressure washer can provide a more thorough and efficient cleaning, especially when combined with a hard-bristled scrub brush to scrub the surface.
Apply the cleaning solution to the stained or dirty areas of your block paving, working in small sections. Use a scrub brush or a stiff broom to agitate the cleaner and loosen the dirt and stains. Scrub the surface vigorously but without causing any damage to the block paving.
Once you’ve applied the cleaner and scrubbed the surface, allow the cleaning solution to sit on the block paving for the recommended amount of time specified by the manufacturer. This will help the cleaner to penetrate and break down the stains and dirt, making them easier to remove.
Afterwards, rinse off the cleaning solution using a pressure washer or a hose with high-pressure water. Make sure to thoroughly rinse the entire driveway, including the areas you haven’t directly applied the cleaner to. This will help remove any remaining dirt and cleaners from the surface.
It’s important to note that some cleaners may leave behind residue on the block paving. If this happens, rinse the surface once more to ensure that all residue is completely removed. This will help maintain the cleanliness and appearance of your block paving.
Once you’ve finished applying the cleaning solution and rinsing off the surface, you can move on to the next step: Step 4 – Replace Lost Sand and Remove Weeds.
Step 4: Scrub the Paving Surface
Once you’ve pre-treated any stains or spills on your block paving, it’s time to give the entire surface a thorough scrub. This step is essential for removing any dirt, algae, moss, or weeds that may have accumulated over time.
1. Start by filling a bucket with warm water and adding a few drops of a mild detergent or a specially formulated block paving cleaner. Be sure to read the instructions on the cleaner and use it according to the manufacturer’s recommendations.
2. Dip a scrub brush or a stiff broom into the soapy water solution and begin scrubbing the paving surface. Work in small sections, moving the brush back and forth vigorously to lift off any stubborn dirt or stains.
3. Pay extra attention to areas where moss or weeds have taken hold. Scrubbing these areas more thoroughly will help break up the growth and make it easier to remove.
4. If you’re dealing with particularly tough stains or spots, you may need to use a pressure washer to get them clean. However, be careful not to use too much pressure, as it can damage the surface of the blocks or cause them to become loose.
5. Once you’ve scrubbed the entire paving surface, rinse it thoroughly with clean water. You can use a hose or a pressure washer on a low setting to ensure all the soapy residue is removed.
6. Allow the paving to dry completely before applying any protective sealant or finishing touches. This may take a few days, depending on the weather conditions in your area.
By following this step-by-step guide, you can effectively clean your block paving and restore its original beauty without the need for expensive cleaners or professional help. With just a little bit of time and effort, your block paving will look as good as new!
Step 5: Rinse and Seal the Block Paving
Once you have finished cleaning the block paving, it is important to rinse off any remaining dirt and cleaning solution. This will not only make the surface look cleaner, but it will also help prevent any leftover cleaning solution from damaging the blocks over time.
To rinse the block paving, you can use a high-pressure jet washer or a regular garden hose with a strong nozzle attachment. Start from one end and work your way across the entire paved area, making sure to cover all the blocks. You may need to repeat this process several times to ensure a thorough rinse.
If you notice any stubborn stains or marks on the blocks that haven’t been fully removed by the cleaning process, you can use a specialist block paving cleaner or remover. Follow the manufacturer’s instructions carefully and apply the solution to the affected areas. Allow the cleaner to work its magic for the recommended amount of time, and then rinse it off with water.
Once the block paving is clean and rinsed, you can consider applying a sealant to protect the surface and enhance its appearance. There are various sealants available, such as solvent-based or water-based sealants. Choose the one that is suitable for your particular type of block paving.
Before applying the sealant, make sure the block paving is completely dry. If you’re unsure, wait for at least 24-48 hours after rinsing before applying the sealant. Follow the instructions on the sealant packaging for the best results.
Wearing protective clothing, such as gloves and eye goggles, is essential when applying the sealant. Use a clean brush or roller to apply a thin, even coat of sealant to the block paving. Work in small sections and make sure to cover all the blocks. Allow the sealant to dry according to the manufacturer’s instructions, which usually takes a few hours.
Sealing the block paving will help protect it from stains, oil spills, and weed growth. It will also make future cleaning and maintenance easier. Depending on the type of sealant used, you may need to reapply it every 2-5 years to maintain its protective properties.
After the sealant is dry, your block paving will be restored to its original beauty. Enjoy the clean and vibrant look of your paved area!