
Are you tired of dealing with the mess left behind in your wax warmer? Are you wondering how to clean it without wasting any more time or energy? Look no further! In this article, we will share with you 5 effective methods for cleaning your wax warmer, so you can enjoy a fresh and clean wax melting experience every time.
1. Silicone Liners
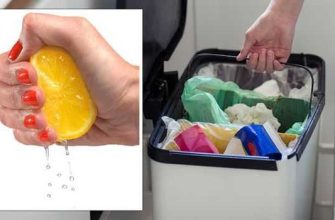
One of the easiest ways to clean your wax warmer is to use disposable silicone liners. Simply pour the melted wax into the liner and let it cool. Once the wax solidifies, you can easily remove the liner and throw it away, without any mess or hassle. These silicone liners are not only convenient but also reusable, making them a popular choice among wax warmer users.
2. Freeze and Pop
If you’re dealing with a wax warmer that has wax stuck to the sides or bottom, try this method. Place the entire wax warmer in the freezer and let it sit for a few hours. The cold temperature will cause the wax to shrink and solidify, making it easier to remove. Once it’s fully frozen, take it out of the freezer and gently pop out the wax with a spoon or butter knife.
3. Baking Soda and Warm Water
For a more traditional approach, you can use baking soda and warm water to clean your wax warmer. Fill the warmer with warm water and add a teaspoon of baking soda. Let it sit for a few minutes to loosen any stuck-on wax. Then, use a dish towel or sponge to wipe away the remaining wax. Rinse with clean water and dry thoroughly before using again.
4. Cotton Balls and Alcohol
If you want to remove any lingering scent from your wax warmer, try using cotton balls and rubbing alcohol. Simply soak a cotton ball in rubbing alcohol and use it to wipe down the inside of the wax warmer. This method is particularly effective for removing strong scents or residue that may be left behind after melting certain types of wax.
5. Dish Soap and Warm Water
For a quick and easy cleaning method, you can use dish soap and warm water. Fill the wax warmer with warm soapy water and let it sit for a few minutes. Then, use a sponge or brush to scrub away any remaining wax. Rinse thoroughly with clean water and dry before using again. This method is especially useful for removing any buildup or residue that can accumulate over time.
Now that you know these 5 effective methods for cleaning your wax warmer, you can say goodbye to the mess and enjoy a fresh start every time you light your favorite wax scent. Whether you choose to use silicone liners, freeze and pop, baking soda, cotton balls and alcohol, or dish soap and warm water, you can’t go wrong with any of these cleaning methods. So, start cleaning and get ready to melt your wax without any worries!
- How to Clean a Wax Warmer with No Mess
- 1. Let it cool down
- 2. Dispose of the melted wax
- 3. Wipe away any remaining residue
- 4. Clean with baking soda
- 5. Use liners for easy cleanup
- Related Articles
- 4 Must-Try Methods for Cleaning Your Wax Warmer
- The Benefits of Using Silicone Liners for Wax Warmers
- How to Clean and Reuse Wax Melts
- Top 5 Tips for Recycling Wax Warmer Waste
- How to Clean a Wax Burner
- Method 1: Traditional Cleaning
- Method 2: Silicone Liner
- Method 3: Wax Popper
- Method 4: Wax Removal Balls
- Method 5: Baking Soda and Dish Soap
- Check out our easy to use wax warmers
- 1. Easy to Use
- 2. No Mess, No Fuss
- 3. Compatible with Various Waxes
- 4. Safe and Efficient
- Try Our Wax Warmers Today!
- Recycling Pro
- Introduction
- 1. Reusable Wax Warmer Liner
- 2. Wax Warmer Air Freshener
- 3. Wax Warmer Candle Holder
- 4. Wax Warmer Jewelry Holder
- 5. Wax Warmer Table Decor
- Conclusion
- READ MORE
- 1. Silicone Liner Method
- 2. Baking Soda Method
- 3. Freezer Method
- 4. Hot Water Method
- 5. Popper Method
- The Fire Starter
- 1. Silicone Liners
- 2. Freezer Method
- 3. Traditional Cleaning Method
- 4. Baking Soda and Warm Water
- 5. Recycling the Wax
- Video:
- Put aluminum foil in your toilet…and THIS will Happen! (Dollar Tree Trick)
How to Clean a Wax Warmer with No Mess
If you’re a fan of wax warmers and love using scented wax to create a cozy and inviting atmosphere, you know how important it is to keep your burner clean. Cleaning your wax warmer not only helps it last longer, but it also ensures that you get the best scent throw and a safe flame-free experience. Here’s a step-by-step guide on how to clean a wax warmer with no mess.
1. Let it cool down
Before you start cleaning your wax warmer, make sure it has cooled down completely. Trying to clean a still-hot burner can lead to burns and make the cleaning process messy.
2. Dispose of the melted wax
If there is still melted wax in your wax warmer, let it solidify. Once it has hardened, simply grab a paper towel or a silicone dish and remove the solid wax. You can also place the wax warmer in the freezer for a few minutes to make the removal easier.
3. Wipe away any remaining residue
After removing the melted wax, use a paper towel or a damp cloth to wipe away any leftover residue. Be careful not to use excessive force as it may damage the burner.
4. Clean with baking soda
If there are stubborn stains or residue on your wax warmer, mix baking soda with warm water to create a paste. Apply the paste to the stained areas and leave it for a few minutes. Then, gently scrub with a soft brush or sponge. Rinse with clean water and wipe dry.
5. Use liners for easy cleanup
If you want to avoid any mess in the future, using liners for your wax warmer can be a game-changer. These reusable liners fit perfectly in the top of your wax warmer and catch any melted wax. All you need to do is throw away the liner and replace it when it’s full.
In conclusion, cleaning your wax warmer doesn’t have to be a messy or time-consuming task. With these easy cleaning methods and the use of liners, you can keep your wax warmer clean and enjoy a hassle-free scented wax experience.
Related Articles
-
4 Must-Try Methods for Cleaning Your Wax Warmer
If you love using wax warmers, then you’ll want to check out these additional articles on how to clean them. In this article, we’ll show you 4 different heat-free methods for cleaning your wax warmer, using simple household items.
-
The Benefits of Using Silicone Liners for Wax Warmers
Are you tired of the mess and waste that comes with traditional wax warmers? Then you should definitely check out silicone liners. In this article, we’ll go over the pros and cons of using silicone liners and how they can make your wax melting experience much easier and cleaner.
-
How to Clean and Reuse Wax Melts
If you’re wondering how to clean and reuse your wax melts, then this article is for you. We’ll show you step-by-step instructions on how to remove the melted wax from your warmer and how to clean it properly so that you can use it again.
-
Top 5 Tips for Recycling Wax Warmer Waste
If you want to minimize waste when using wax warmers, then you should definitely check out these top 5 tips for recycling wax warmer waste. From repurposing used wax to recycling the packaging, we’ll show you how to be more environmentally friendly with your wax melting routine.
How to Clean a Wax Burner
Cleaning your wax burner is essential to maintain its functionality and prevent any lingering wax residue from affecting future uses. In this article, we will discuss the step-by-step process of cleaning a wax burner, using simple and effective methods.
Method 1: Traditional Cleaning
If you have a traditional wax burner with a built-in dish, follow these steps:
- Allow the wax burner to cool down completely after use.
- Remove any solid wax residue using a spoon or spatula.
- Wipe the dish with a paper towel to remove any remaining wax.
- Clean the burner with warm soapy water and a sponge or cloth. Rinse thoroughly.
- Make sure to dry the burner before using it again.
Method 2: Silicone Liner
If your wax burner has a removable silicone liner, try the following:
- Wait for the wax to cool down and solidify in the liner.
- Remove the liner from the burner and put it inside the freezer for about 10 minutes.
- Take the liner out and gently flex it to release the solidified wax.
- Dispose of the wax in the trash or recycling, depending on local guidelines.
- Clean the liner with warm soapy water and let it dry before reusing it.
Method 3: Wax Popper
If you have a wax popper or melter, try this quick and mess-free method:
- Wait for the wax to cool and become solid.
- Place the popper or melter in the freezer for about 10 minutes.
- Take it out and give it a gentle squeeze or tap to release the solid wax.
- Dispose of the solid wax in the trash or recycling.
- You can wipe the interior with a paper towel, but avoid using water or soap.
Method 4: Wax Removal Balls
If you love scented wax and use it frequently, consider investing in wax removal balls:
- Wait for the wax to harden.
- Place a few wax removal balls into the burner near the melted wax.
- Let them grab onto the melted wax and solidify with it.
- Remove the hardened wax and balls together and discard them.
- Wipe the inside of the burner with a paper towel, if needed.
- Clean the burner using one of the previous methods.
Method 5: Baking Soda and Dish Soap
If you prefer a more natural approach, try this method:
- Fill the dish of the wax burner with hot water.
- Add a few drops of dish soap and 1-2 tablespoons of baking soda.
- Let it sit for a few minutes to loosen the wax residue.
- Scrub the dish with a sponge or brush to remove the melted wax.
- Rinse thoroughly and allow it to dry before using the burner again.
By following these simple cleaning methods, you can keep your wax burner in top condition, ensuring a clean and safe environment for your scented wax enjoyment.
Check out our easy to use wax warmers
If you’re a wax enthusiast, you know how important it is to have a reliable wax warmer. Whether you’re a professional or just a home waxing queen, our wax warmers are perfect for you. Read on to find out more about these amazing warmers and how they can make your waxing experience even better.
1. Easy to Use
Our wax warmers are designed to be user-friendly, making them perfect for beginners and experts alike. Simply plug in the warmer, place your wax in the built-in melting dish, and adjust the heat to your desired temperature. With just a few easy steps, your wax will be melted and ready to use.
2. No Mess, No Fuss
Gone are the days of messy wax removal and cleaning up a sticky mess. Our wax warmers come with additional liners that you can use to line the melting dish. Once your wax is melted and ready to go, simply lift out the liner and throw away the mess. No more scrubbing or scraping wax off your warmer.
3. Compatible with Various Waxes
Our wax warmers are compatible with different types of wax, including hard wax and soft wax. Whether you prefer scented wax for a fresh and inviting atmosphere or hair removal wax for a smooth and hair-free finish, our warmers can handle it all. Simply place your desired wax in the melting dish and let the warmer do the rest.
4. Safe and Efficient
When it comes to using wax warmers, safety is always a top priority. Our wax warmers are equipped with a built-in heat control system that ensures a consistent and safe temperature. You don’t have to worry about overheating or fire hazards. Our warmers provide a gentle and even heat that is perfect for melting your wax without any risks.
Try Our Wax Warmers Today!
If you’re tired of dealing with messy and hard-to-clean wax warmers, it’s time to upgrade to our easy-to-use and efficient wax warmers. Say goodbye to wasted wax and hello to a cleaner and more enjoyable waxing experience. Check out our range of wax warmers and start enjoying the benefits today!
Recycling Pro
Introduction
If you’re wondering what to do with your used wax warmers, don’t throw them away! With a little creativity and some simple materials, you can easily transform your old wax warmers into something new and useful. In this article, we will show you how to recycle your wax warmers and give them a second life.
1. Reusable Wax Warmer Liner
Instead of using disposable wax liners, try making your own reusable liner using silicone. All you need to do is melt some silicone in a double boiler or microwave-safe dish, then pour it into your wax warmer. Let it cool and solidify, and you’ll have a heat-resistant liner that you can easily clean after each use.
2. Wax Warmer Air Freshener
If you’re tired of using scented wax melts, you can repurpose your wax warmer into an air freshener. After cleaning your wax warmer, add a few drops of your favorite essential oil onto a cotton ball and place it in the warmer. When you turn on the heat, the oil will slowly evaporate and fill your home with a fresh scent.
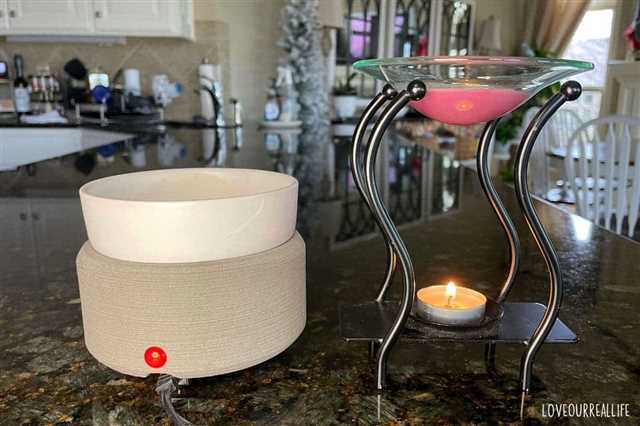
3. Wax Warmer Candle Holder
If you have a wax warmer with a removable top dish, you can easily transform it into a candle holder. Simply remove the top dish and place a tea light or pillar candle in the center of the warmer. The warm light from the candle will create a cozy atmosphere in your home.
4. Wax Warmer Jewelry Holder
If you have a wax warmer with a dish that’s in good condition, you can use it as a jewelry holder. Just place it on your dresser or vanity and add your favorite jewelry pieces. The dish will keep your jewelry organized and easily accessible.
5. Wax Warmer Table Decor
If you have multiple wax warmers, you can create a beautiful centerpiece for your table. Arrange the warmers in a decorative fashion and add some dried flowers or potpourri around them. The warmers will add a touch of elegance to your home decor.
Conclusion
Don’t let your old wax warmers go to waste. With a little creativity and some simple materials, you can give them a new purpose. Whether you choose to make a reusable liner, an air freshener, a candle holder, a jewelry holder, or a table decor, these recycling ideas will help you repurpose your wax warmers and reduce waste.
READ MORE
Cleaning your wax warmer doesn’t have to be a daunting task. With these 5 effective methods, you can easily keep your wax warmer clean and fresh, ensuring optimal performance and long-lasting use.
1. Silicone Liner Method
If you want an additional layer of protection and an easy cleaning solution, try using a silicone liner in your wax warmer. Silicone liners are heat-resistant and can catch any melted wax, making cleanup a breeze. Simply throw the liner into the freezer for a few minutes to solidify the wax, then remove and wipe it clean. You can also use a silicone liner to recycle melted wax and try new scented combinations without any mess.
2. Baking Soda Method
If your wax warmer has some stubborn residue that won’t easily wipe away, try the baking soda method. Mix baking soda with a small amount of water to create a paste, then apply it to the burner and let it sit for a minute. Afterward, wipe the burner clean with a damp cloth. The baking soda will effectively remove any remaining wax residue and leave your warmer looking like new.
3. Freezer Method
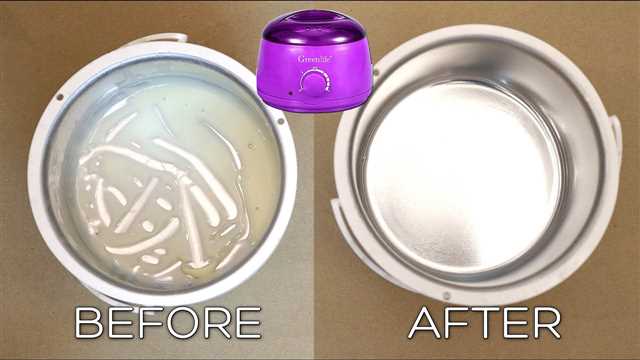
For a quick and easy cleaning solution, the freezer method is a great option. Place your wax warmer in the freezer for about 10-15 minutes. Once the wax has hardened, it will be much easier to remove from the warmer. Use a plastic stick or a butter knife to gently pry out the solid wax, and then wipe down the warmer with a damp cloth to remove any remaining residue. This method is particularly useful for warmers with removable dishes or inserts.
4. Hot Water Method
If you’re looking for a simple and traditional cleaning method, the hot water method is the way to go. Fill your sink or a basin with hot water and a small amount of dish soap. Submerge the wax warmer in the water and let it soak for a few minutes. The heat and soap will help loosen the wax, making it easier to wipe away. Use a cloth or sponge to wipe down the warmer, paying special attention to the area around the wick and the inside of the dish. Rinse with clean water and dry thoroughly before using again.
5. Popper Method
If you’re in a hurry and don’t have time for cleaning, the popper method is a quick fix to keep your wax warmer clean without any mess. Simply place a pre-made wax popper or a tealight on top of the warmer and let it melt. The heat from the popper or tealight will melt away any remaining wax residue and freshen up the aroma. This method is perfect for those busy days when you need your wax warmer to be clean and fresh without any hassle.
Following these cleaning methods will ensure that your wax warmer stays in top shape for long-lasting use. Whether you prefer silicone liners, baking soda, the freezer method, hot water, or the popper method, there’s a cleaning solution that will work best for you. Don’t let wax residue build up and cause a mess, keep your wax warmer clean and enjoy the long-lasting fragrance without any distractions.
The Fire Starter
Dreaming of a cozy home with a sweet-smelling ambiance? Wax warmers are the perfect solution to achieve a warm and inviting atmosphere. However, cleaning these warmers can sometimes be a challenging task. But worry no more; we have got you covered with these top 5 effective methods for cleaning your wax warmer. Read on to find out how to keep your favorite scents fresh without any mess.
1. Silicone Liners
For an easy and mess-free wax removal, try using silicone liners. Simply place the liner into the wax well of your warmer. Once the wax has fully melted and cooled down, grab the edges of the liner and lift it out. The solid wax will come right out with the liner, leaving your warmer clean and ready for a new scent.
2. Freezer Method
If you’re wondering how to remove hardened wax from your warmer, the freezer method is your go-to solution. Place your wax warmer dish into the freezer and let it sit for about 15 minutes. The cold temperature will cause the wax to shrink and easily pop out. After removing the dish, simply wipe it clean with a paper towel, and it will be good as new.
3. Traditional Cleaning Method
If you prefer a more traditional cleaning method, follow these easy steps. First, unplug your wax warmer and let it cool down. Then, use a soft cloth or paper towel to wipe away any excess wax. Next, pour boiling water into the dish to melt the remaining wax. Finally, wipe the dish clean with a towel, and your wax warmer will be ready for its next scent.
4. Baking Soda and Warm Water
For an additional cleaning boost, mix baking soda with warm water. Create a paste-like consistency and apply it to the wax warmer dish. Let it sit for a few minutes to loosen any stubborn residue. Then, wipe the dish clean with a damp cloth or sponge. This method is effective for removing any leftover wax and leaving your warmer fresh and clean.
5. Recycling the Wax
If you’re an eco-conscious individual, you might want to recycle your used wax. Place used wax in an ice cube tray or silicone mold. Allow it to cool and solidify. Once solid, pop out the wax cubes and store them in a container for future use. This way, you can enjoy your favorite scents without wasting any leftover wax.
Now that you know these effective methods for cleaning your wax warmer, there’s no need to worry about the mess. Keep your home smelling fresh and inviting by following our easy cleaning tips. Enjoy the cozy ambiance and the welcoming scent that your wax warmer will bring into your home.
Have any additional tips for wax warmer cleaning? Leave them in the comments down below!