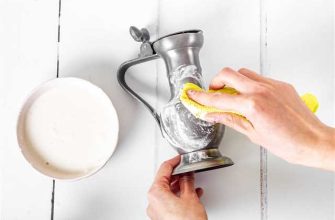

If you have Indian sandstone paving in your garden, you know how beautiful it can be. However, over time, dirt, grime, moss, lichens, and other natural elements can take away its shine and make it look dull and worn. But don’t worry! With a little bit of preparation and the right cleaning solution, you can easily bring back the beauty of your Indian sandstone.
Before we dive into the cleaning steps, let’s talk about some measures you can take to prevent your sandstone from getting dirty in the first place. Borders can be a good way to protect your sandstone from being covered with dirt and moss. Additionally, properly sealing your sandstone can help in protecting it from future stains and discolouration.
Now, let’s get started with the cleaning process. Here’s a complete guide with eight simple steps:
- Prepare the area: Before you start cleaning, remove any furniture or plants from the area and give it a good sweep to get rid of any loose debris.
- Apply a cleaning solution: Buy a good quality sandstone cleaner from a reputable supplier like B&Q or Amazon. Follow the instructions on the label to mix the cleaner with water in a bucket.
- Saturate the sandstone: Wet the sandstone with water using a watering can or a hosepipe. Make sure the entire surface is thoroughly wet.
- Scrub the surface: Using a stiff brush or a wire brush, scrub the sandstone in straight lines. Apply some pressure to remove any tough dirt or stains.
- Let the solution do its magic: Let the cleaning solution sit on the sandstone for the recommended amount of time. This will give it enough time to break down any stubborn stains or algae.
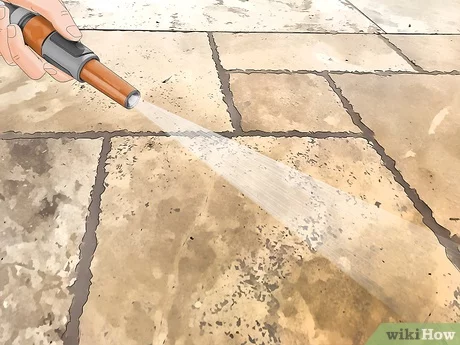
- Power washing: If you have a pressure washer, you can use it to rinse away the cleaning solution. Start from the top and work your way downwards, making sure to cover all parts of the sandstone.
- Remove any remaining stains: If there are any remaining stains or discolouration, you can use a bleach solution to spot clean those areas. Be sure to follow the instructions on the bleach bottle and rinse thoroughly.
- Protect your sandstone: Once the sandstone is clean and dry, apply a good quality sandstone sealer to protect it from future stains and damage.
So, there you have it – a complete guide on how to clean your Indian sandstone. Following these steps will not only help you remove dirt and grime but also keep your sandstone looking beautiful for years to come. If you’re not confident in doing it yourself, you can always hire a professional stone cleaner to do the job for you. Now go ahead and enjoy your clean and beautifully restored sandstone!
- Step-by-Step Guide: Cleaning Indian Sandstone
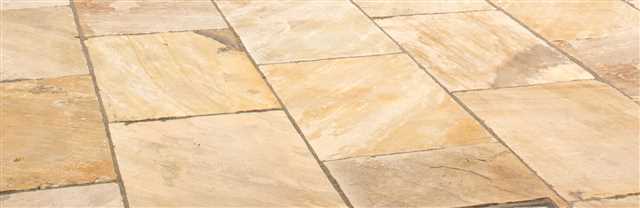
- Show off your beautiful Indian sandstone garden patio
- Step 1: Sweep the surface
- Step 2: Prepare the cleaning solutions
- Step 3: Start with a gentle wash
- Step 4: Move on to a tougher cleaning solution if needed
- Step 5: Deal with moss and algae
- Step 6: Re-jointing or re-sealing if needed
- Step 7: Pressure wash for a thorough clean
- Extra tips and FAQ’s:
- Gather the necessary cleaning supplies
- Here’s a list of the essential cleaning supplies you’ll need:
- Remove any loose dirt and debris
- Prepare a cleaning solution
- Apply the cleaning solution to the sandstone
- What you’ll need:
- Here’s how to apply the cleaning solution:
- Scrub the sandstone with a brush
Step-by-Step Guide: Cleaning Indian Sandstone
Show off your beautiful Indian sandstone garden patio
If you want to keep your Indian sandstone patio looking its best, regular cleaning is a must. By following these simple steps, you can ensure your sandstone stays clean and vibrant for years to come.
Step 1: Sweep the surface
Before you start the cleaning process, it’s important to remove any loose dirt and debris from the surface. Use a stiff brush or broom to sweep away leaves, dust, and any other particles that have accumulated on the patio.
Step 2: Prepare the cleaning solutions
Depending on the level of dirt and stains, you’ll need different cleaning solutions. Here are a few options:
- Mild detergent diluted in water
- Bleach mixed with water (be cautious, as bleach can permanently damage the sandstone if not used correctly)
- Specialized sandstone cleaner (available online or at your local hardware store)
Step 3: Start with a gentle wash
If your sandstone isn’t too dirty, start by washing the surface with a mild detergent diluted in water. This should help remove light dirt and grime and restore the stone’s natural beauty.
Step 4: Move on to a tougher cleaning solution if needed
If the gentle wash didn’t do the trick, try using a more powerful cleaning solution. Mix bleach with water (1 part bleach to 10 parts water) and scrub the stained areas with a stiff brush. Be sure to wear gloves and protective eyewear when working with bleach.
Step 5: Deal with moss and algae
Indian sandstone can sometimes develop moss and algae in damp areas. If you notice any moss or algae growing on your patio, use a moss and algae remover. Apply the remover according to the manufacturer’s instructions, and then gently scrub the affected areas with a stiff brush.
Step 6: Re-jointing or re-sealing if needed
If you notice any loose joints or discolored sealant, you may need to re-joint or re-seal your sandstone patio. This will help prevent further damage and keep your patio looking its best.
Step 7: Pressure wash for a thorough clean
If you have access to a pressure washer, it can make the cleaning job more efficient and effective. Use a wide-angle nozzle attachment to avoid damaging the sandstone, and keep the pressure washer at a safe distance to prevent any accidents.
Extra tips and FAQ’s:

- If you’re not sure whether bleach is safe for your sandstone, test it on a small, inconspicuous area before applying it to the whole surface.
- If you want a more eco-friendly option, you can try using vinegar instead of bleach. Mix equal parts vinegar and water, and scrub the stained areas with a brush.
- To prevent future staining, consider applying a quality sealant to your sandstone patio. This will help protect it from dirt, oils, and other substances.
- For stubborn stains, you may need to repeat the cleaning process several times until the stain is completely removed.
Gather the necessary cleaning supplies
Before we even start the cleaning process, we need to gather all the necessary supplies for the job. Without the right tools and products, we’re not going to be able to clean the sandstone slabs effectively. Thankfully, there are a few items that are very important and will help us get the job done.
Here’s a list of the essential cleaning supplies you’ll need:
- A good quality sandstone cleaner
- A scrubbing brush or power washer
- A bucket of water
- Sweeping brush
- A scraper or trowel
- Protective gloves
- Eye protection
- A watering can or hosepipe
The sandstone cleaner is perhaps the most important item on this list. It will help to remove any dirt, grime, algae, moss, lichens, or fungus that may have built up on the surface of the sandstone. The cleaning brush or power washer will be used to scrub or rinse the cleaner off the surface of the stone.
Before you start cleaning, it’s a good idea to sweep the entire patio or paving area to remove any loose dirt or debris. This will help you see where you need to focus your cleaning efforts.
It’s also worth mentioning that sometimes you may need more than just a cleaner and a brush. In some cases, if the sandstone is heavily stained or has deep-rooted algae or moss growth, you may need to use a fungicidal wash or even bleach to fully remove the problem and restore the sandstone to its original state. However, be careful when using bleach, as it can permanently damage the sandstone if not applied correctly.
Lastly, don’t forget to protect yourself during the cleaning process. Wear protective gloves and eye protection to avoid any potential harm.
Now that we have all our supplies ready, we can move onto the next step and start cleaning the sandstone.
Remove any loose dirt and debris
Before you can start cleaning your Indian sandstone, it’s important to remove any loose dirt and debris from the surface. This step is crucial because if you begin cleaning without doing this, the dirt and debris can get pushed into the stone, making it more difficult to clean later on.
There are several ways you can remove loose dirt and debris from your sandstone:
- Sweep the surface – Use a broom or brush to sweep away any loose dirt and debris. Make sure to sweep in all areas, including corners and edges.
- Use a jet washer – If your sandstone patio or surface is very dirty, using a jet washer can help remove the loose dirt and debris more effectively. Ensure you use the appropriate pressure and nozzle setting to prevent damaging the sandstone.
While sweeping or jet washing, you may notice the presence of lichens, moss, or fungus on your sandstone. These are signs that your sandstone needs a good cleaning to prevent it from being discolored or permanently damaged.
Another trick is to use a wire brush to gently brush the surface of the sandstone. This action helps remove any stubborn dirt or grime that may be stuck to the stone.
Remember, removing loose dirt and debris is an essential first step in properly cleaning your Indian sandstone. By doing this, you’ll create a clean surface for the next steps and ensure better results in the future.
Prepare a cleaning solution
When it comes to cleaning Indian Sandstone, we’re going to need a cleaning solution that is specially made for this type of stone. Regular household cleaners won’t do the job as they may not be suitable for the stone’s delicate surface.
One of the best cleaning solutions for Indian Sandstone is a solution of warm water and a mild detergent. This combination works wonders in removing dirt, grime, and stains from the surface of the stone without causing any damage or discoloration. You can also use a commercial stone cleaner available in the market, as they are specifically designed for cleaning sandstone.
If there are tough stains or stubborn algae/moss growth in the joints, borders, or other areas, you may need an extra cleaning solution. In such cases, a solution of bleach and water can be very helpful. However, be careful while using bleach, as it can permanently damage the stone if not used properly. Make sure to follow the instructions on the bleach bottle and take necessary precautions.
It is recommended to scrub the sandstone with a stiff brush or wire brush to remove any dirt or grime. This action helps to break down the dirt and makes it easier for the cleaning solution to penetrate and act on the stains. Keep in mind that a cleaner containing bleach should not be used on colored stones, as it may cause the colors to fade.
So, let’s prepare the cleaning solution:
- Mix warm water and a mild detergent in a bucket. The ratio of water to detergent should be according to the instructions on the detergent bottle.
- If you’re using a commercial stone cleaner, follow the instructions provided on the packaging.
- If you need an extra cleaning solution for tough stains, mix bleach and water in a separate bucket. The ratio of bleach to water should be according to the instructions on the bleach bottle.
By preparing the right cleaning solution, you’re ensuring that your Indian Sandstone paving gets cleaned properly without causing any damage. This will not only help to remove dirt and grime but will also protect the stone for future use.
Apply the cleaning solution to the sandstone
Once you have prepared the cleaning solution, it’s time to apply it to your Indian sandstone. This step is crucial in removing grime, dirt, and stains from the surface of the stone.
The cleaning solution you have made will work wonders in lifting away much of the dirt that is hiding the natural beauty of your sandstone slabs. This step lets you see the true colors and patterns of the stone.
Before you start applying the cleaning solution, it’s important to keep in mind what type of sandstone you have and what sealant, if any, has been previously applied. Certain sealants may require a specific cleaning product or method, so it’s always best to check the manufacturer’s recommendations. If you have any faq’s about this, don’t worry, we’re here to help!
Now, let’s gear up and get ready to apply the cleaning solution to your sandstone.
What you’ll need:

- A clean bucket
- Warm water
- The cleaning solution you prepared earlier
- A soft-bristle brush or broom
- A mop or sponge
- A garden hose or pressure washer (optional)
Here’s how to apply the cleaning solution:
- Start by sweeping or brushing away any loose dirt or debris from the surface of the sandstone. This will make it easier to clean and prevent scratching during the cleaning process.
- If you notice any moss or fungus growth on the slabs, remove as much as possible before applying the cleaning solution. Moss and fungus can cause discolouration and build up over time if not dealt with.
- If you’ve purchased a cleaner specifically for Indian sandstone, follow the instructions on the packaging for dilution ratios. Otherwise, mix your cleaning solution by adding the appropriate amount of cleaning product to warm water in a clean bucket. Note: Avoid using bleach-based or acid-based cleaners, as they can damage the sandstone.
- Pour the cleaning solution onto the sandstone, ensuring even coverage across the entire surface. Use a mop or sponge to spread the solution around if necessary.
- Let the cleaning solution sit on the sandstone for about 5-10 minutes to allow it to penetrate and break down any stubborn grime or stains. This will give the cleaner time to work its magic.
- Using a soft-bristle brush or broom, scrub the surface of the sandstone in circular motions. Focus on any areas with visible stains or dirt buildup. Be cautious not to scrub too hard, as this could cause damage to the stone.
- Rinse the sandstone thoroughly with clean water. You can use a garden hose or a pressure washer on a low setting, keeping a distance of at least 30 cm from the surface. Make sure all the cleaning solution and dirt are washed away.
- Inspect the surface of the sandstone to see if any stains or grime remain. If necessary, repeat the cleaning process or try an extra step, such as using a stain remover or power washer, to achieve the desired results.
By following these steps, you’ll be able to effectively clean your Indian sandstone and bring it back to its original beauty. Remember, prevention is better than cure, so it’s a good idea to regularly clean and maintain your sandstone to prevent future build-up and keep it looking its best.
For more information and to buy the necessary products, you can visit stonecare4u.co.uk.
Scrub the sandstone with a brush
After you have prepared your cleaning solutions and removed any loose dirt or debris from the sandstone slabs, it’s time to start scrubbing. This step is essential for removing grime and stains that have built up over time.
First, you’ll need a brush that is suitable for cleaning stone surfaces. A soft-bristled brush is typically recommended, as it will be gentle enough to avoid damaging the stone while still effectively removing dirt and grime. Sometimes, a stiff brush may also be necessary for more stubborn stains and algae or moss growth.
When scrubbing the sandstone, it’s important to be mindful of the different colours and types of stone you may have. Certain cleaning agents and brushing methods can cause discolouration or damage to the stone. To protect the stone, it’s helpful to use a brush with protective bristles or some other way of protecting it, like applying a small amount of cleaning solution to the brush instead of directly onto the stone.
Start by wetting the brush either with plain water or the cleaning solution you prepared earlier. Then, gently scrub the surface of the sandstone in circular or back-and-forth motions, paying extra attention to areas that may have more grime or staining. Be sure to cover the whole surface evenly, and take your time to ensure a thorough clean.
If you’re dealing with fungus or moss growth on your sandstone, a good trick is to use a brush with stiff bristles to scrape away as much growth as possible before applying any cleaning solutions. This will help prevent the growth from spreading and minimize the amount of cleaning product needed.
While scrubbing, be cautious of using bleach or bleach-based products, as they can permanently discolor or damage certain types of sandstone. If you have any faq’s or concerns about using bleach, it’s best to consult a professional or seek guidance from the manufacturer of the sandstone.
After scrubbing with the brush, it’s time to wash away the dirt and cleaning solution. You can do this by using a watering can or a hose with a gentle spray nozzle. Start by rinsing the surface with clean water to remove any remaining cleaning solution and dirt. Then, give the sandstone a final rinse with plain water to ensure the surface is clean and ready.
If you’re looking for cleaning products specifically designed for sandstone, there are plenty of options available in the market. Some popular brands include Stonecare4u and World of Clean. These products are specially formulated to clean, protect, and enhance the natural beauty of your sandstone.
Remember, scrubbing your sandstone regularly is a great way to keep it looking its best and maintain its finish. While it may require some effort, the results are well worth it, and your sandstone will thank you for the extra care!